A beginner’s guide to Git feature branches
Why Git
The proprietary software shaped the Version Control Systems (VCS) to fit its requirements:
- the project has a strict release schedule
- the team is collocated
- the sprint goals are well-defined and the focus goes to a limited number of stories
- branching is usually reserved for releases or risky development features
- the centralized server is hidden from the outside world
This is the context in which centralized Version Control Systems (e.g. Subversion) have emerged, but that’s not a good fit for open-source projects because:
- releases are not imposed by deadlines
- the contributors may be scattered allover the globe
- new ideas are welcomed, even if radical or time-consuming
- branching becomes mandatory as developers work on features rather than sprints
- the code is available to the whole world
Git is the quintessence of software development spirit. If the available tools are not suitable for your use cases you build your own tools. Git is a Distributed Version Control System (DVCS) addressing the impedance mismatch between open-source development and classic VCS.
When working with Subversion a User Interface like Tortoise SVN is more than sufficient, and I seldom had to use the Subversion command line. The trunk based development style simplifies the version control process and that’s why the UI can handle it.
Git offers multiple workflow styles to choose from. You can still use the trunk base development style (I use it for managing this blog source code examples), but if you plan on contributing to other open-source projects you have to get familiar with feature branching.
Why feature branches
Git makes branching a commodity and each feature can be developed in a separate branch. This is desirable since the merging process may be out of your control. If you develop on the default master default branch and a given committed feature is postponed, you will have to revert your changes prior to starting working on a completely different feature. Feature branching allows you to isolate changes and to simplify the merging process. But once you start using feature branches you realize that the command line is no longer optional. To properly understand Git and to successfully employ it, it’s advisable to first master its commands.
A feature branch example
I decided to add Metrics support to the Bitronix Transaction Manager and so the first step is to create a new metrics branch.
First I must check my current branches.
D:\wrk\vladmihalcea\btm>git branch
* master
I have only the default master branch, so let’s create a new branch where my changes will go to.
D:\wrk\vladmihalcea\btm>git checkout -b metrics
Switched to a new branch 'metrics'
The previous command does two things:
- it creates a new local metrics branch
- it switches the working folder to reference the newly created branch
We can see that the current branch reference changed:
D:\wrk\vladmihalcea\btm>git branch
  master
* metrics
Usually you will do multiple commits until you are happy with a final version, but to simplify the merging process you must squash your commits into one single commit that looks like that:
commit f75838a7cf8cfdb9ceeb364a0f0faae24642d39e
Author: vladmihalcea <mih_vlad@yahoo.com>
Date:   Thu Jan 23 11:57:16 2014 +0200

    add metrics support (Codahale)

    add PoolingDataSource connection wait time histogram

    add PoolingDataSource in-use connections histrogram
All the previous changes are only available to my local repository, so I need to make them available to the outside world. This process is called remote branching and you do it as follows:
D:\wrk\vladmihalcea\btm>git push --set-upstream origin metrics
Username for 'https://github.com': vladmihalcea
Password for 'https://vladmihalcea@github.com':
Counting objects: 56, done.
Delta compression using up to 4 threads.
Compressing objects: 100% (32/32), done.
Writing objects: 100% (34/34), 7.64 KiB | 0 bytes/s, done.
Total 34 (delta 15), reused 0 (delta 0)
To https://github.com/vladmihalcea/btm.git
 * [new branch]      metrics -> metrics
Branch metrics set up to track remote branch metrics from origin.
All changes pushed from my local metrics branch will go to the remote metrics branch now.
D:\wrk\vladmihalcea\btm>git push
Username for 'https://github.com': vladmihalcea
Password for 'https://vladmihalcea@github.com':
Everything up-to-date
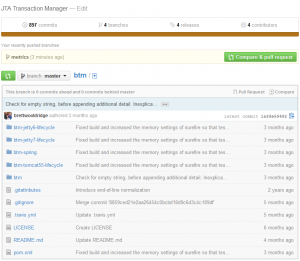
Let’s go to GitHub and see the results:
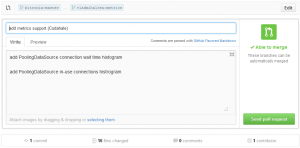
To notify the product owner of my contribution, we need to send a pull request:
The product owner can review the changes and decide if and when to merge them to the main branch. During the review process the product owner may ask for additional changes prior to merging your branch, so you need to:
- commit new changes to the local metrics branch
- re-squash commits to a single commit
- force a push to your remote branch (e.g. git push -f)
As a rule of thumb, you don’t usually rewrite the commit history after you published your changes. This may affect other contributors that have used your branch as a starting point for their work. But your feature branch is not meant to be used by other contributors aside from the product owner who will only merge it once it’s ready.
For more about Git, you can check the free online Pro Git book or this excellent compact guide.


