A wise man once told me that a car’s suspension setup and tires are the most important thing if you want to be quick around the track or on your favorite backroad.
He’s obviously right; without the proper suspension or proper tires the ability to carry speed through a turn is severely limited as you will probably be fighting understeer, oversteer, or both.
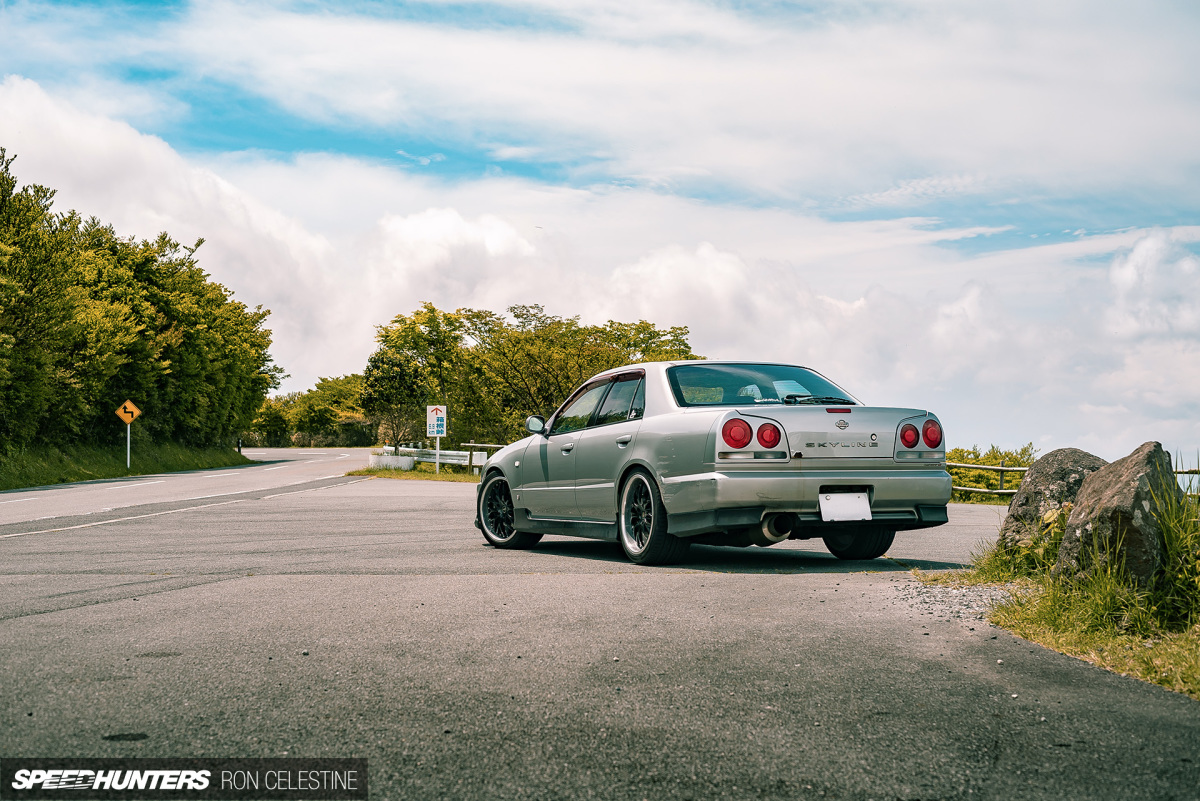
In the case of Project Rough, the Tuner Concept suspension my friend designed specifically for the ER34 is working wonders for controlling body roll and helping the rather long (4,700mm) and somewhat heavy (1,460kg) body rotate. The tires have been the problem.
With the few basic upgrades it has, the engine’s torque would light up the rear tires even if you looked at the go pedal funny. Seriously, first gear was utterly unusable, as was second gear if you tried to lay into it too soon.
It’s not like the RB25DET is outputting more than 500 or 600ft-lbs of torque, just that the 245/40R17 Kenda 20A ‘grip’ tires weren’t too grippy at all. Who would have guessed…
So, when a nail found its way into one of the rear tires, it was more than a good enough excuse to search for some bigger and better tires. But of course, bigger tires mean bigger wheels, right? OK, let’s add wheels and tires to the list.
The Refurbish Plan
If you didn’t pick up on it during my coverage from the R34 Day gathering at Fuji Speedway, I somewhat fell in love with the look of multi-spoke, multi-piece wheels on the ER34. So I was on the hunt for 18-inch, two or three-piece multi-spoke wheels.
I immediately ran into a financial problem – these sorts of wheels can be very expensive. Of course I knew this beforehand, but having just moved to a new place and still trying to furnish it meant that it would be rather difficult explaining to the missus that I was about to drop a large amount of yen on a set of bigger wheels and tires.
So, what’s a man supposed to do?
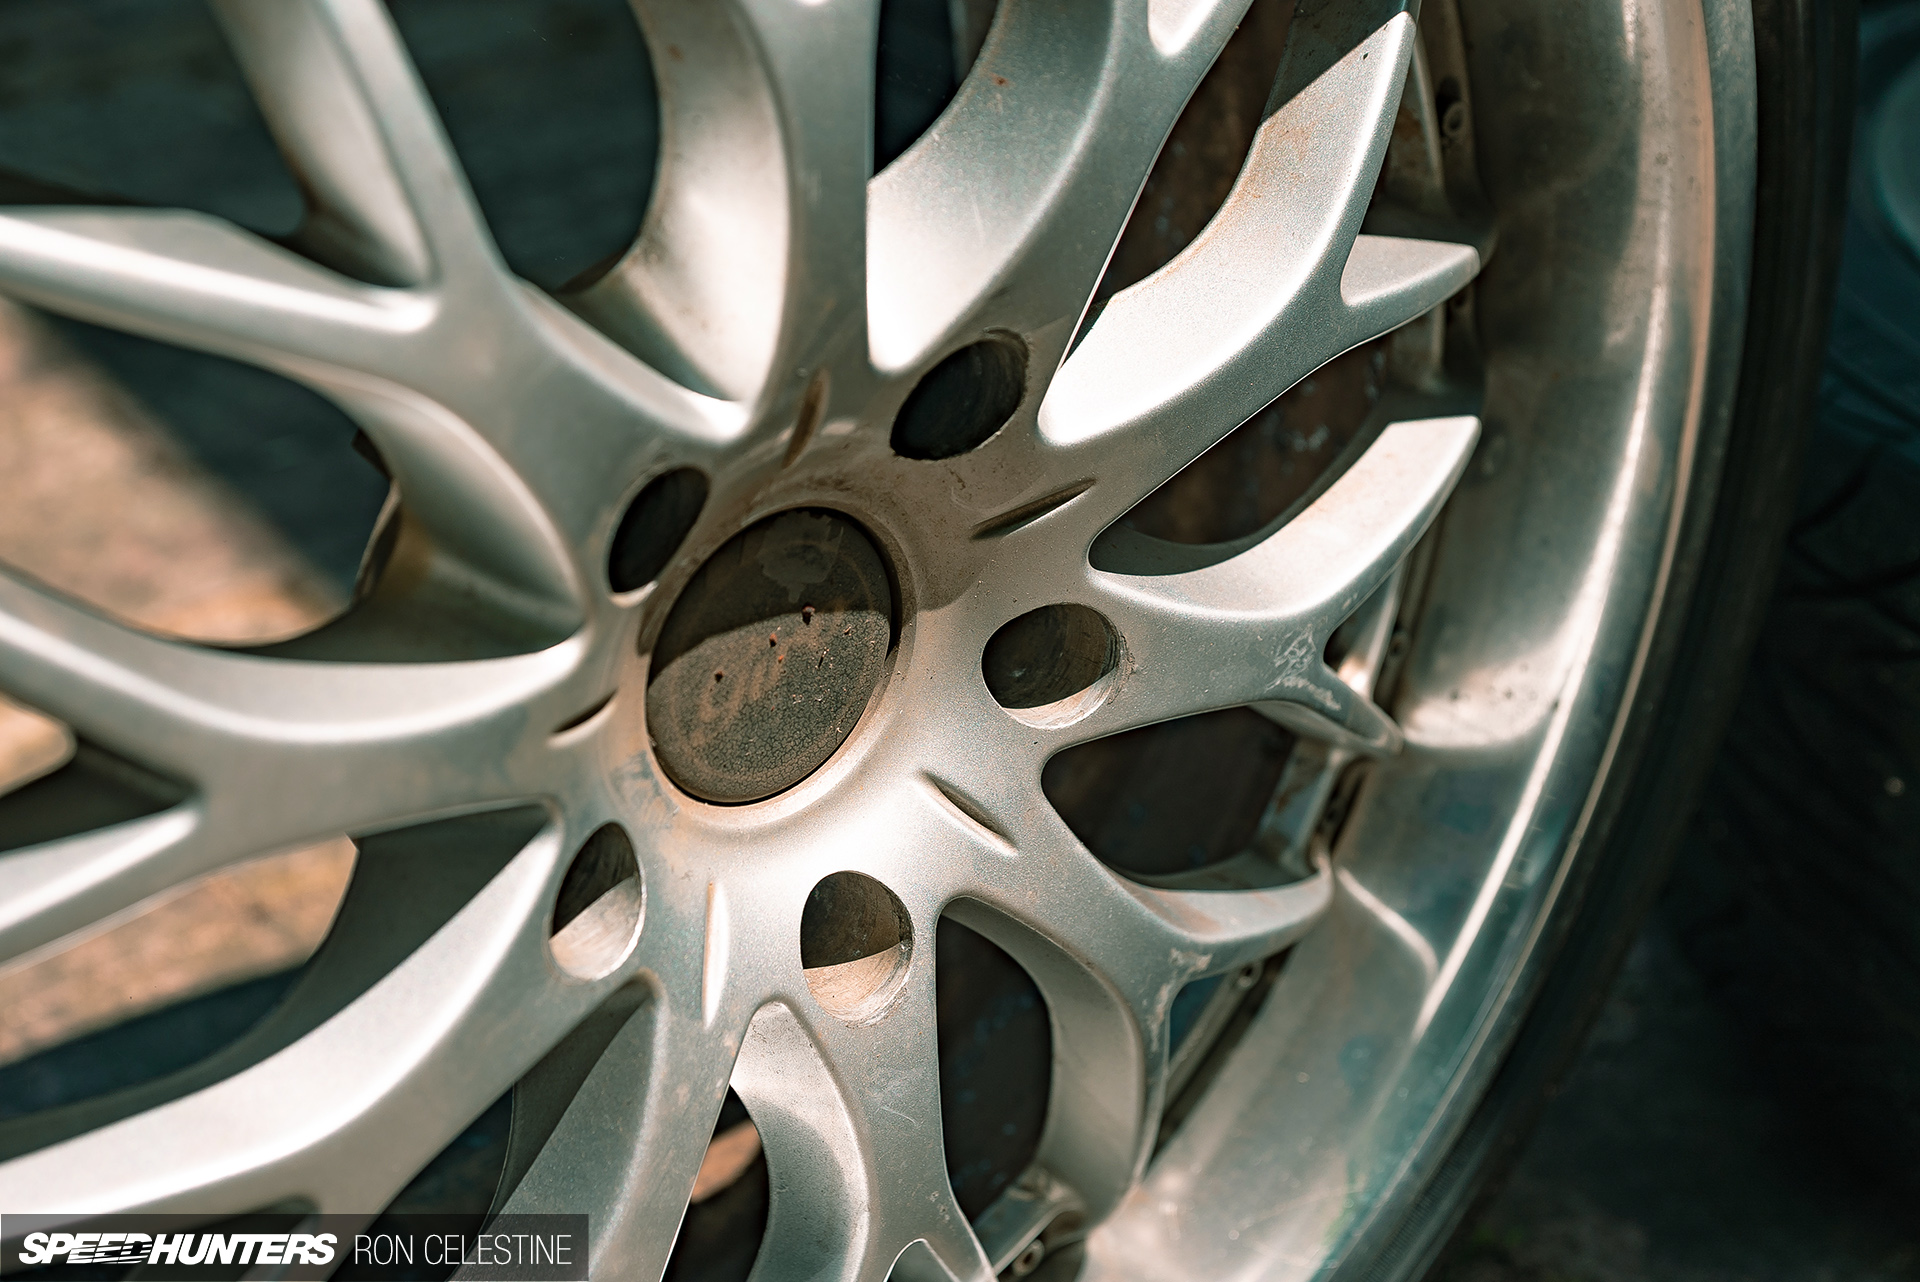
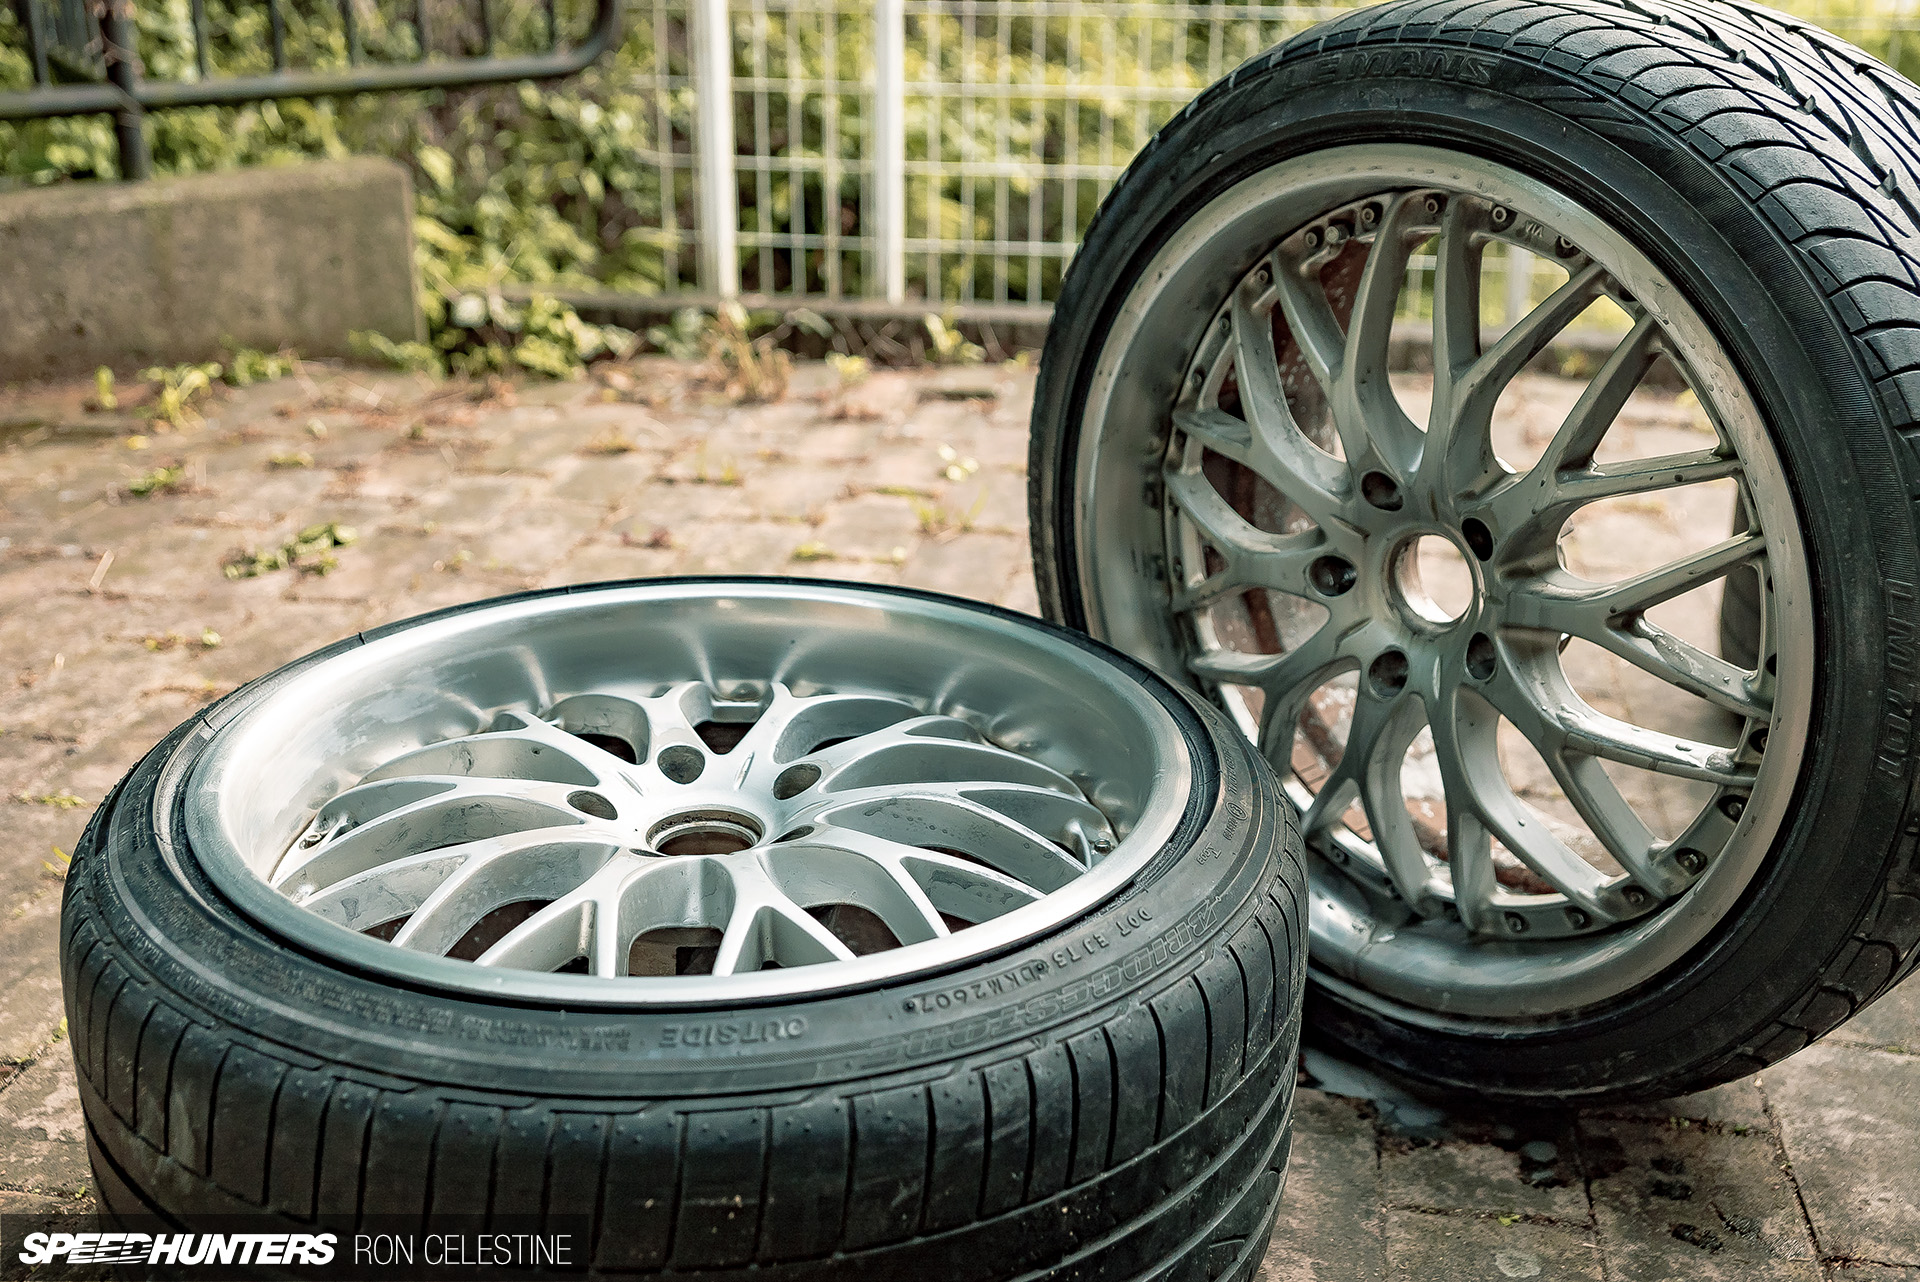
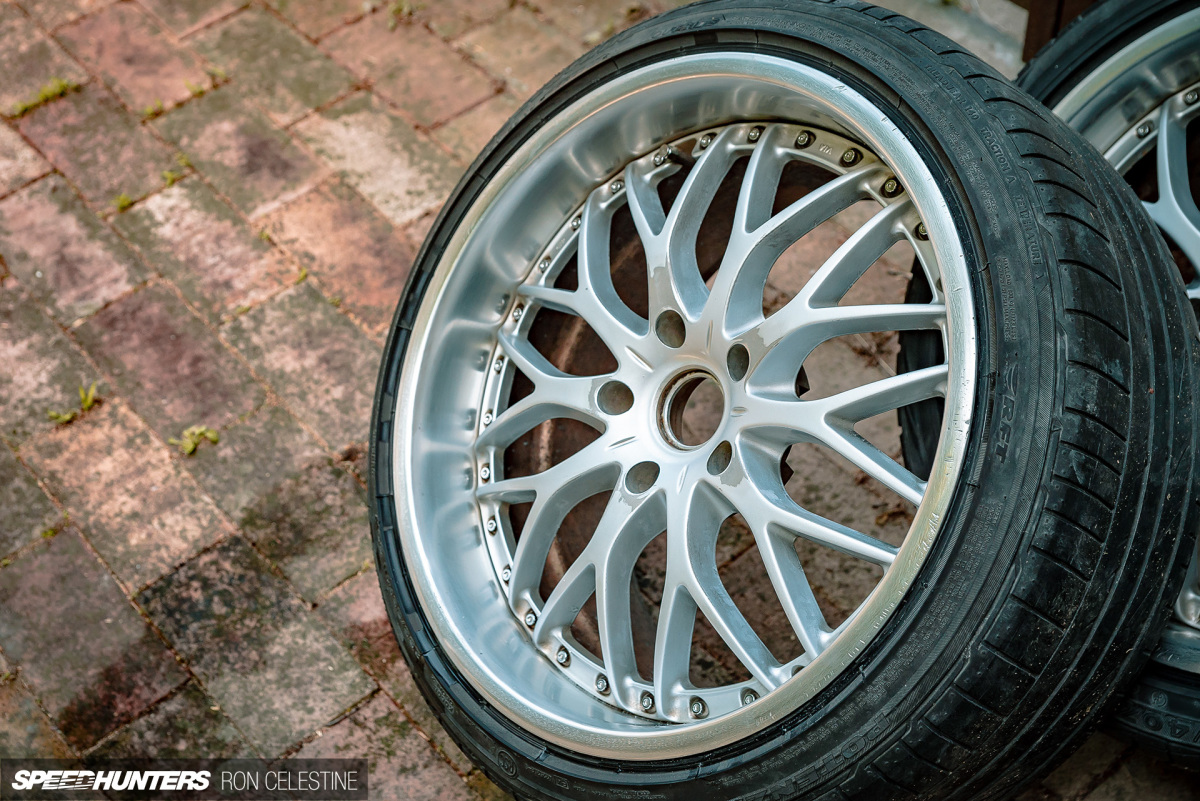
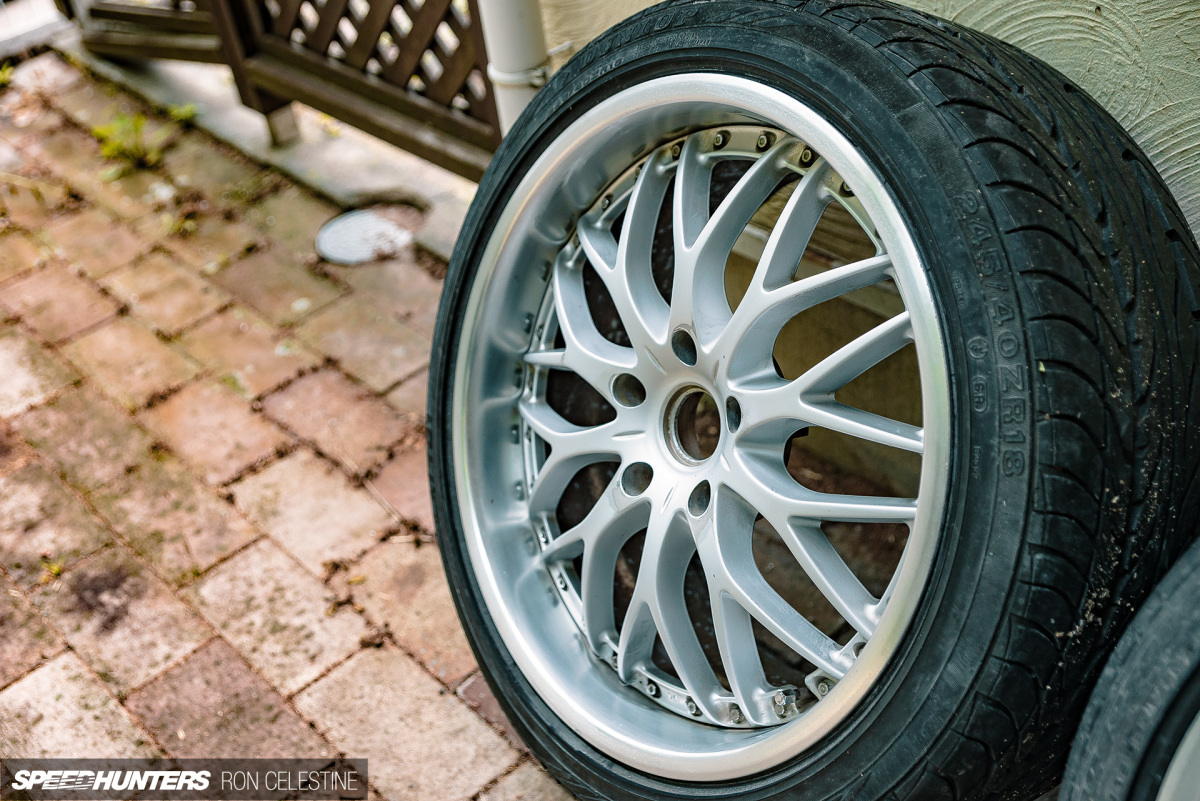
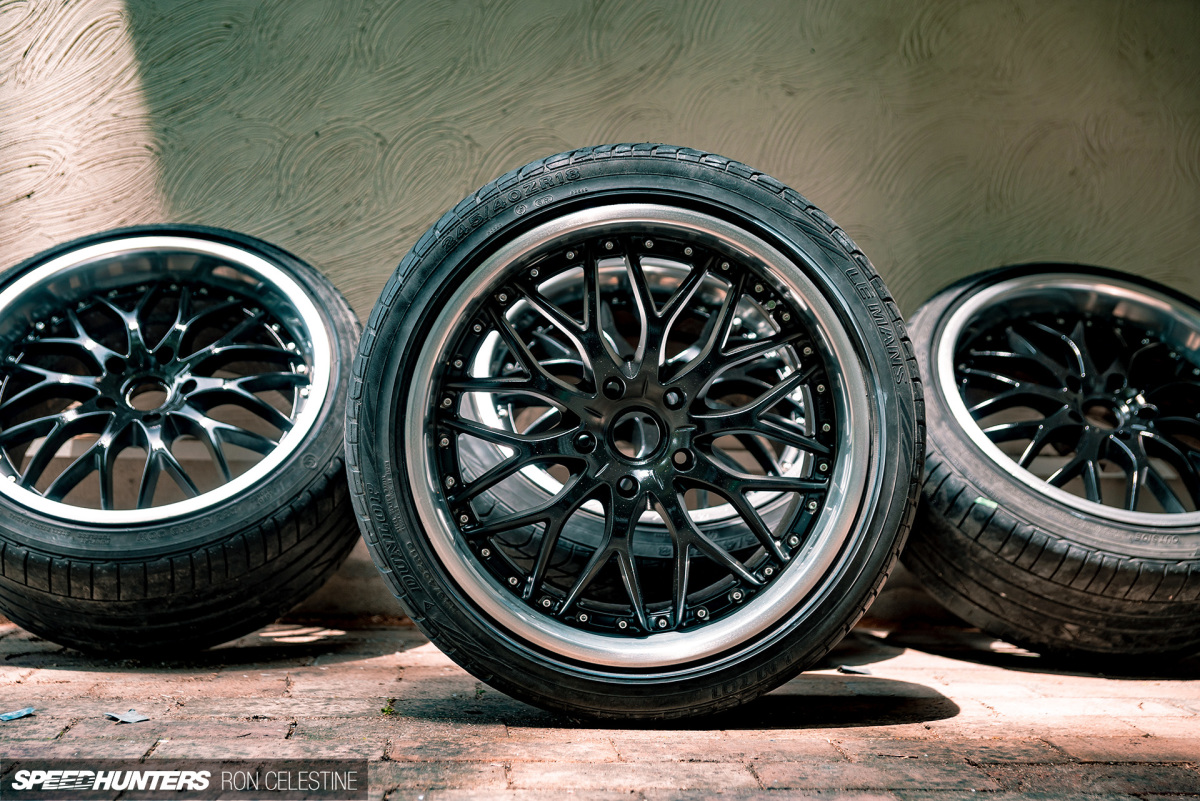
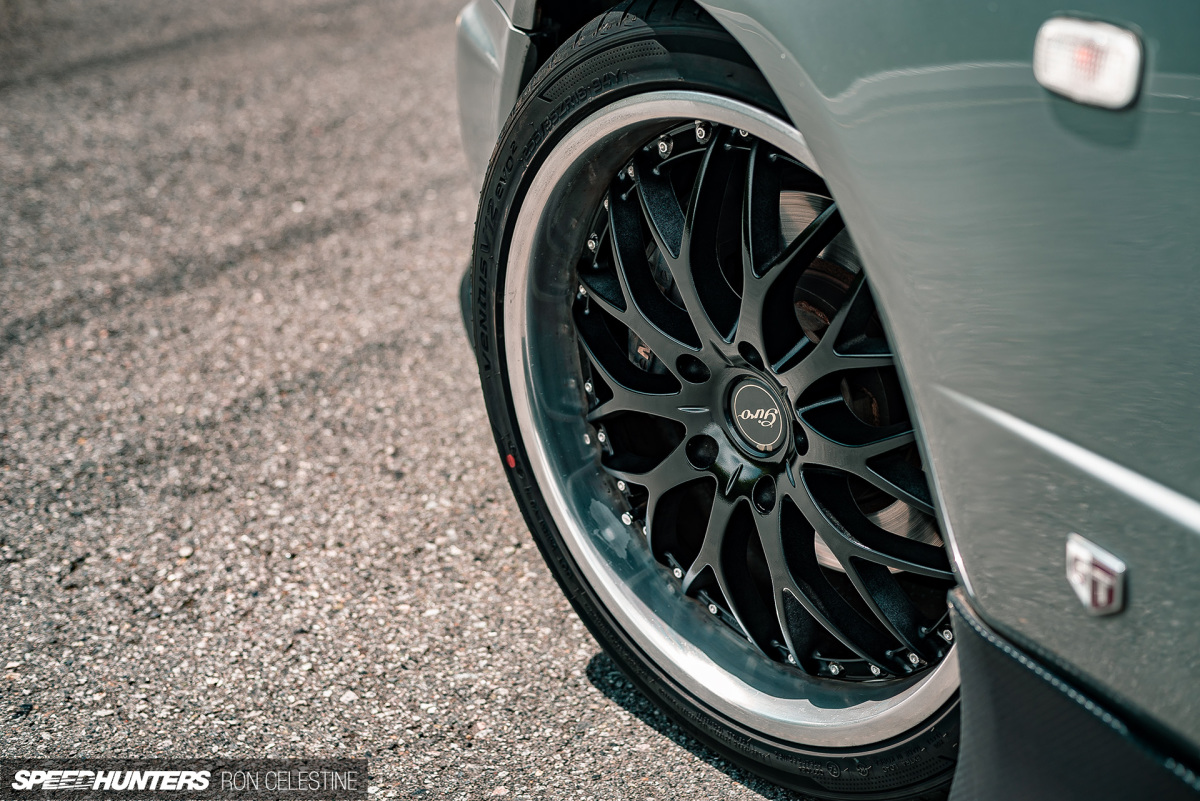
I turned to Yahoo! Auctions, hoping for a miracle. And that’s when these RAYS Arthur Exchange wheels flashed across my page after a couple of nights’ worth of searching.
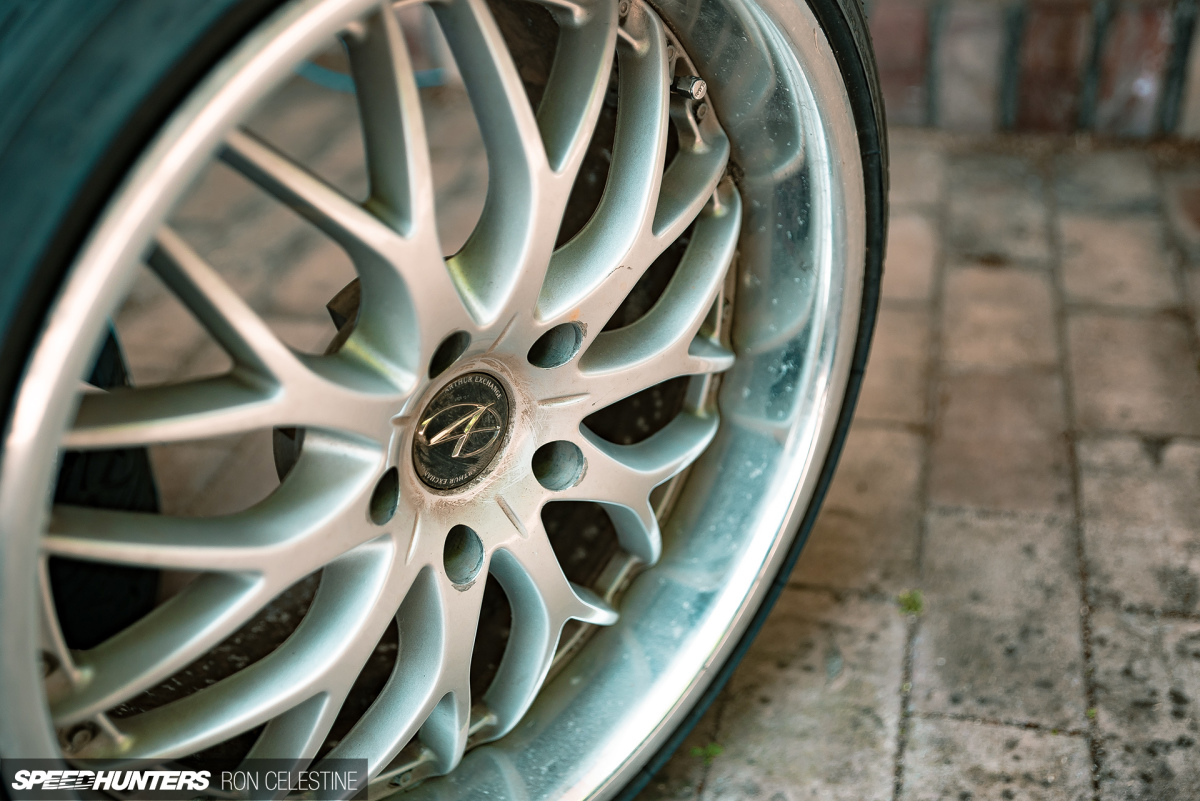
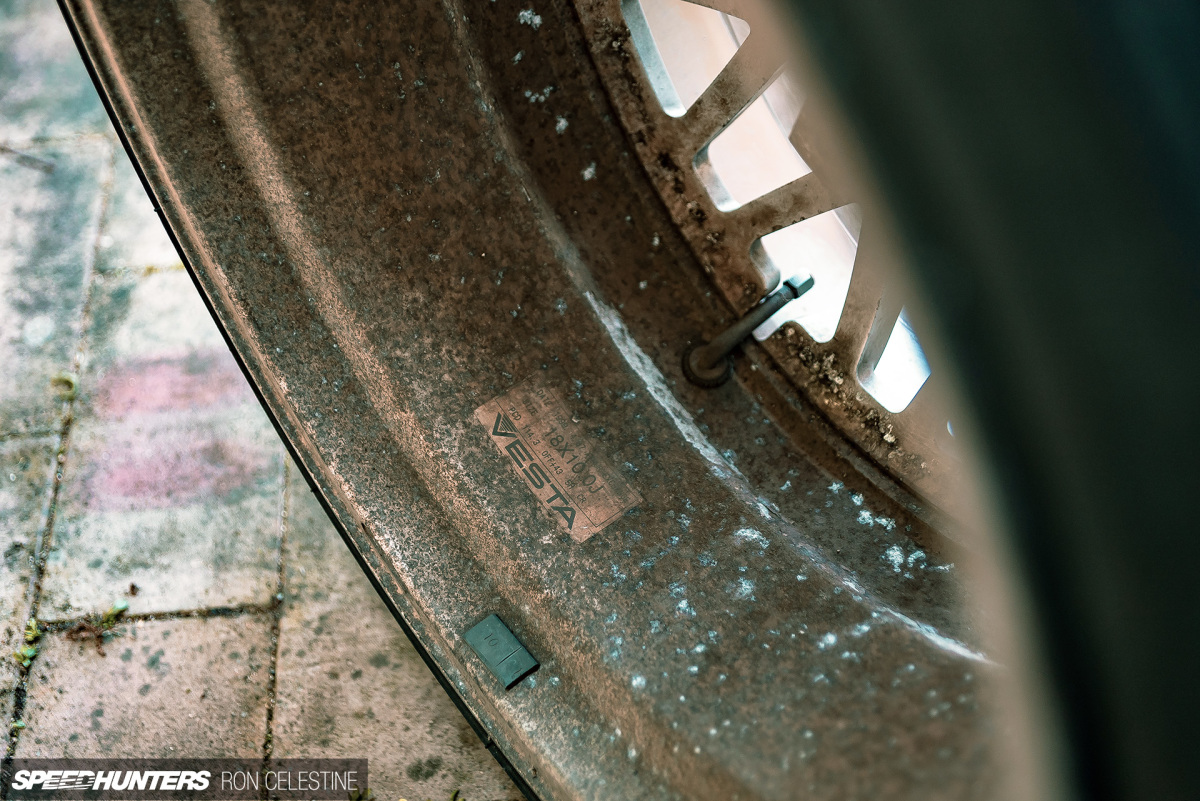
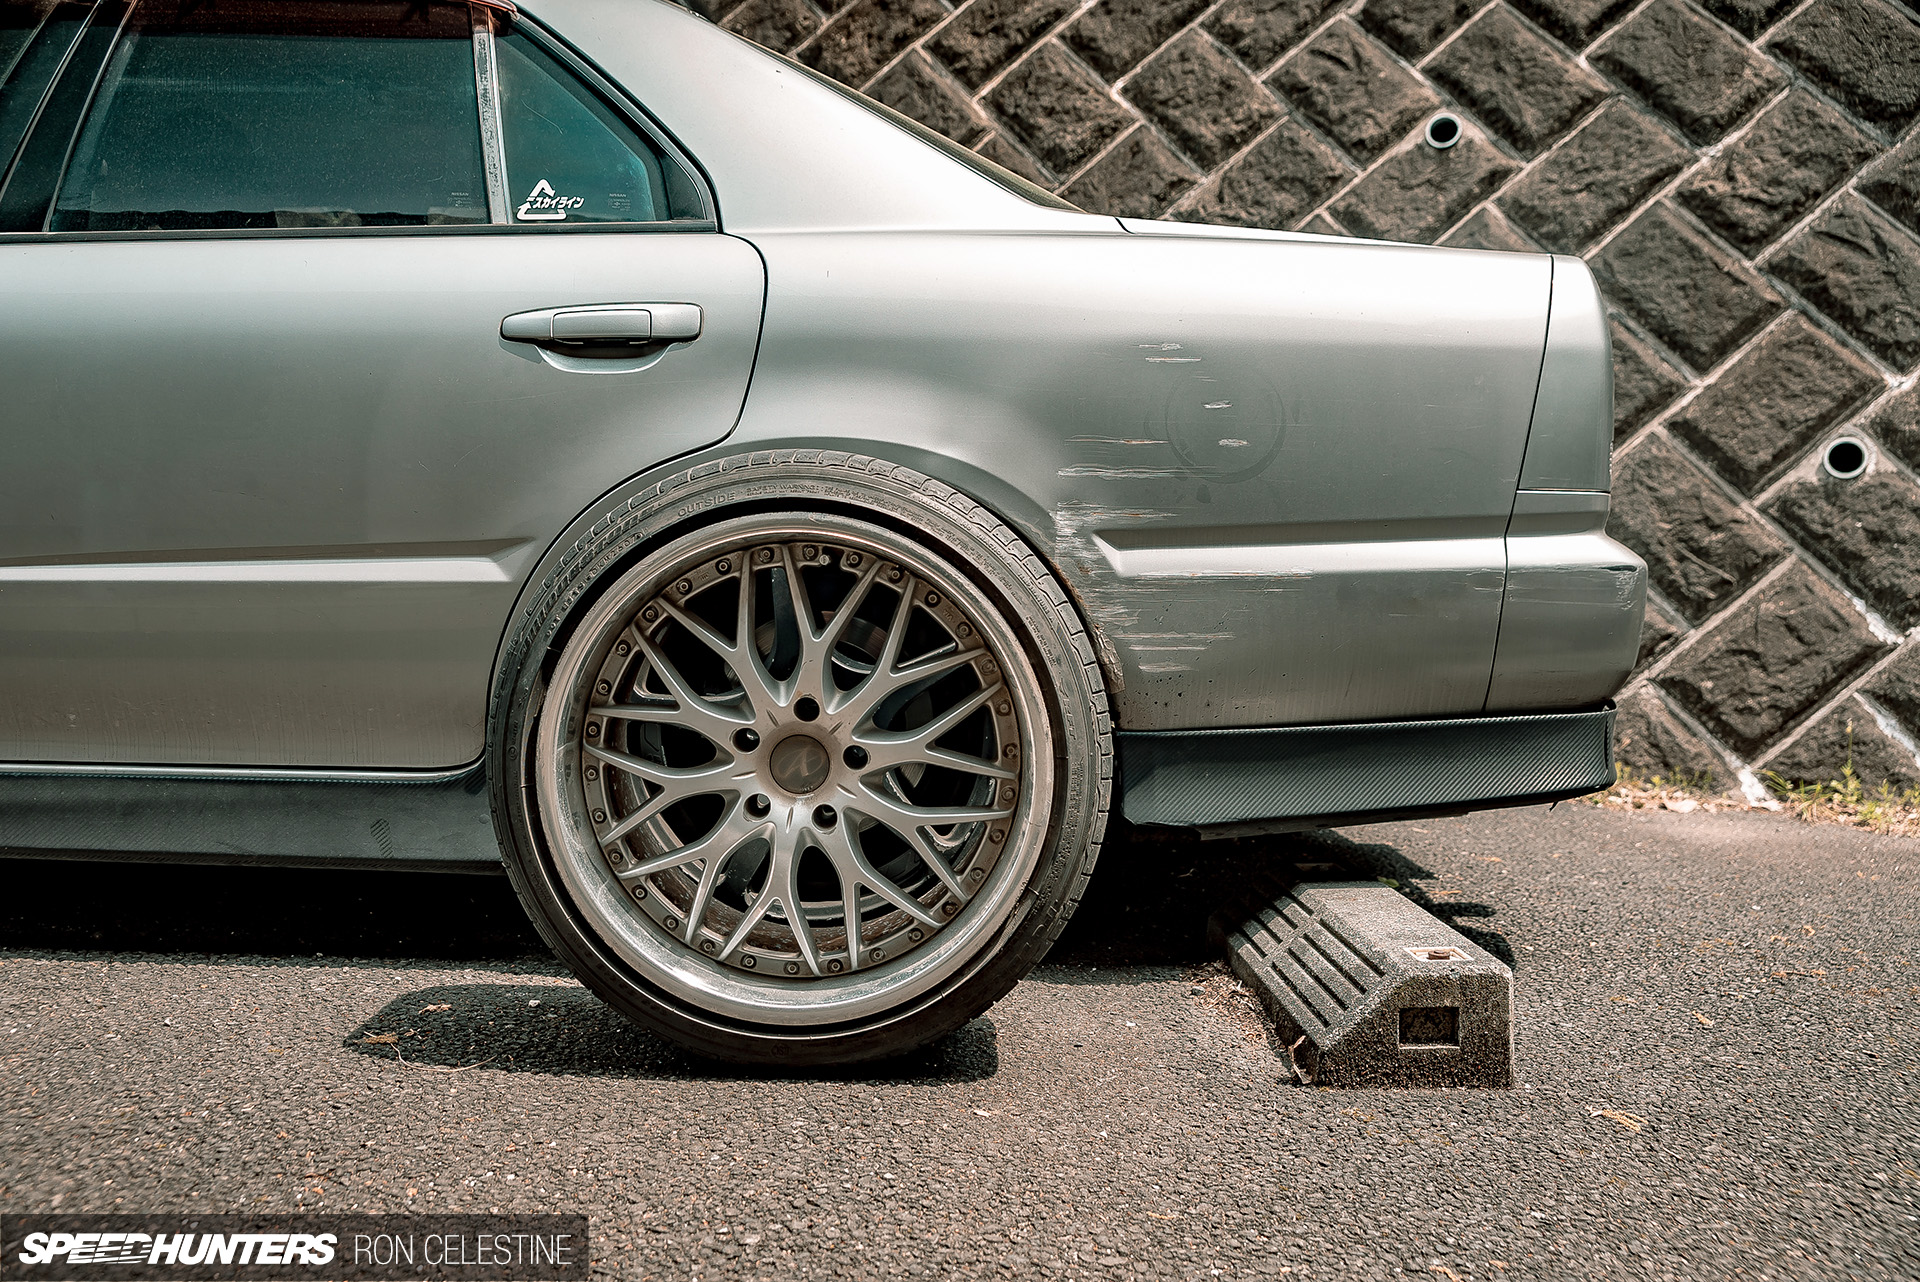
They had clearly seen better days, but the previous owner said they held air (something my wheel didn’t do), they were the sizes I was looking for (18×9-inch for the front and 18×10-inch for the rear), and were really cheap. Perfect.
Although I haven’t been able to find any real information about these wheels, I do know that Vesta was RAYS’ casting division back in the day, before it was renamed to RAYS Foundry Co. in 2000. Arthur Exchange was one of RAYS’ brands, and these appear to be the ‘Style-M’ model – or a predecessor to those at least.
Despite the lack of info – other than the fact the build stickers say they were manufactured in 1999 – owning a slice of RAYS history was good enough for me.
Now I just needed to breathe some new life into them.
Will They Fit?
It’s the question that everyone asks when buying a bigger set of wheels for their project: will they even fit?

You can search online and find endless forum topics related to this very question. If you’re lucky, you will stumble upon a page that has people showing both their fitment and wheel specs (shoutout to the ‘ER34 Crew’ Facebook page).
However, if you really want to be sure how a particular wheel will fit – if at all – you should grab the tape measure and do the math.
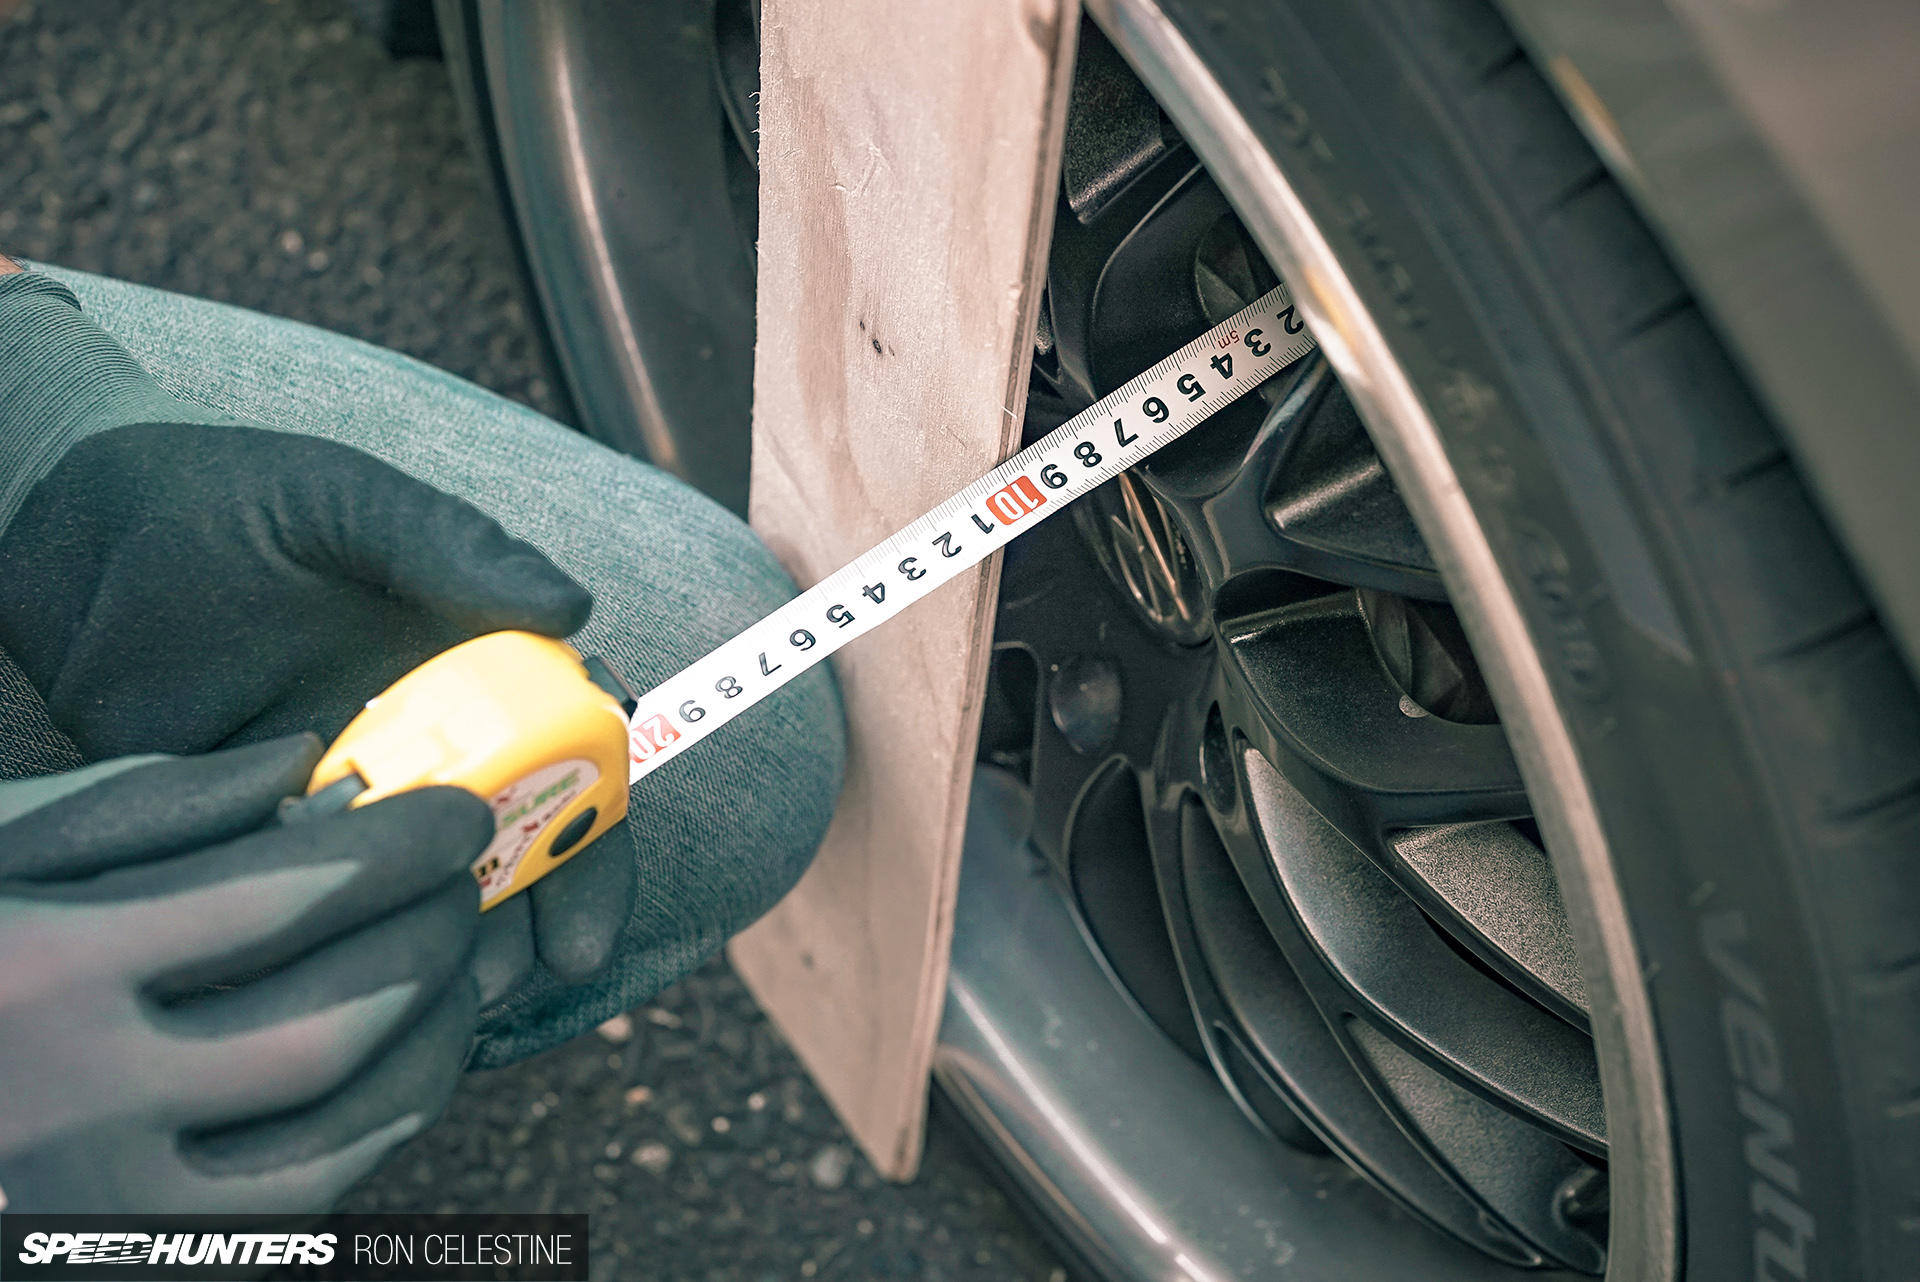
Of course, for the most accurate measurements I highly suggest taking the wheel and tire off and measuring the space available. That being said, if you don’t have access to a jack or really just want to gain a quick reference, it is possible to get an idea of space available while the tires are still on. Allow me to demonstrate.
With a flat object to help you get a better reading, measure the wheel arch clearance ahead and behind of the wheel’s mating face. For the purpose of this walk through we will call it the front and back spacing.
The front spacing is the measurement from the wheel hub to fender; it’s the space you have before you start to protrude out of the arch.
If the wheel is off, the back spacing is the closest object that will cause interference (For Project Rough, it’s the upper control arms in the front, and the shocks in the rear) to the wheel mating face on the hub. Remember that you might have lots of clearance to the shock, but with the wheel turned you may hit the inner arch. It is always good to check with the steering turned too.
– If you are doing this with the wheel on you have to be a little more creative, measure from that interference point to the front plane of your wheels (we will call this Back Space A)
– Then measure the distance from your wheel hubs to the front plane of your wheels (we will call this Hub to Wheel)
– (Back Space A) – (Hub to Wheel) = True Back Spacing.

Now that you have your vehicle’s front and back spacing, you are now ready to determine your desired wheels’ required spacing. I admit that I let the ex-engineer inside nerd out a bit making this.
- With your desired wheel specs, you will use the width and offset to determine the wheel front space, back space, and center lines.
- You must make sure to convert your wheel width from inches to cm, and offsets mm to cm or else everything will be messed up.
After solving the equations, if the wheel spacing numbers (the numbers in yellow) are less than your vehicle’s spacing (the numbers in green), then the wheels should fit. As you can see, I knew the Arthur Exchange wheels would fit Project Rough just fine.
Remember though, this is only good for telling about your wheels spacing; you should also take into consideration the tire size you want to run. I would recommend being a bit conservative with your numbers (round down when measuring, not up) just in case.
This is especially true if you are doing this with the wheels still on, as it may be difficult to get the exact obstruction point when measuring the back spacing.
Am I In Over My Head Again?
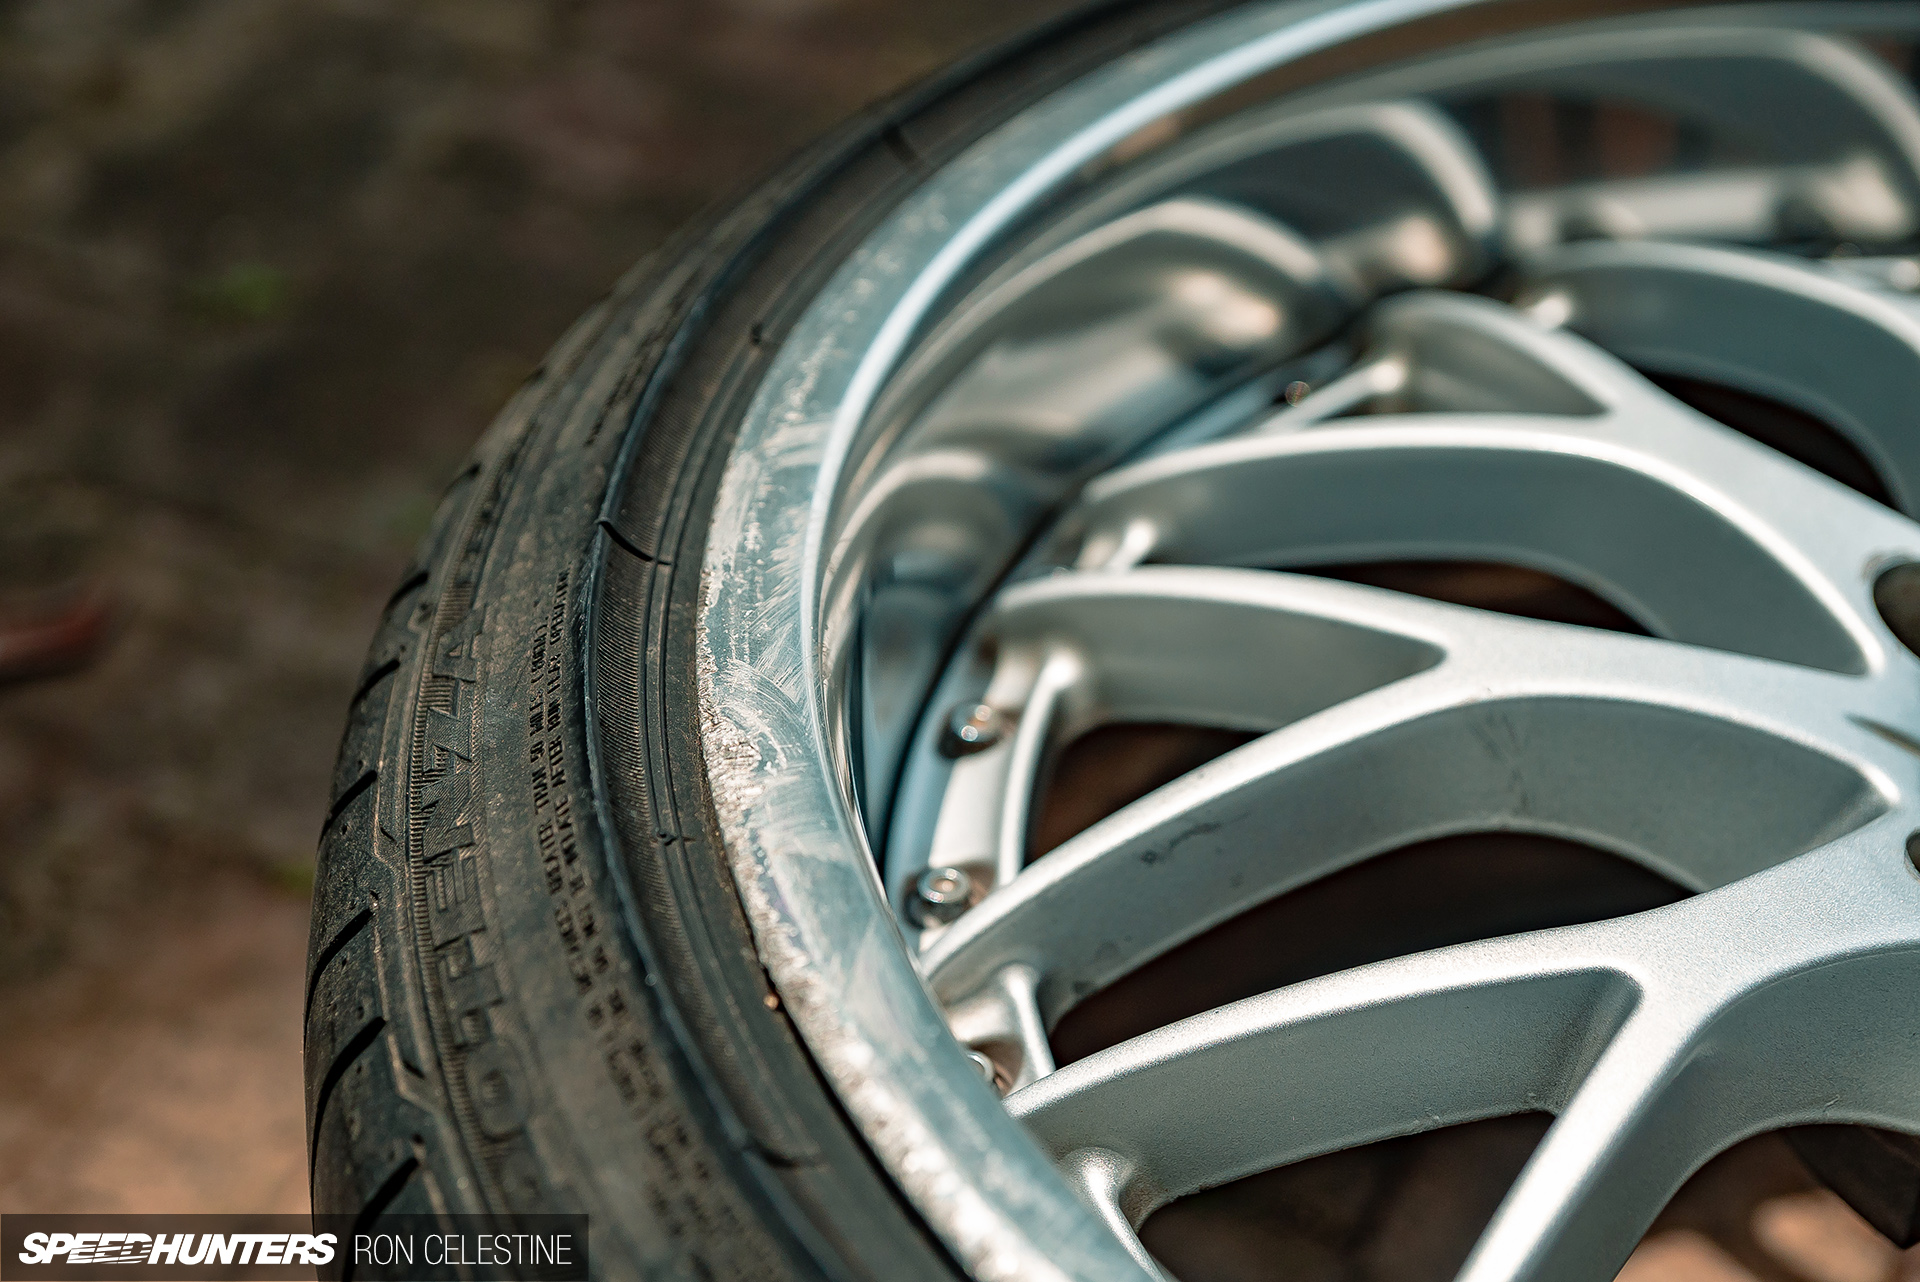
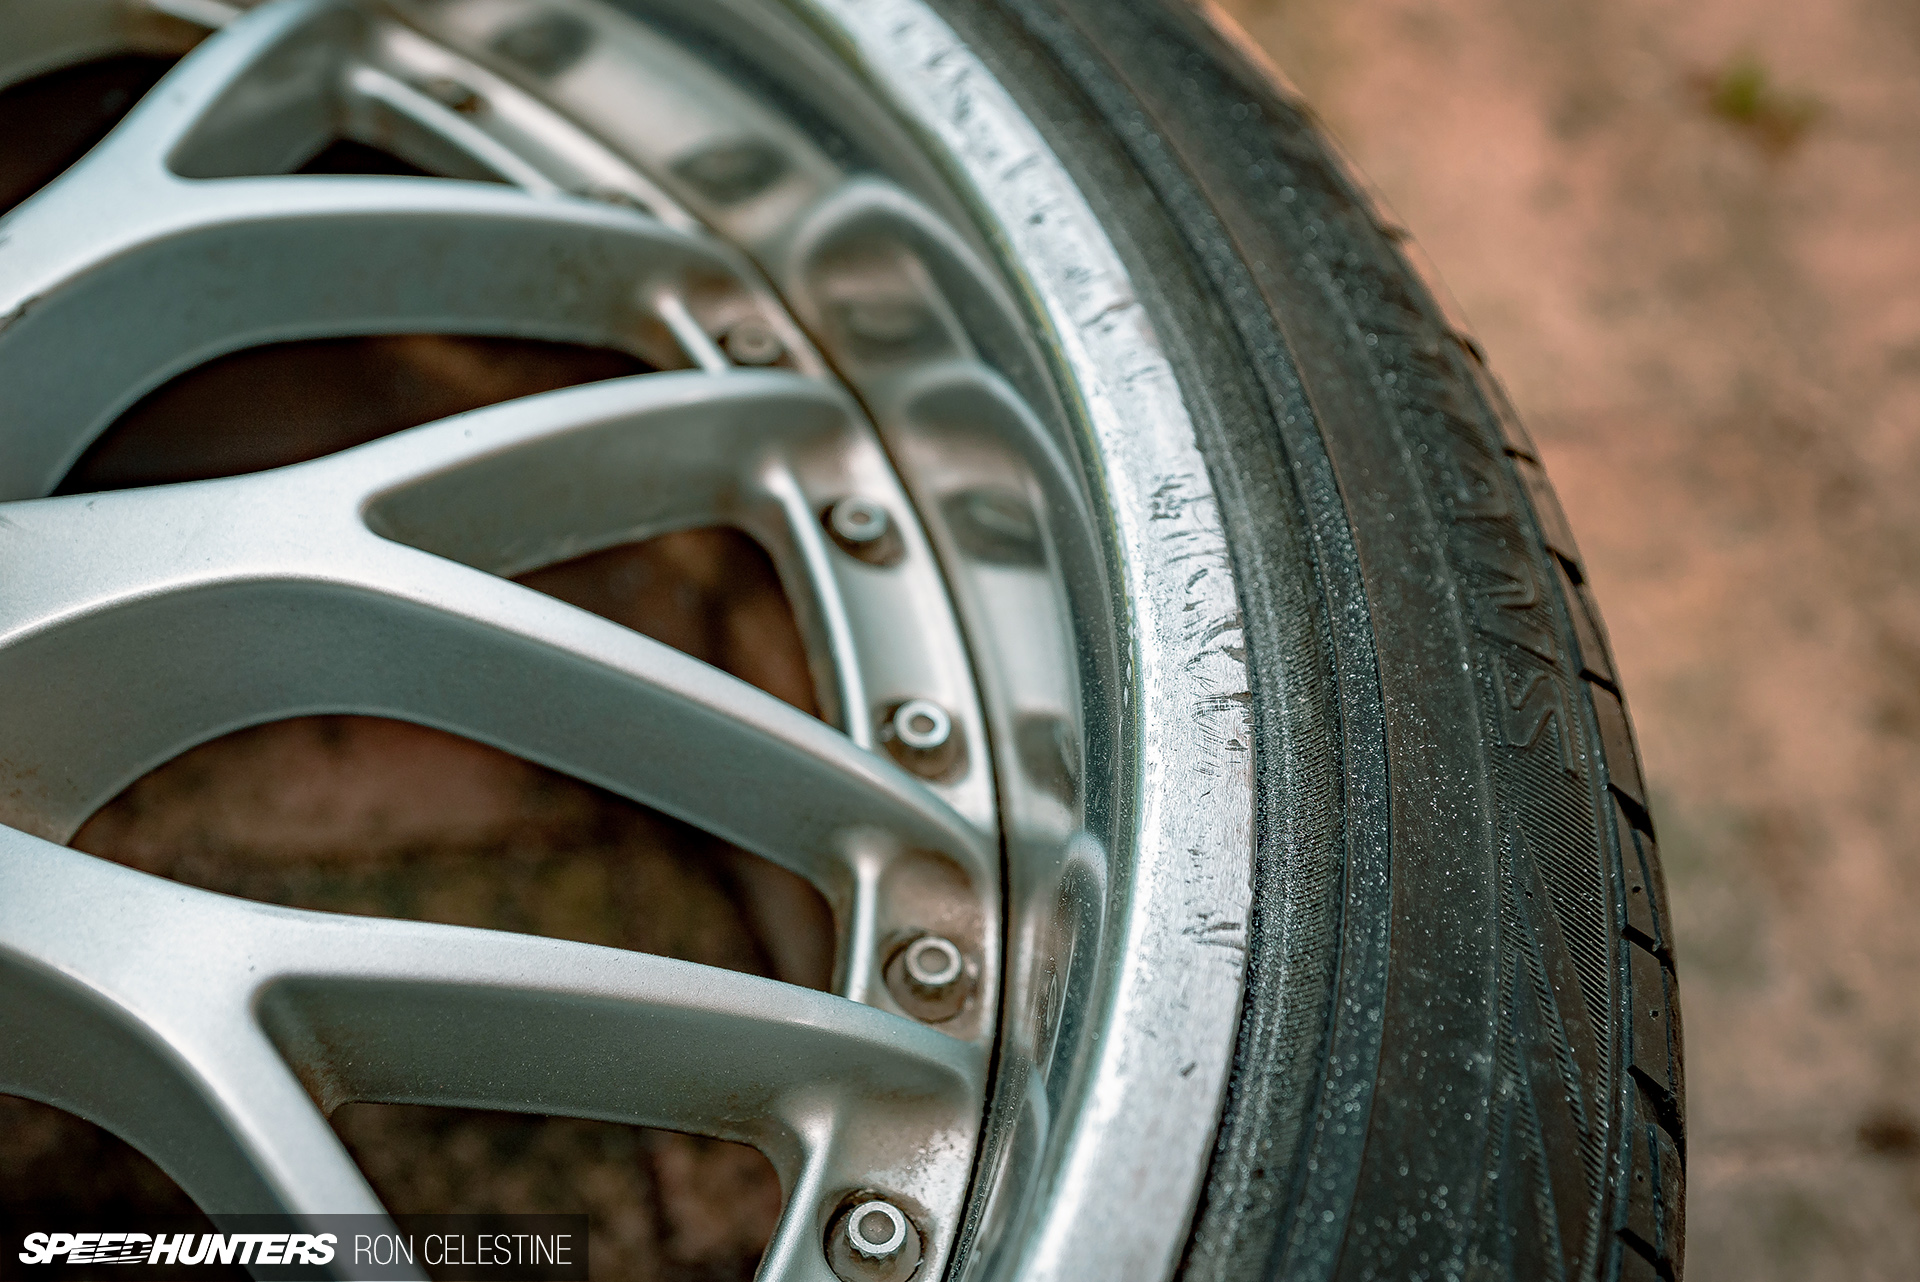
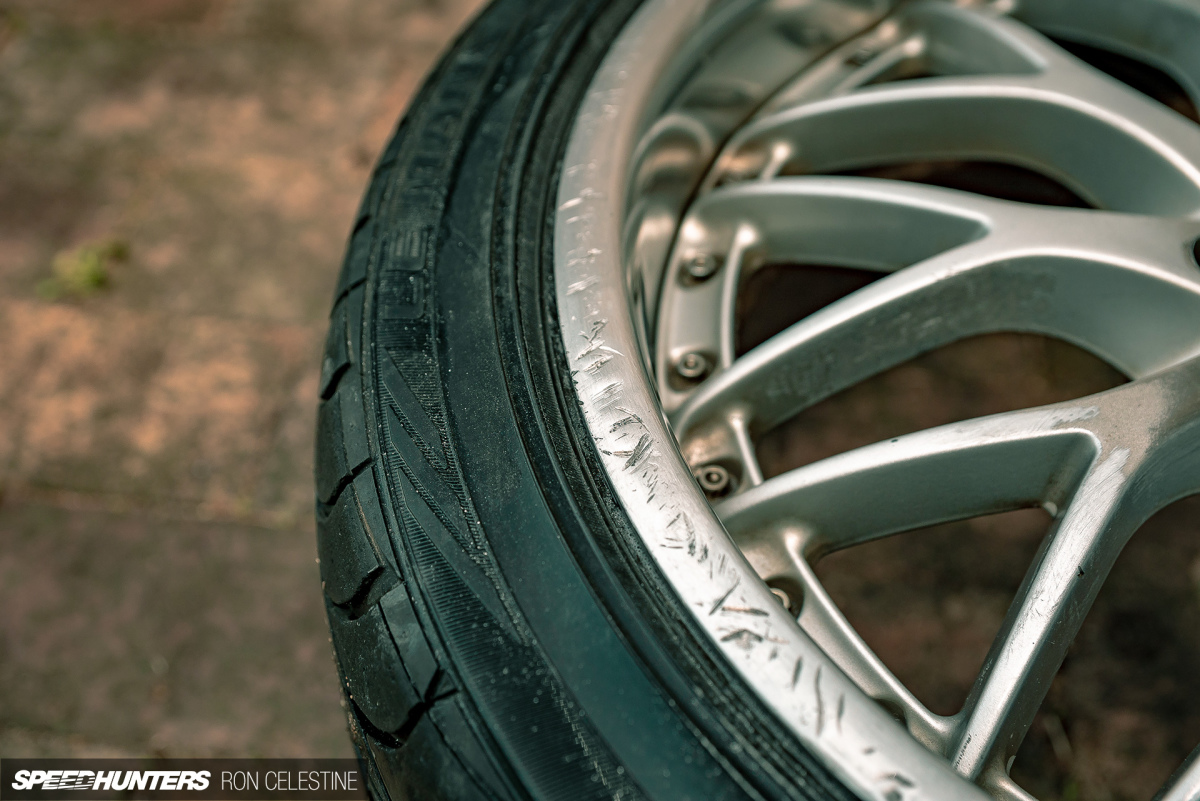
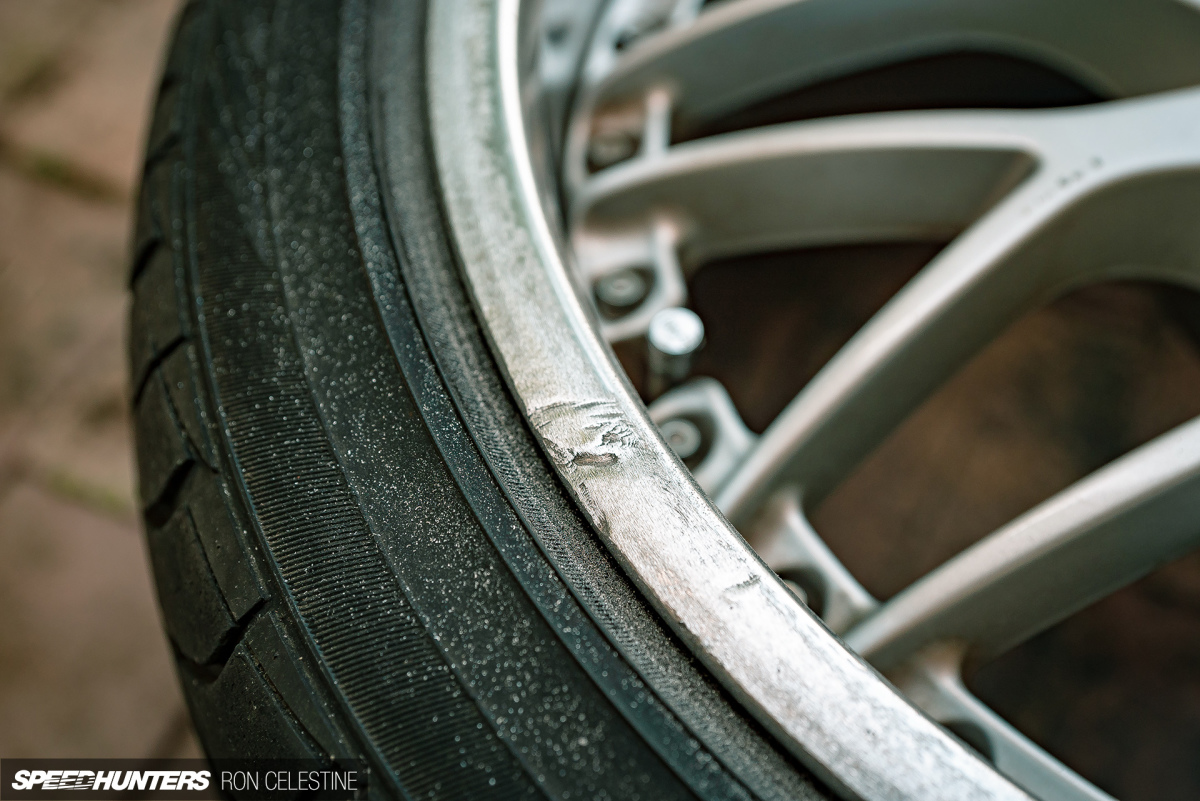
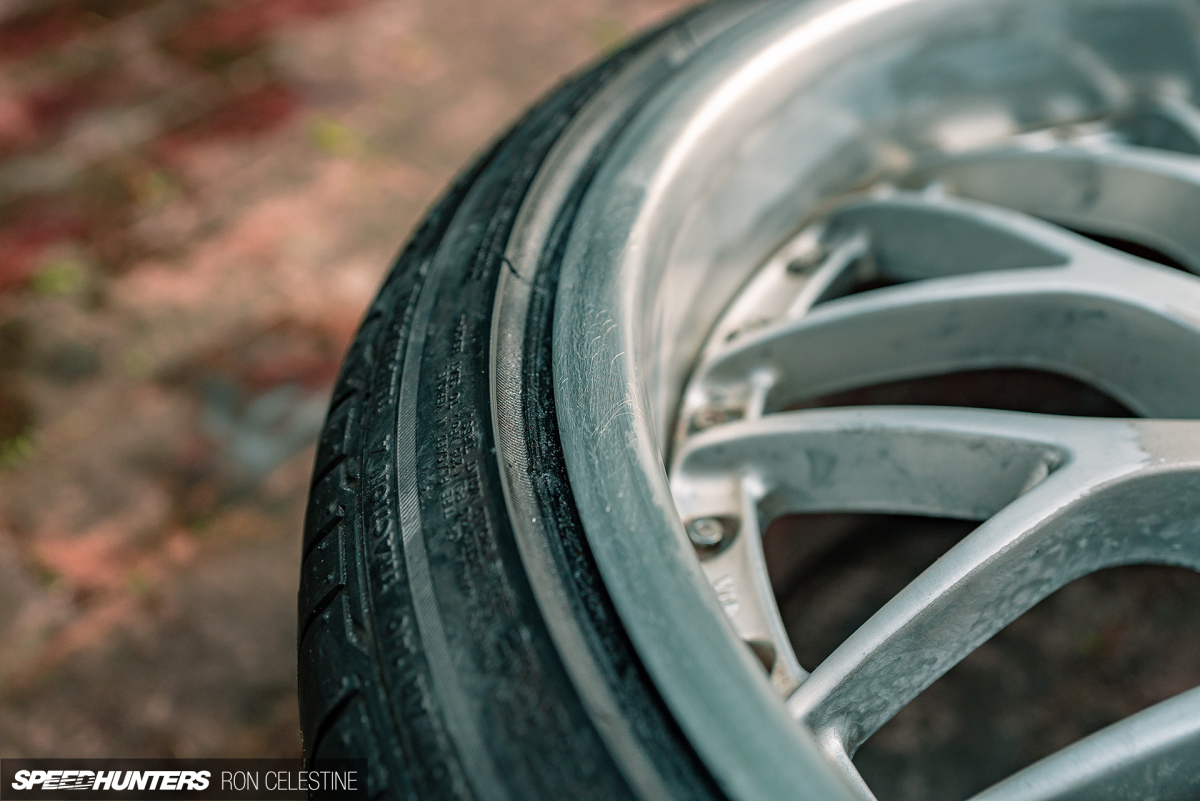
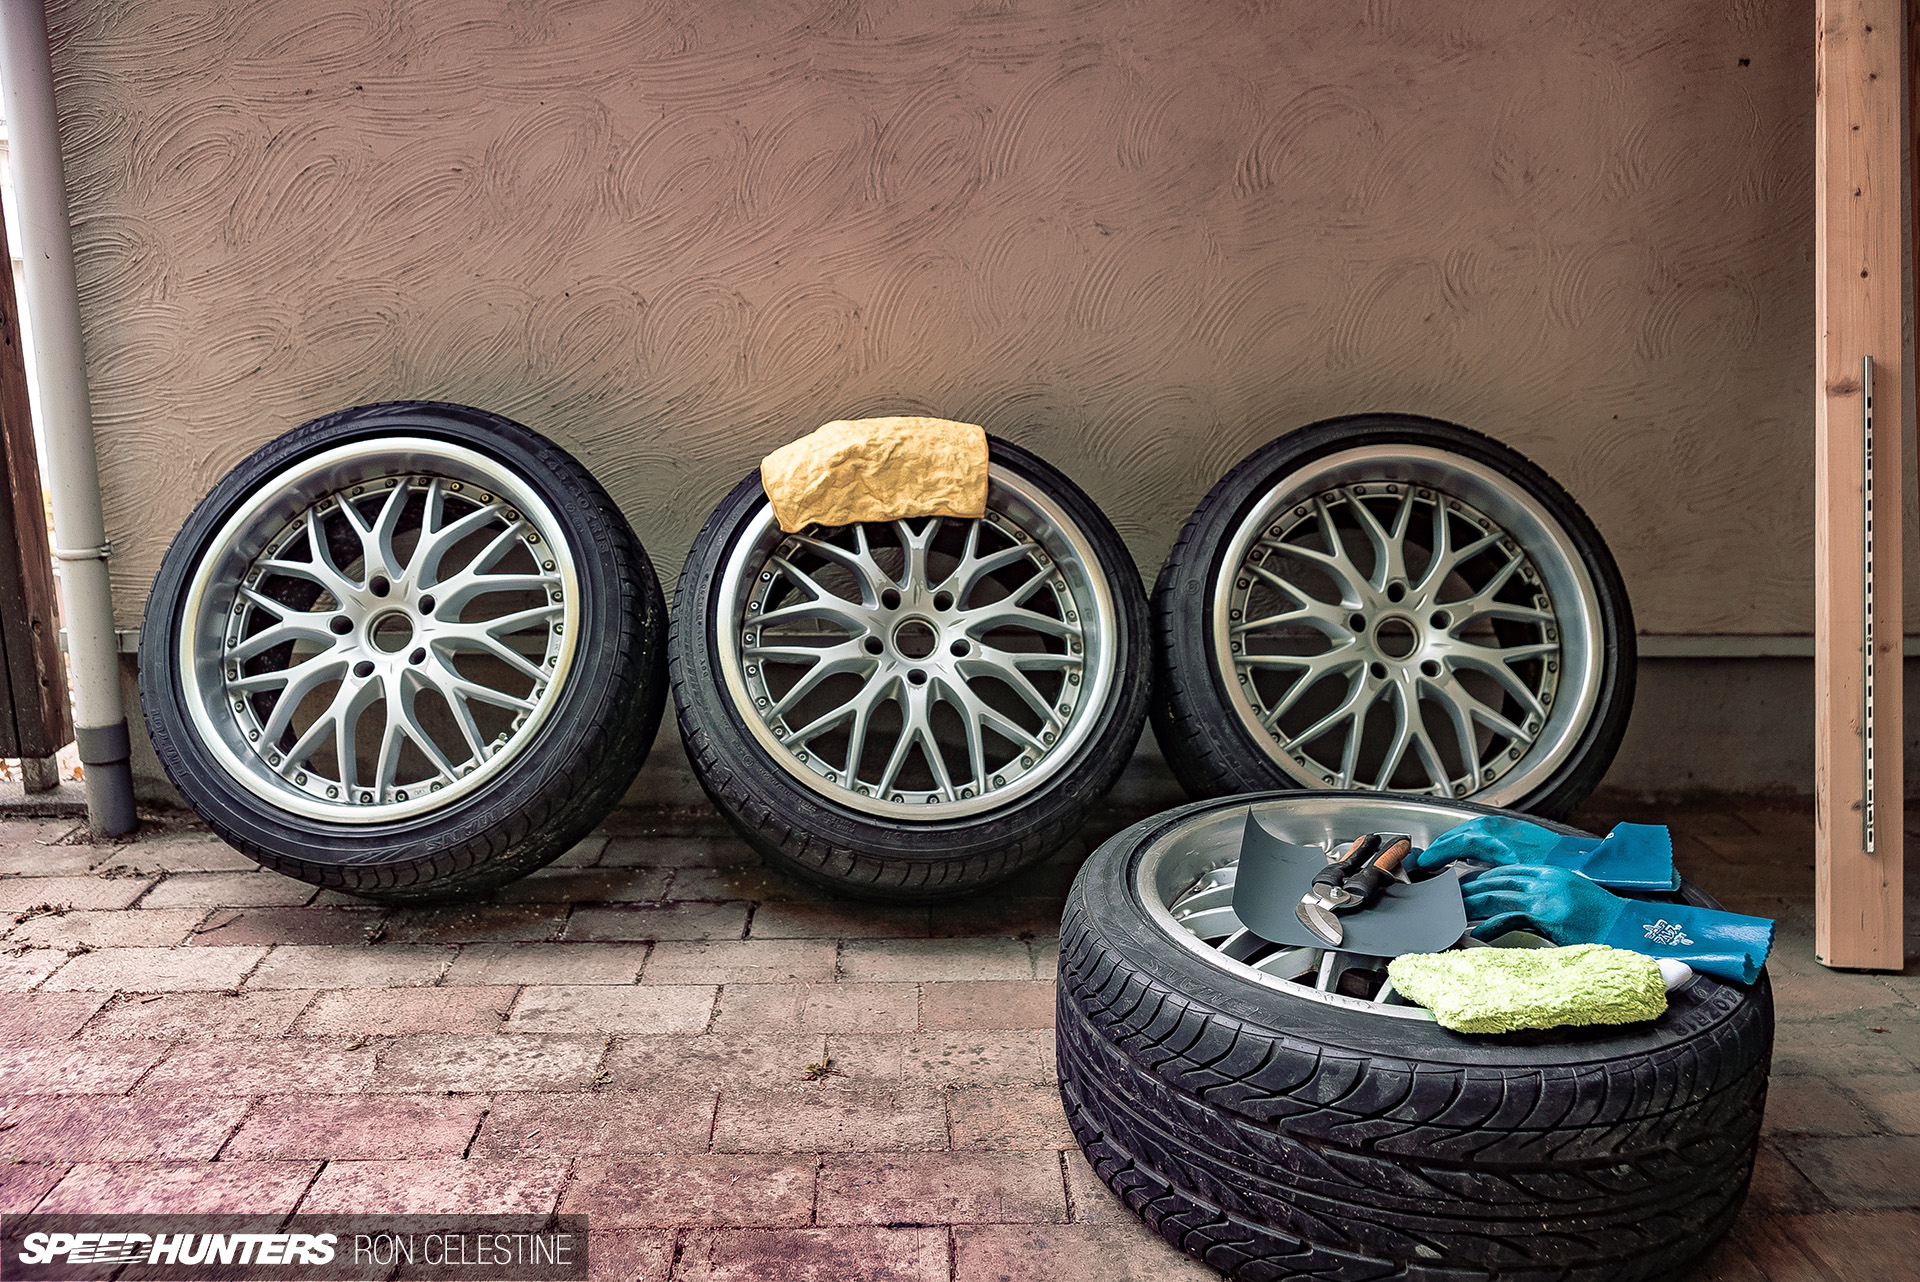
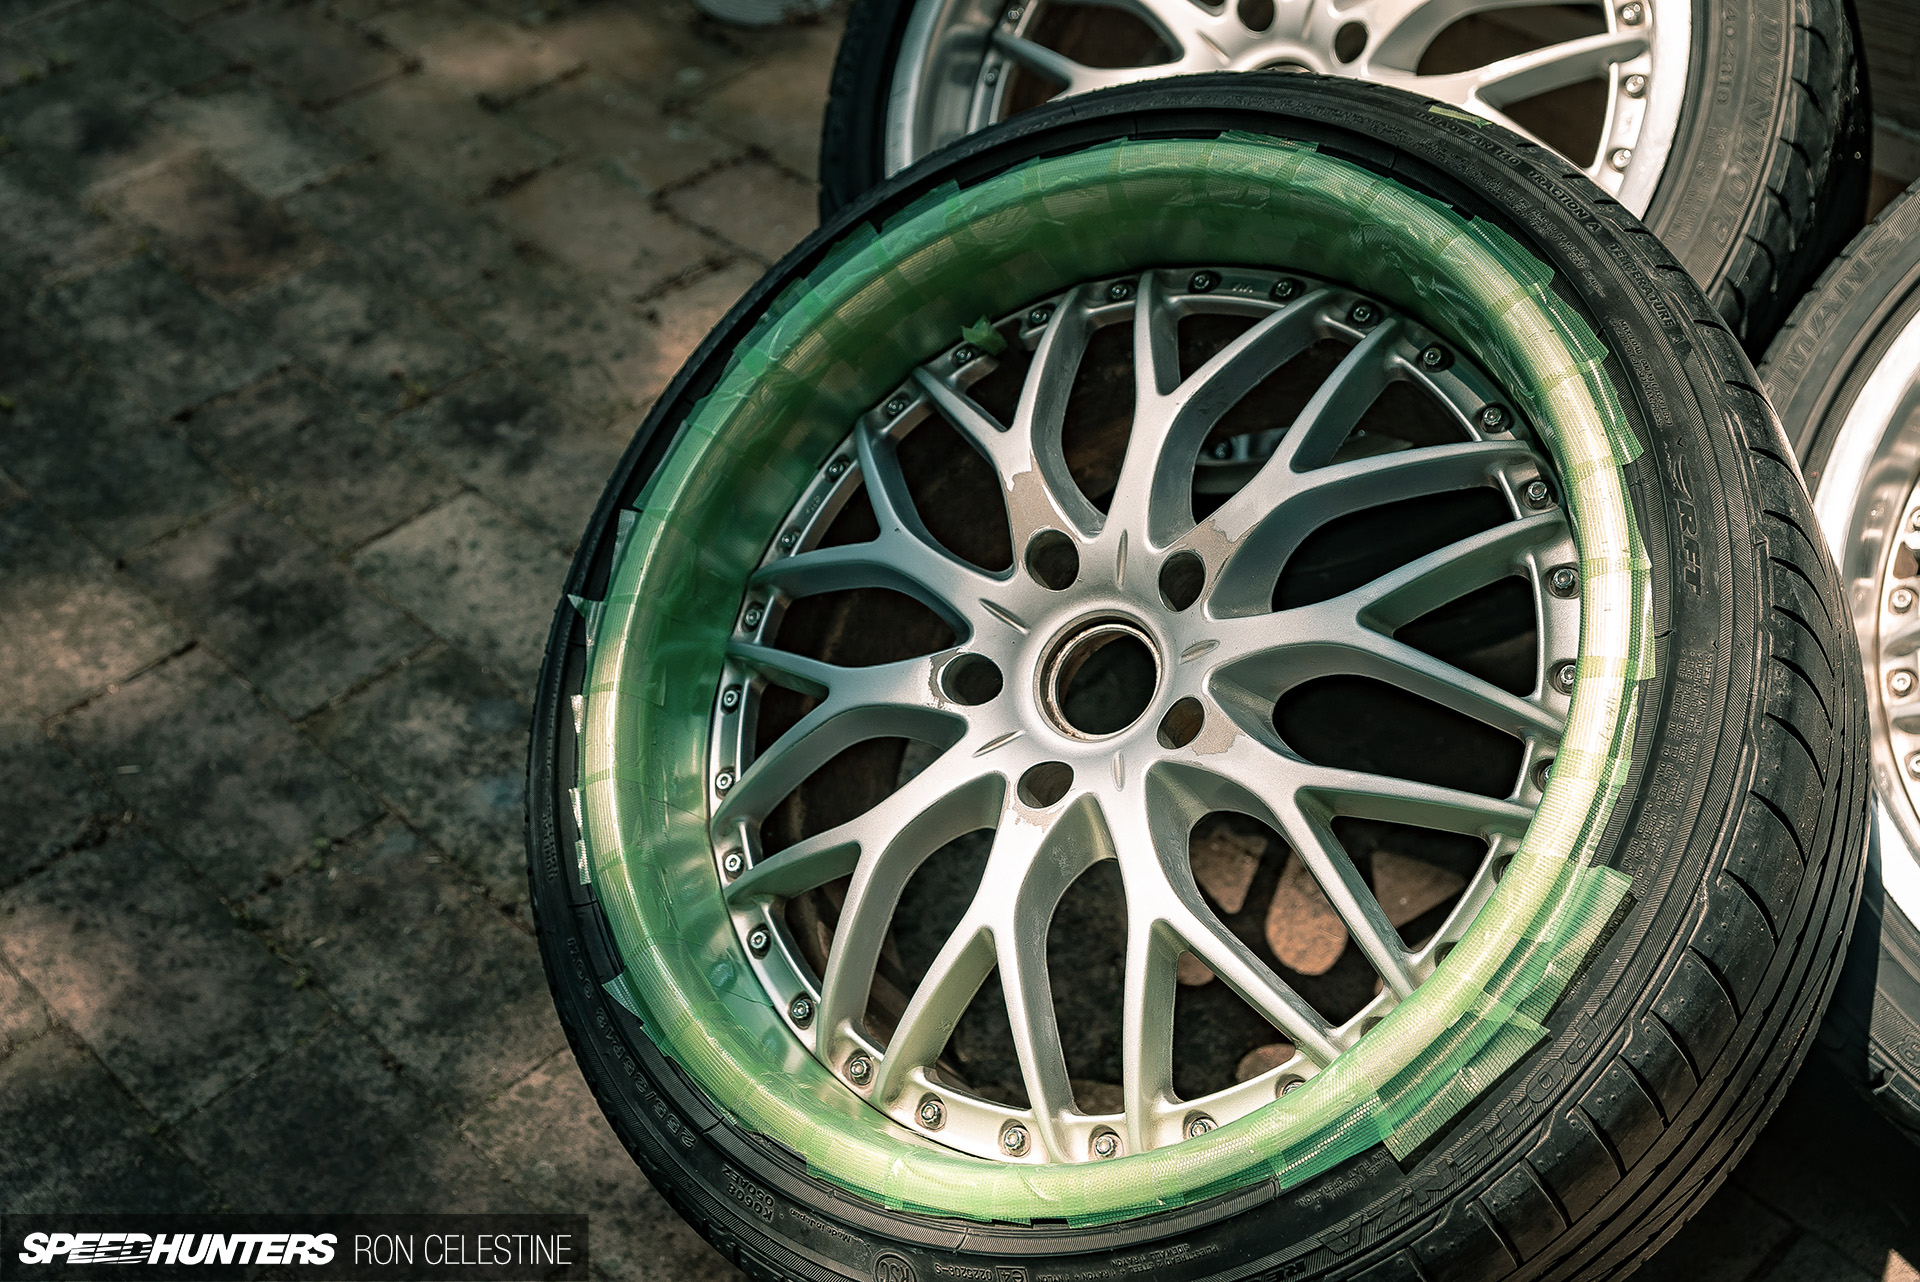
Now that we all know how to check if wheels will clear, it’s time for the refurbish part of the program. Given how little the seller was wanting for these wheels I knew they’d be far from perfect, but it wasn’t until I physically had them that I realized exactly how much love these wheels were going to need to bring them back to a presentable state.

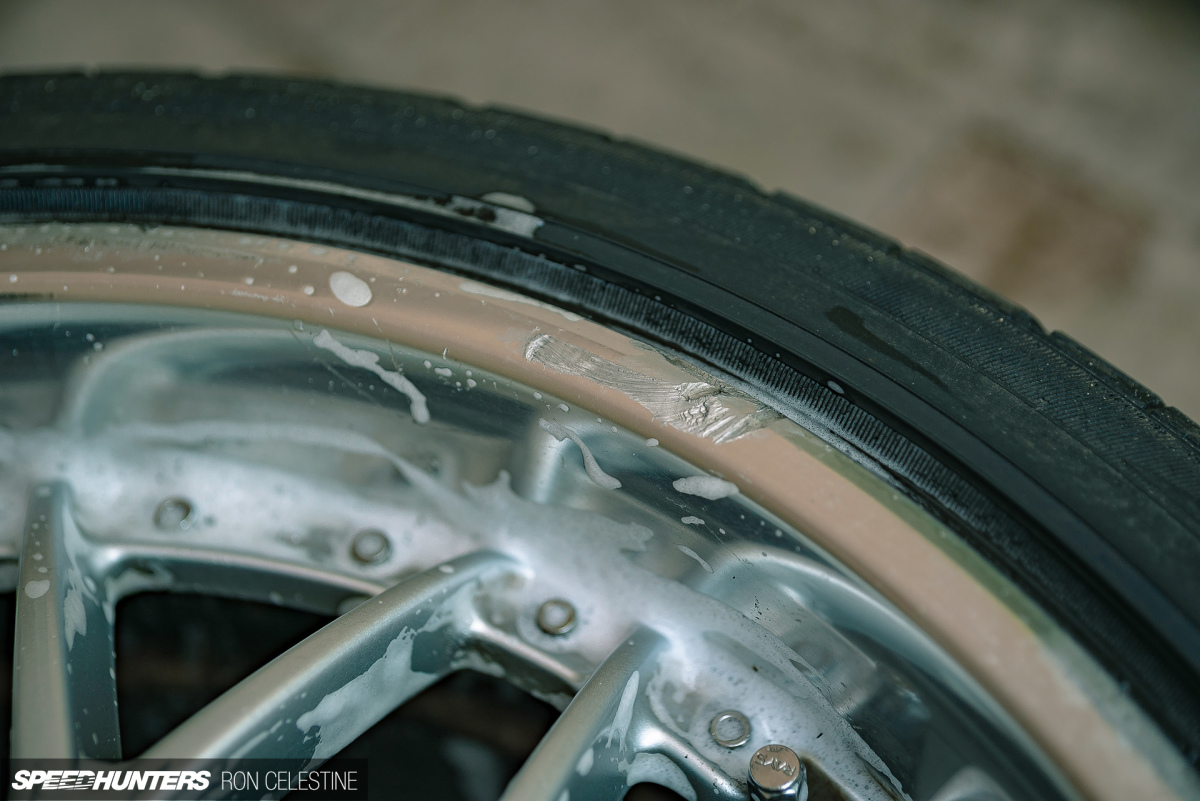
Every wheel had light curb rash or deep gouges – or both – around the lips. I’m not exactly sure how someone could cause this much damage, besides drifting off a curb or something..
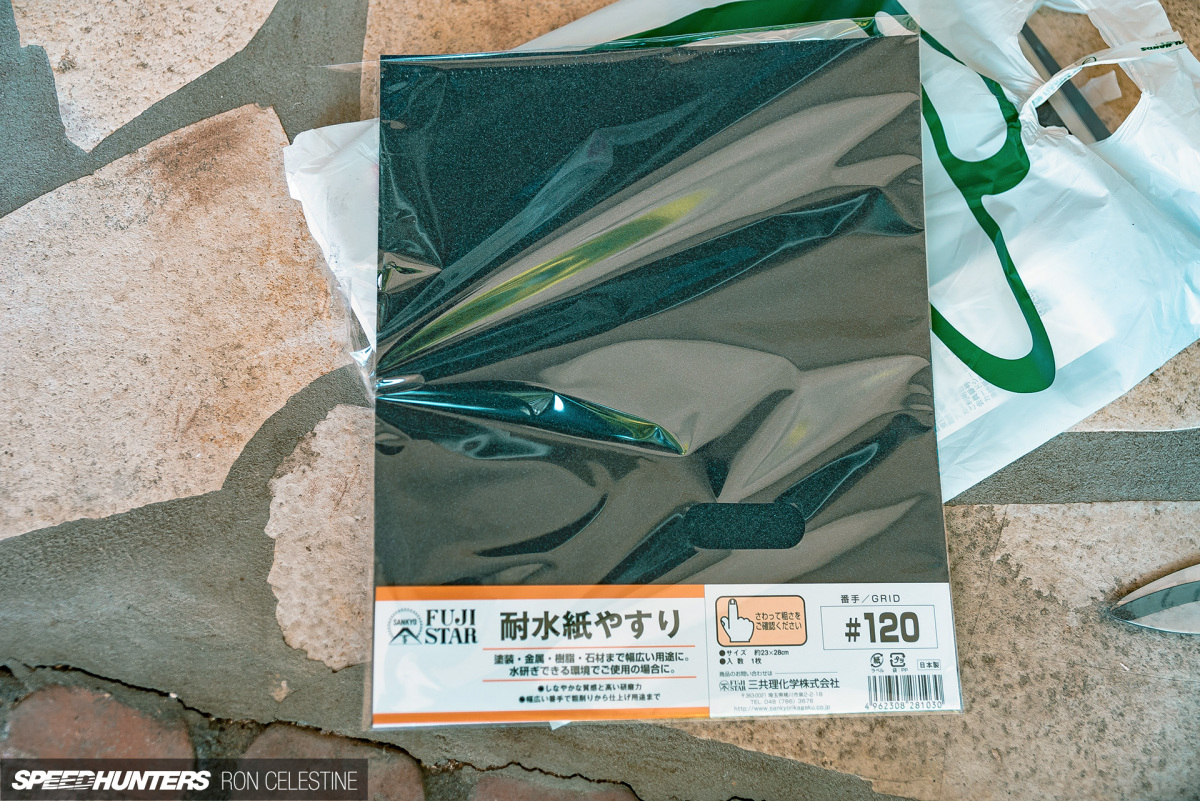
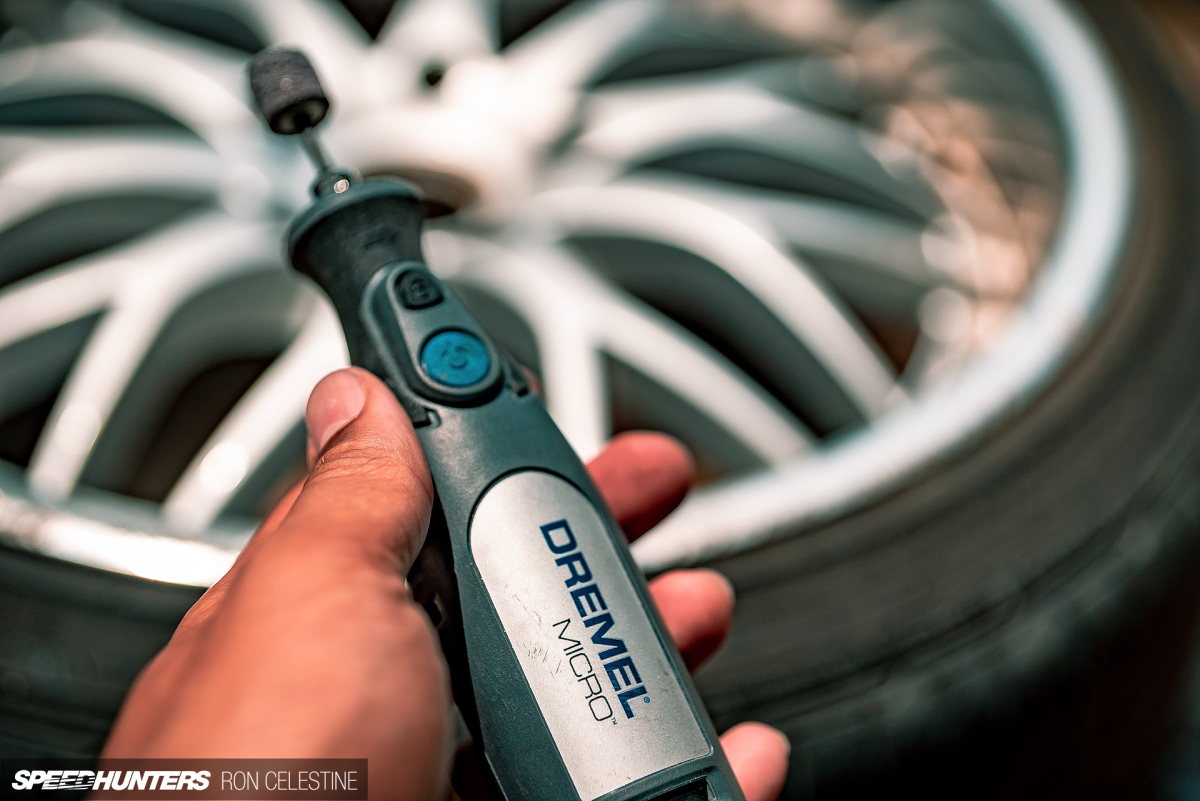
A lot of wet sanding was going to be happening in my foreseeable future. I bought 120, 240, 400, 1000, and 2000-grit sandpaper with the aim of starting off with the most abrasive paper to work out the curb rash and cuts, and then smooth it all out for a nice finish. I quickly realized that 120 grit wasn’t going to be abrasive enough for the really bad sections and resulted to 40-grit paper and my Dremel with the most abrasive paper I had laying around.
And sanded…
And sanded…
And sanded some more…
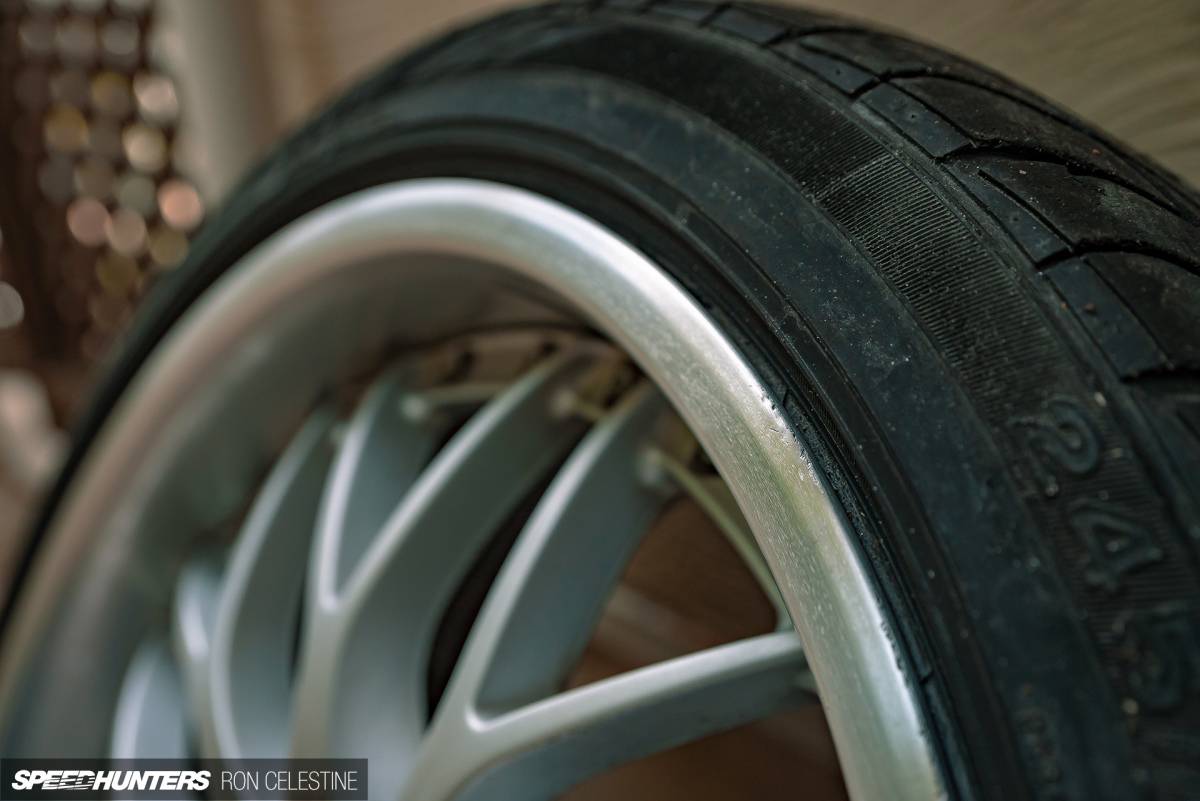
I basically spent an entire day going around the lips and spokes of the wheels and working out as much of the damage as possible. I couldn’t get them perfect, but I’ll think of them as leftover ‘character’ marks that tell of the wheels’ past. My fingers are still raw.
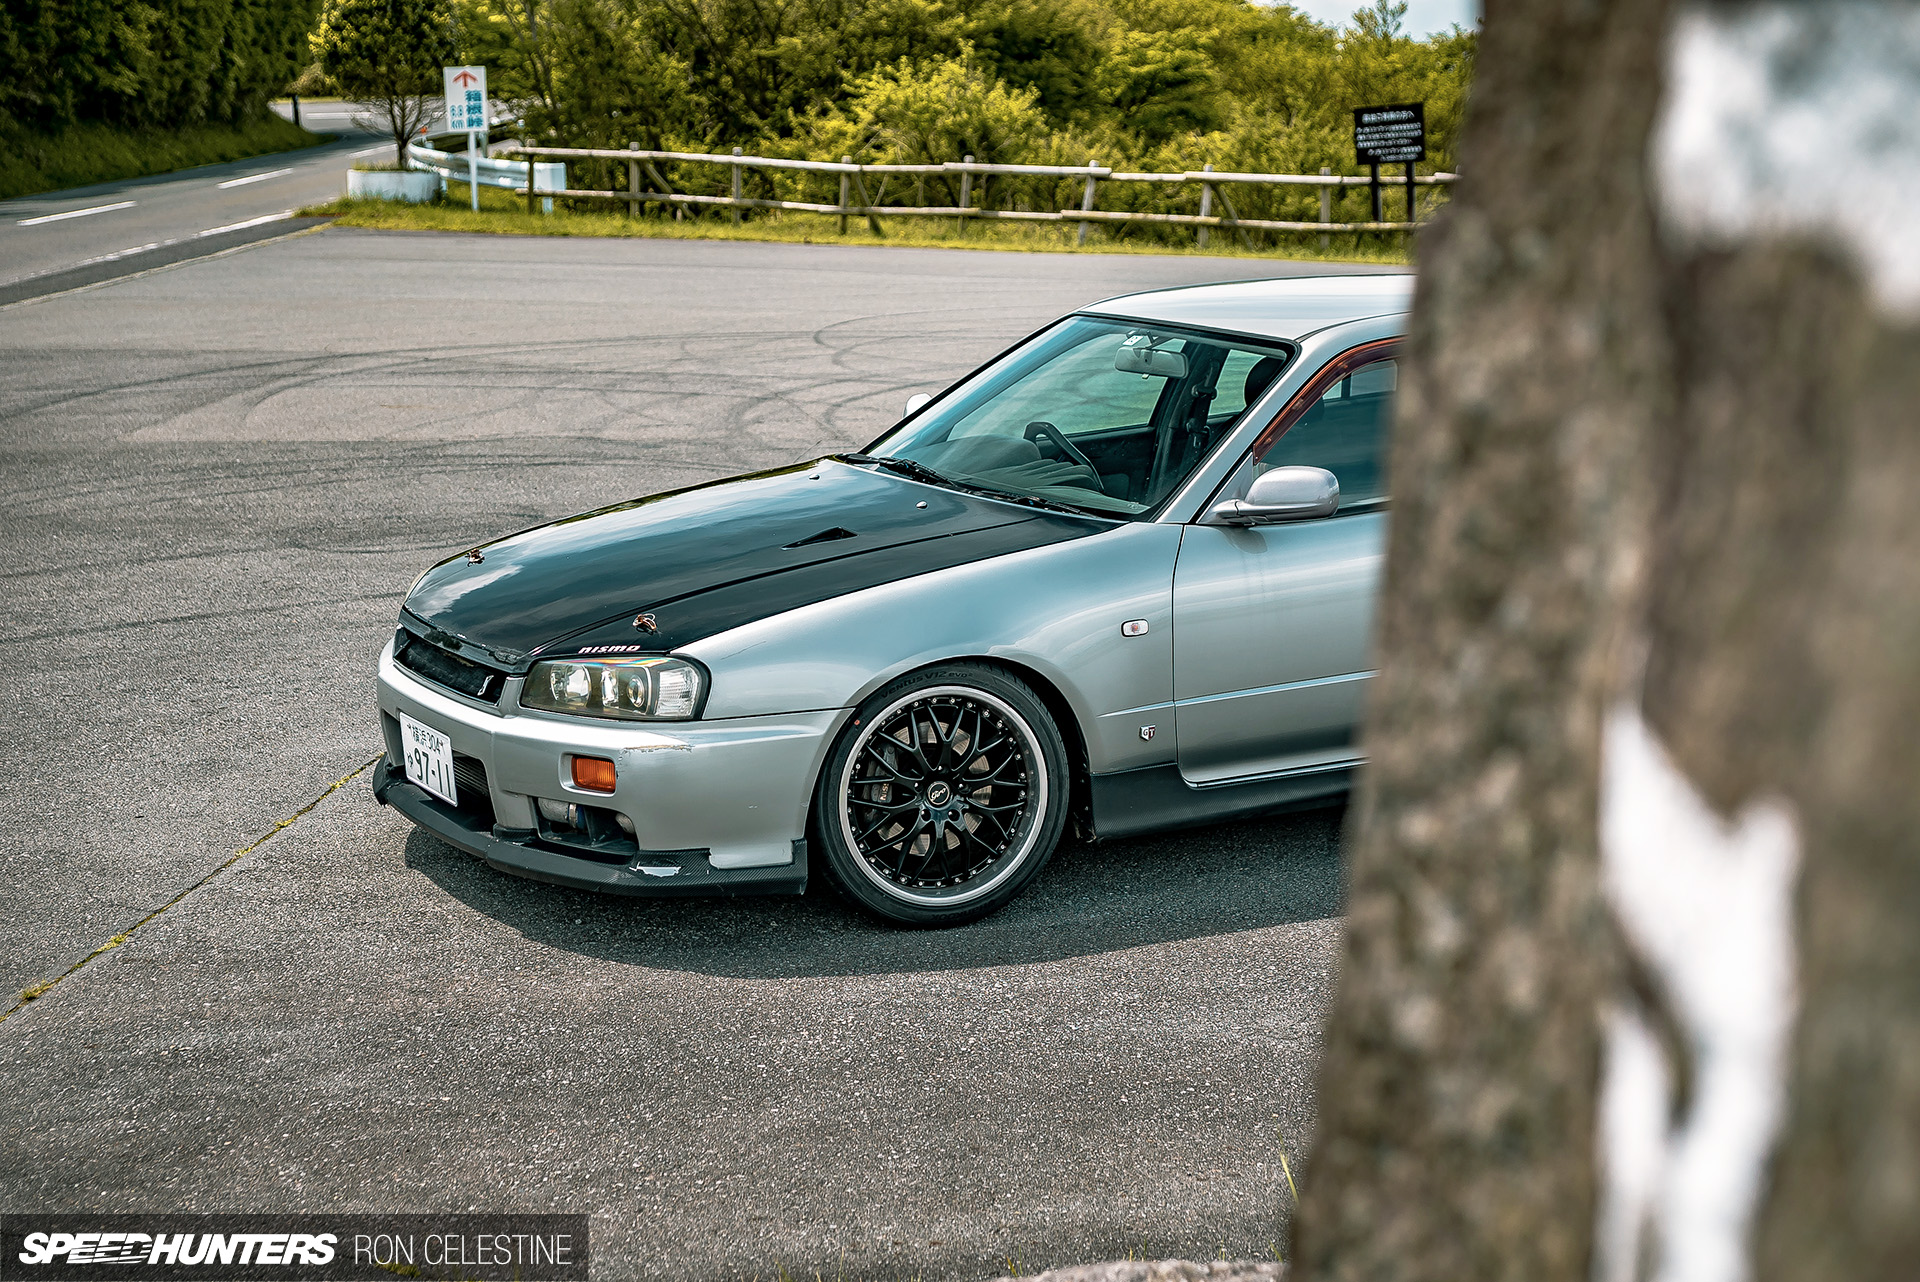
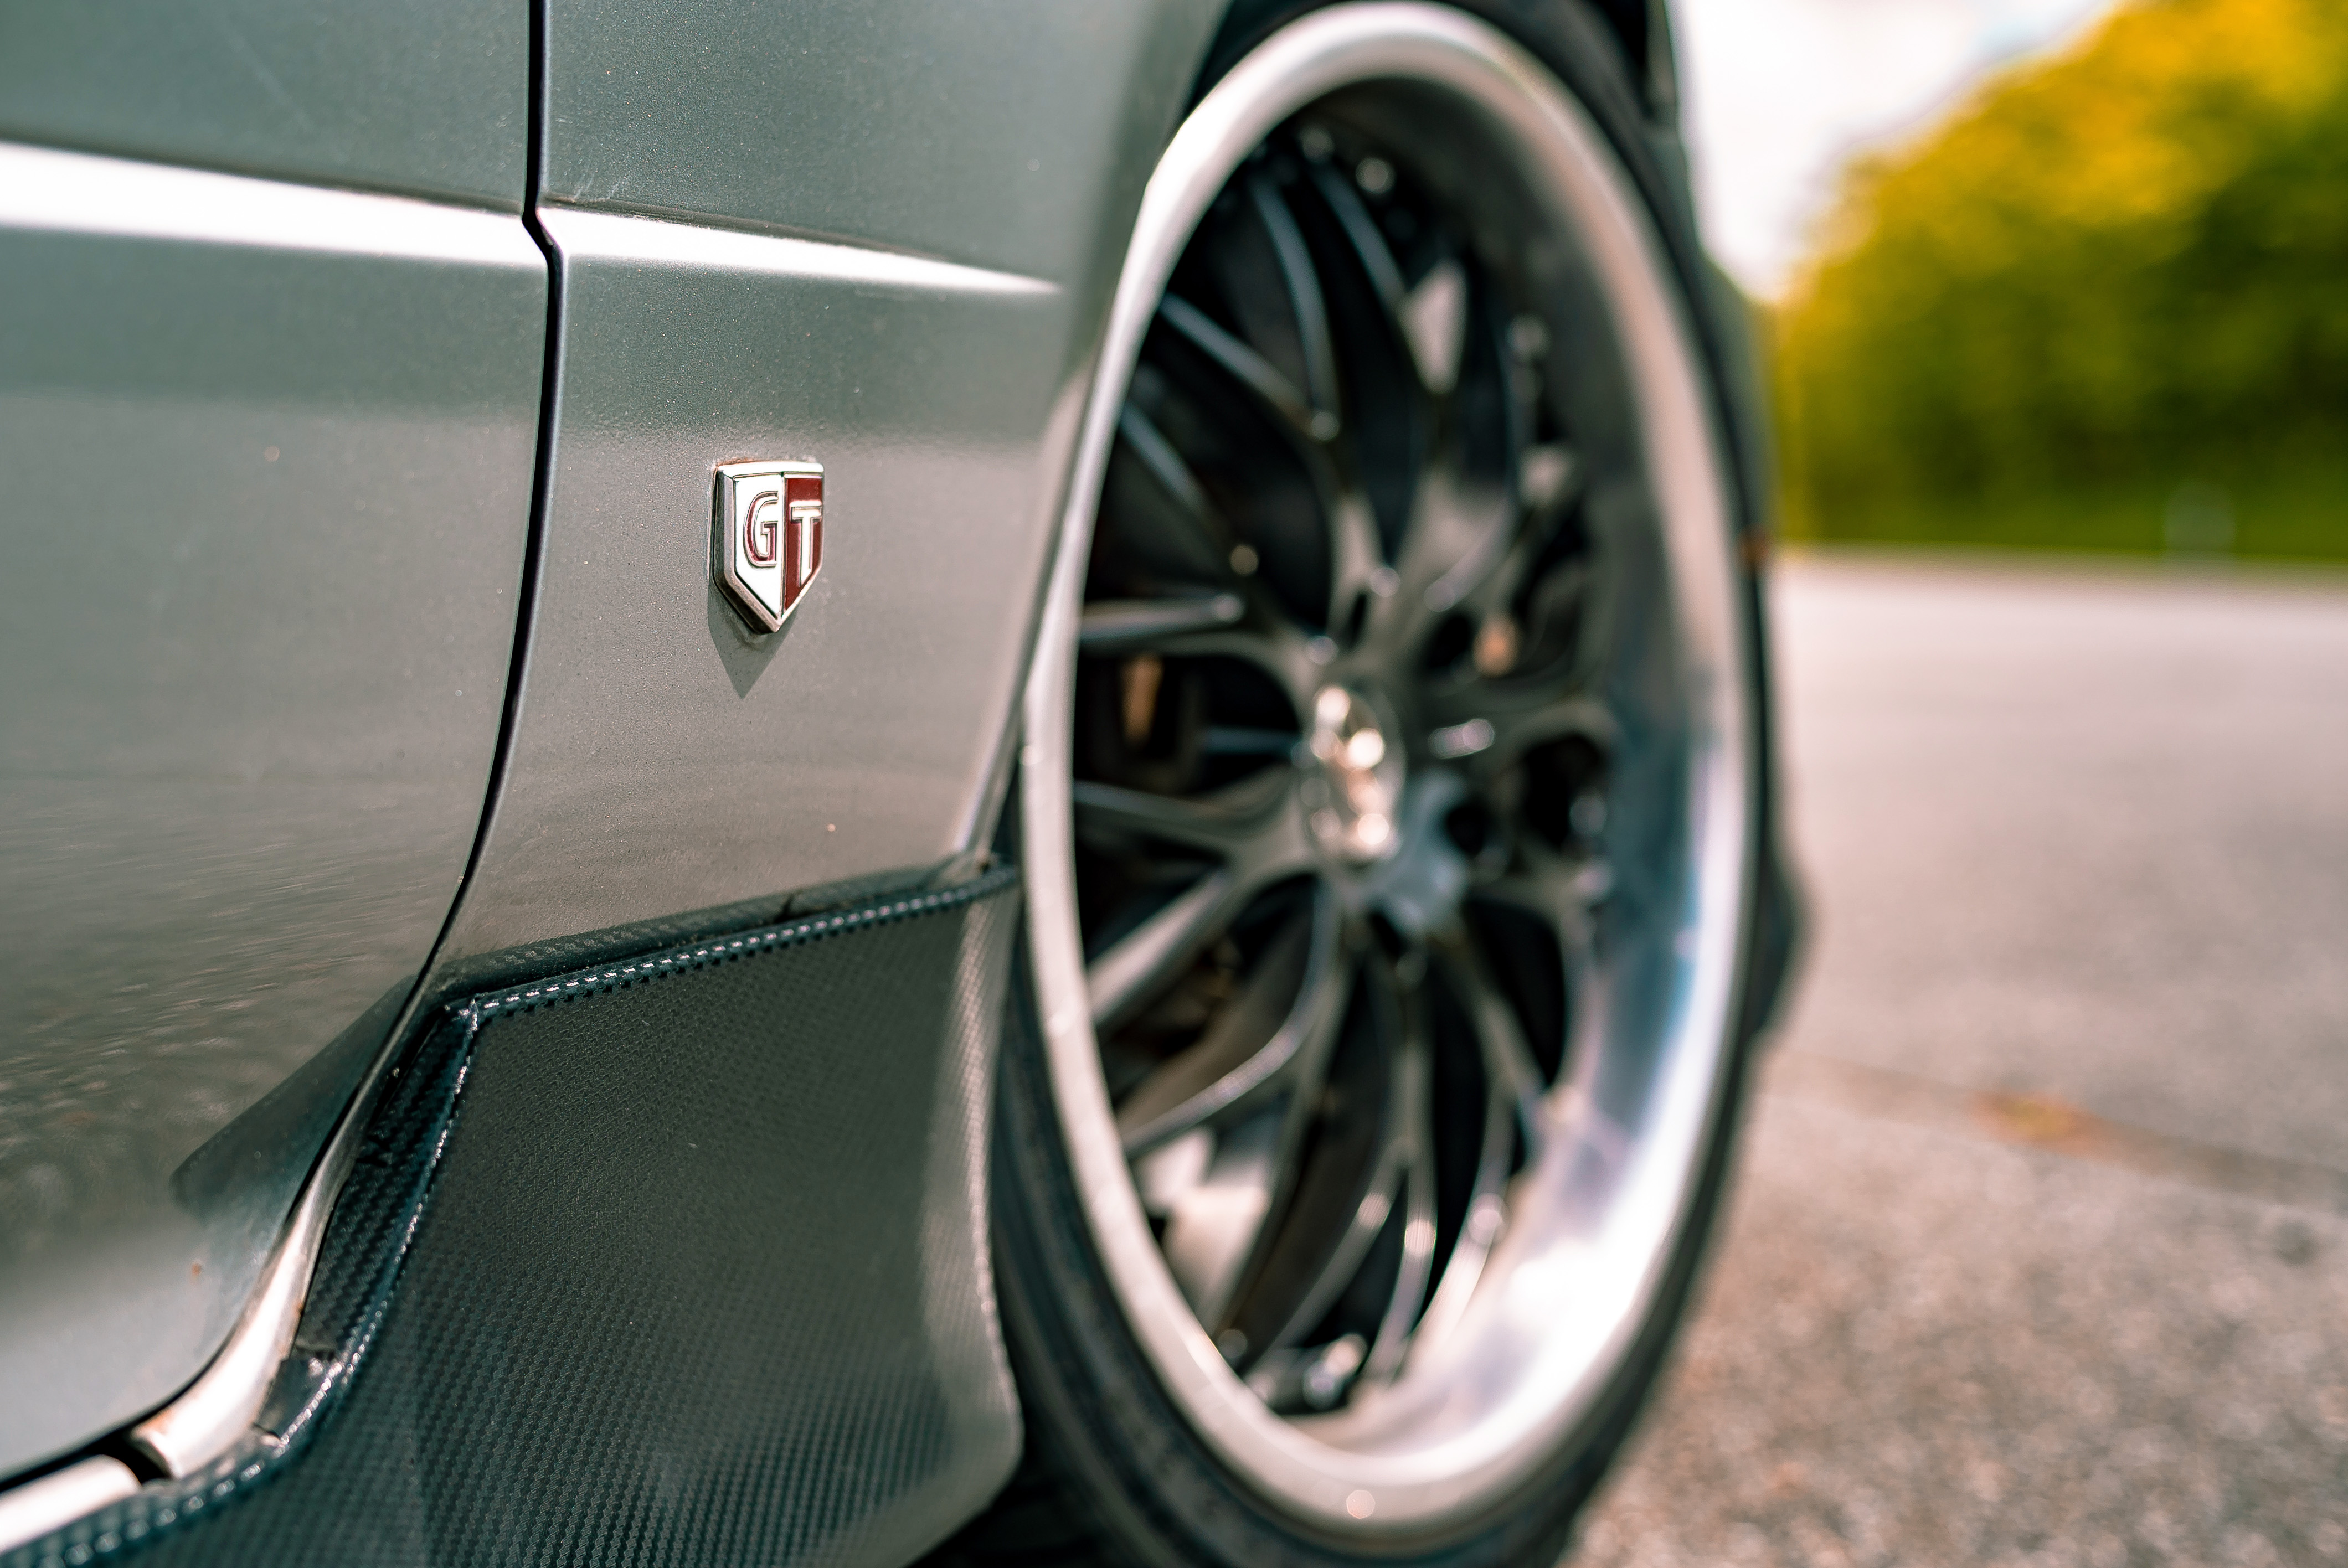
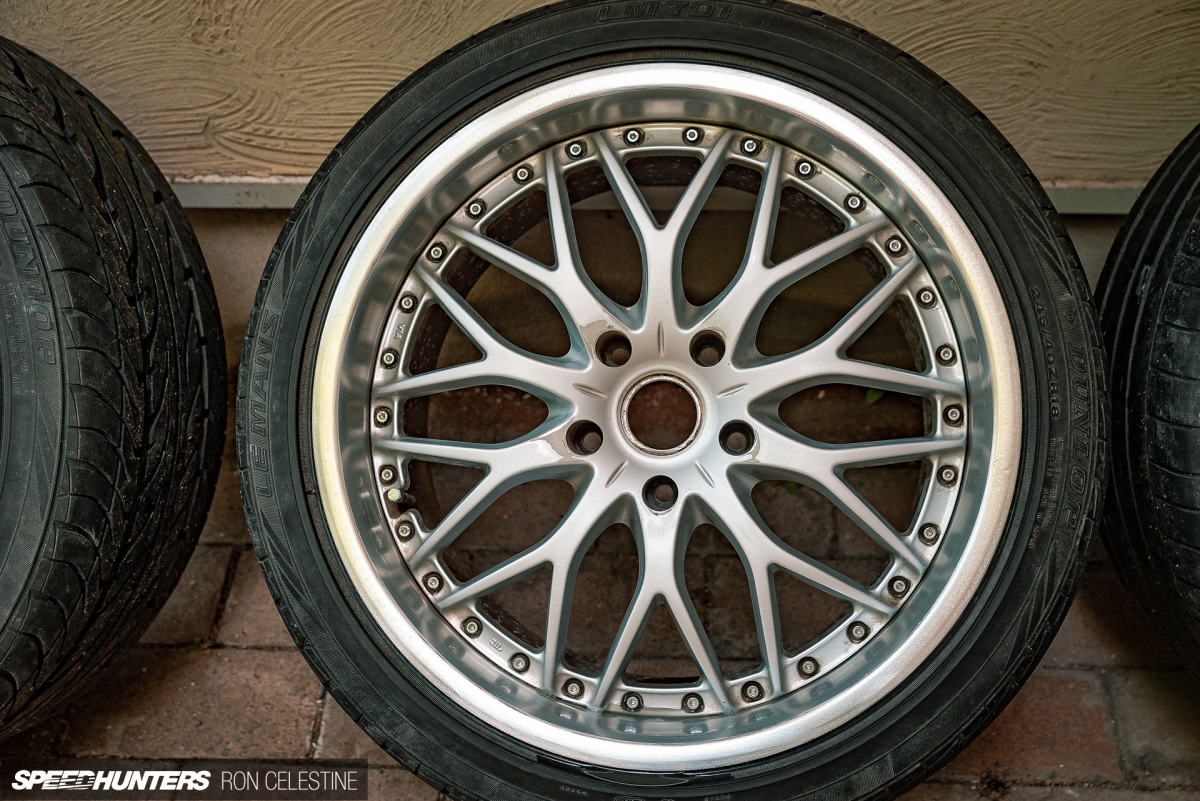
It was now time for paint. What I had in mind was keeping the lips and bolts polished, and then painting the spokes black. So I masked those areas off and got the paint cans ready.
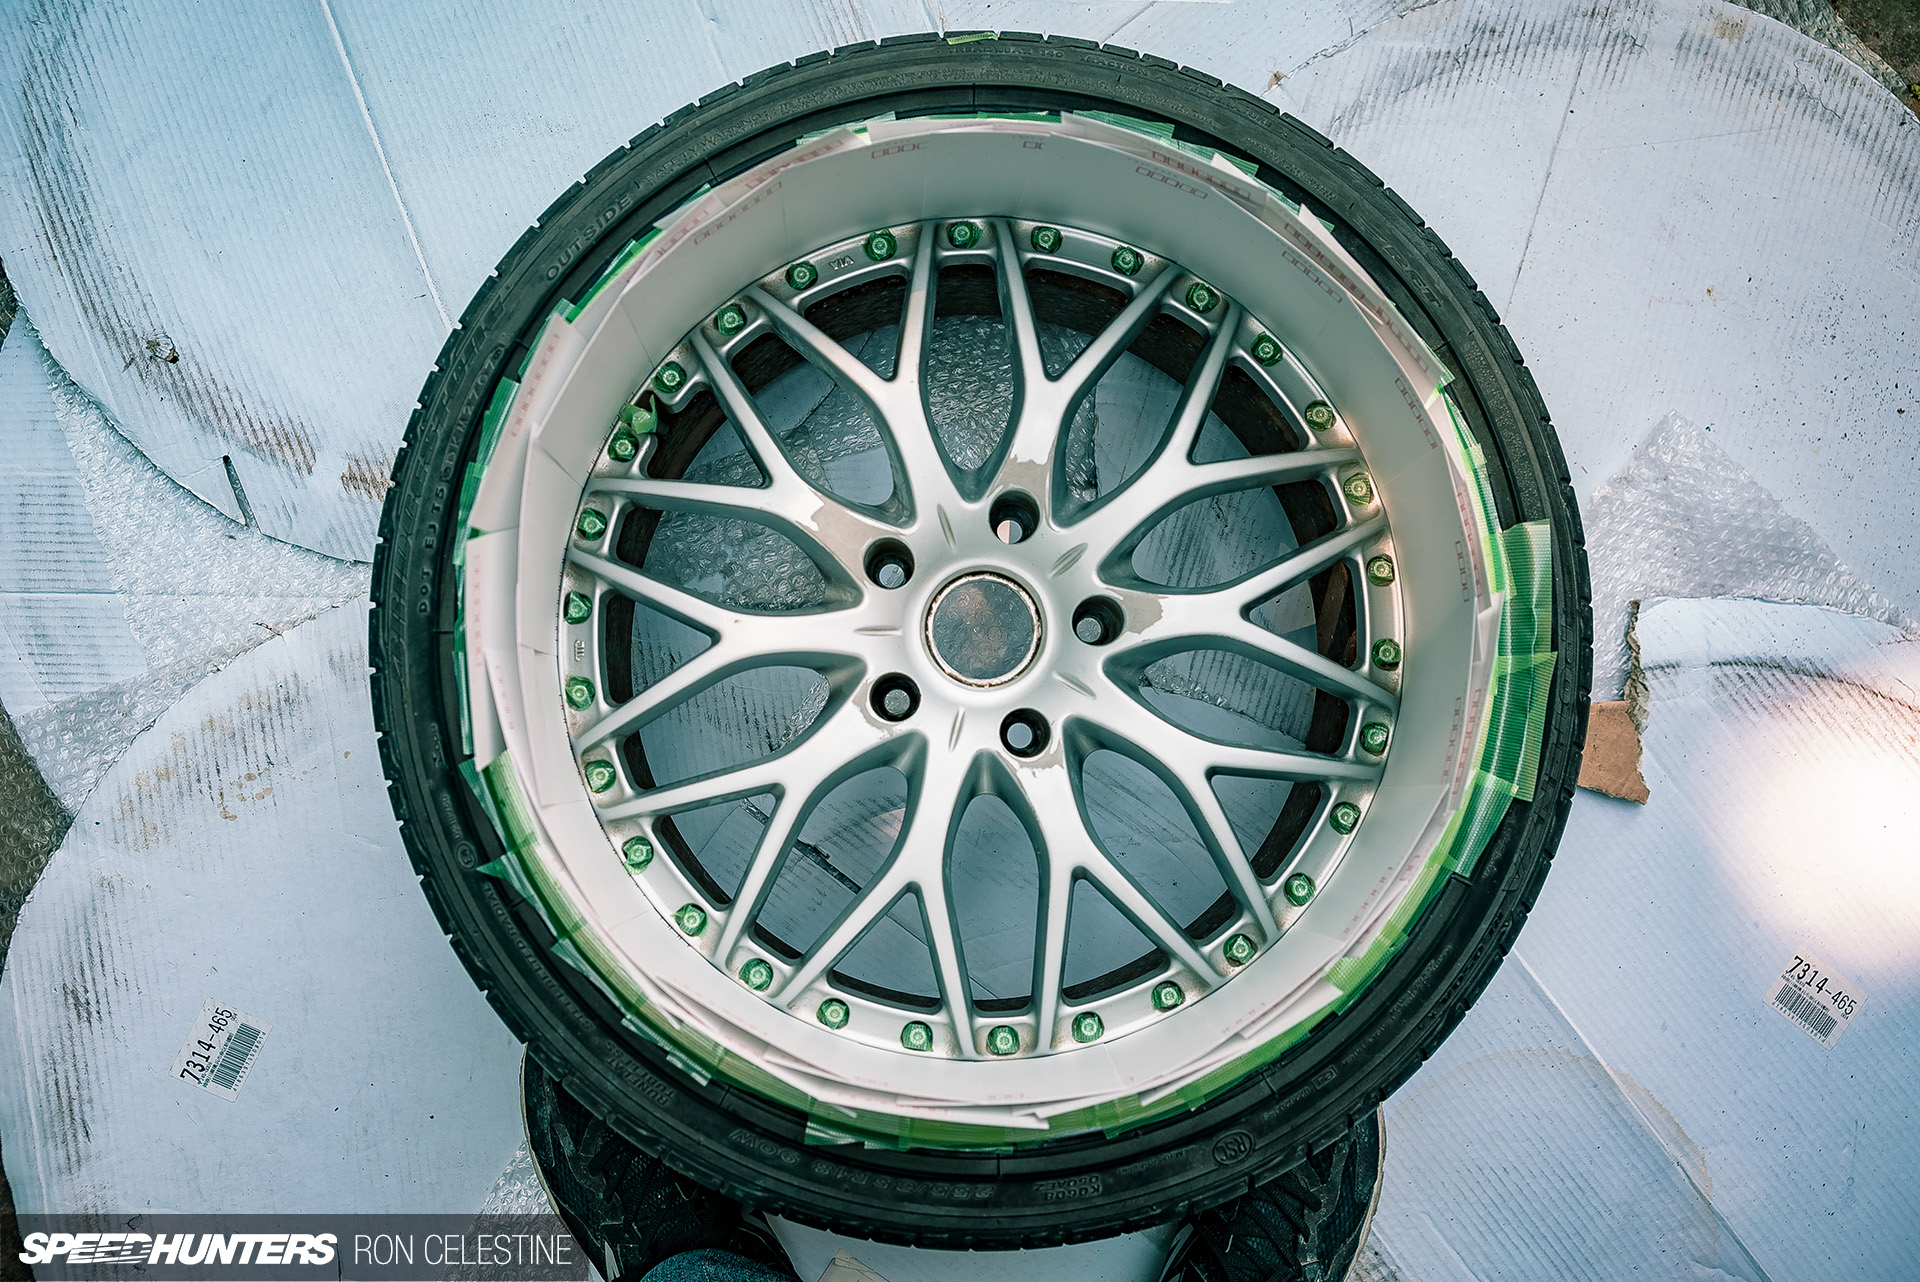
You’re probably wondering why the hell I just didn’t unbolt the faces from the barrels. Well, at this point I still didn’t know much about these wheels and I wasn’t 100% convinced that they were actually two-piece. I wanted a bit more information before I accidentally broke something trying to take the face apart.
So to err on the side of caution, I simply masked the bolts and got to work.
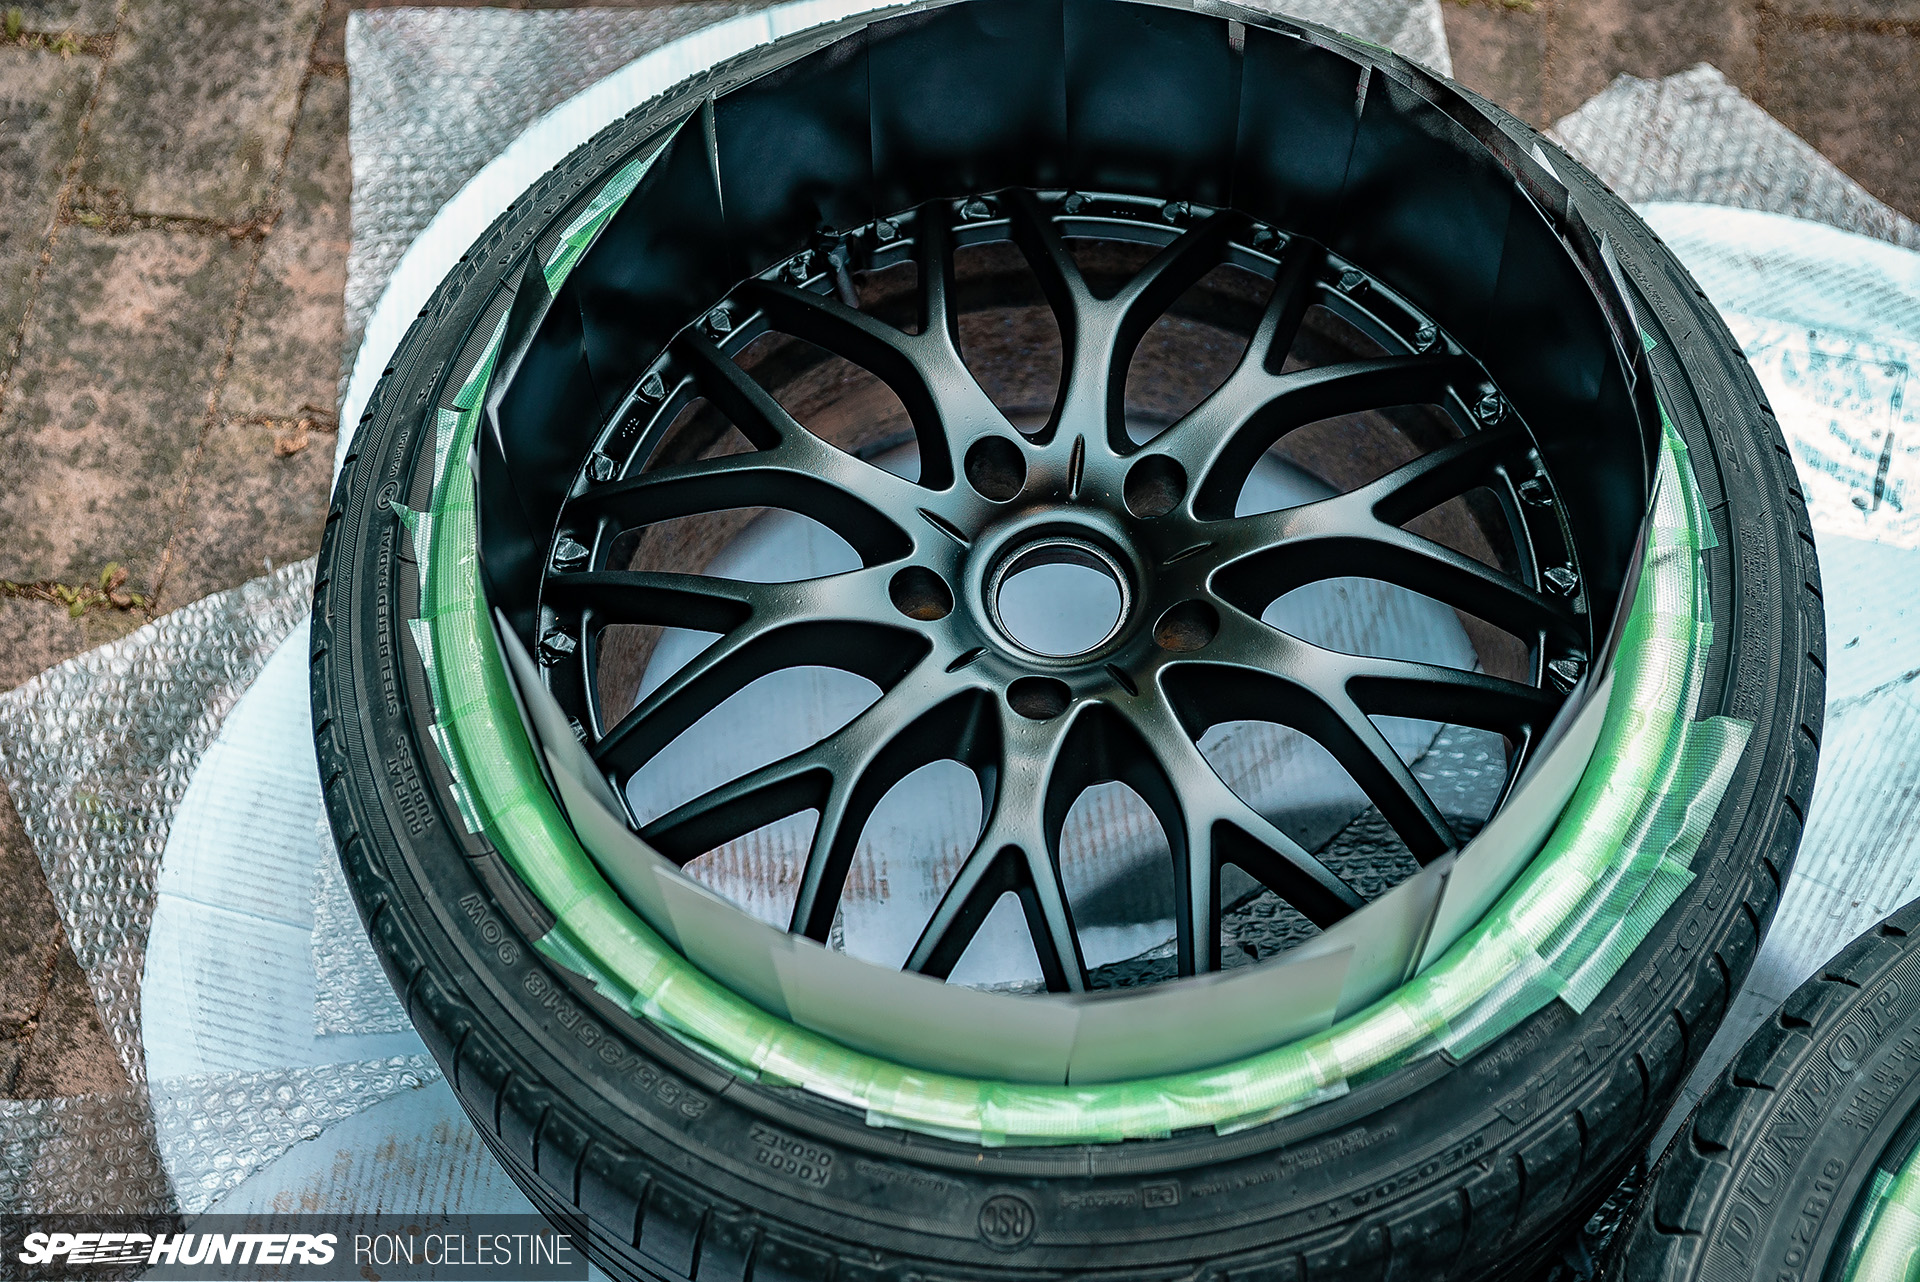
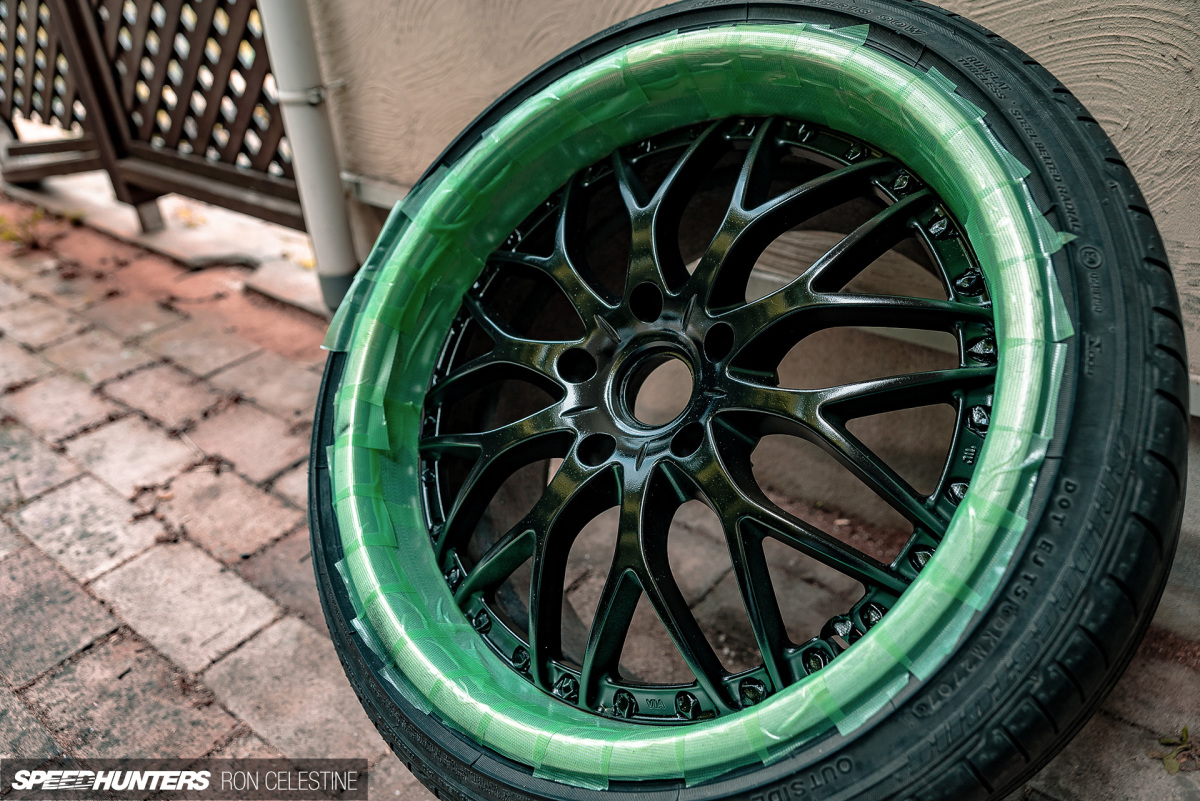
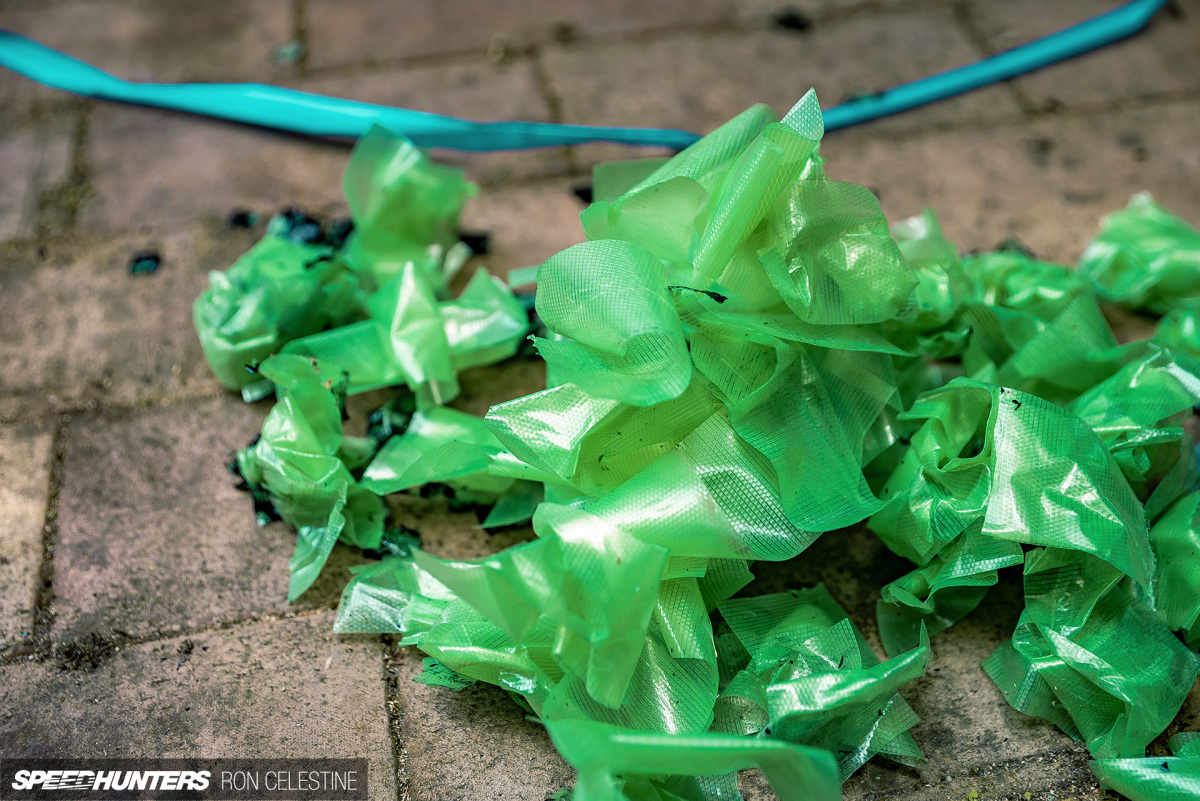

Let’s be clear – I’m no paint expert. All I did was take my time, put on some Kendrick Lamar to get synced up to some type of rhythm, and worked my way around the wheels in a circle trying to apply an even coat. I ended up applying five coats of black and three coats of clear.
Also, ignore some of the specks of dirt you see on the black; I live next to a jungle and at the time I took the pictures I didn’t realize they were already dirty.

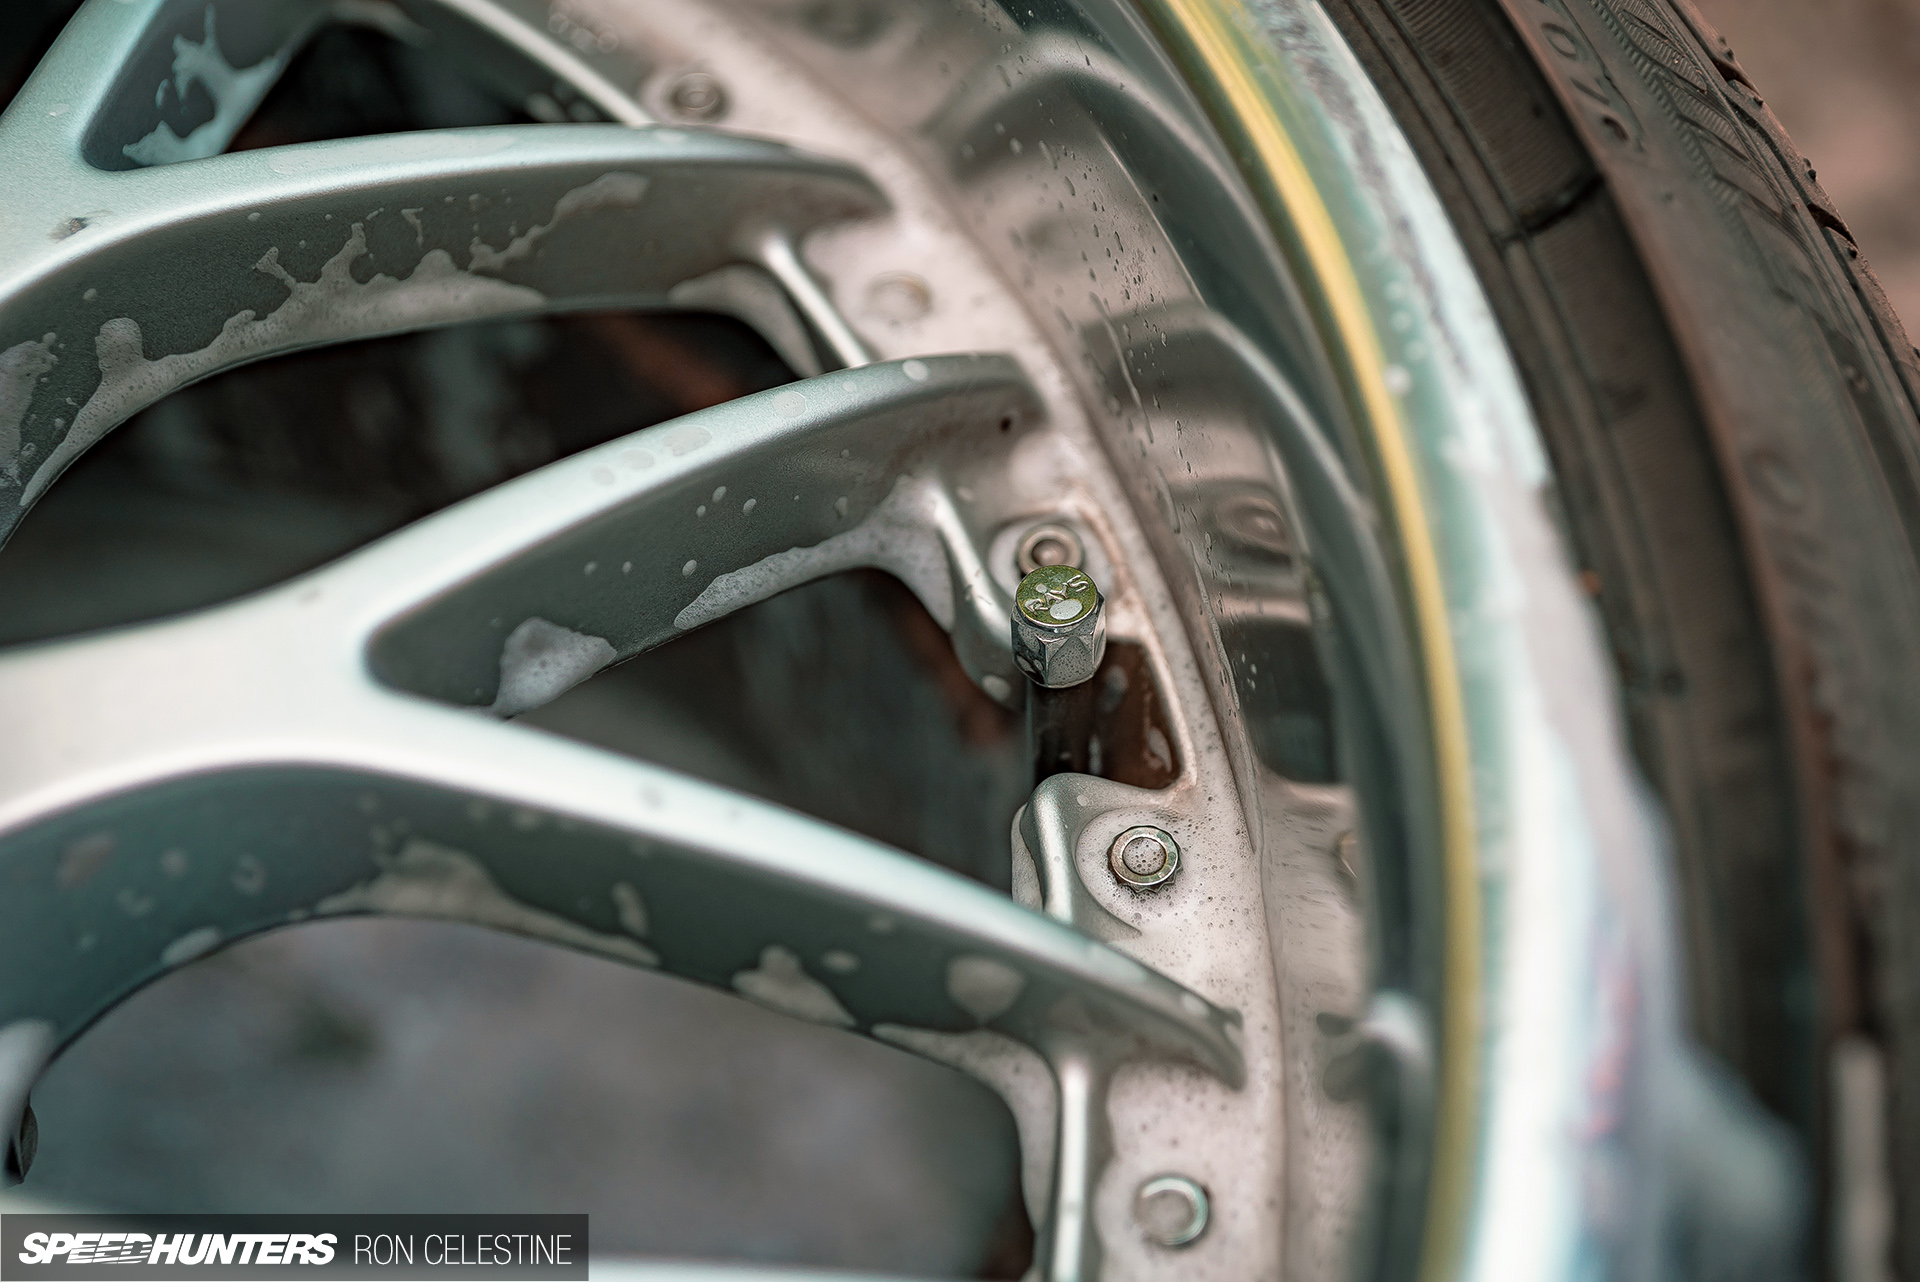
While painting, the new set of rubber was delivered. I’ve heard nothing but good things from friends about Hankook’s Ventus V12 evo2 for street and occasional track use. Getting as close as possible to a square fitment, I went with 255/35s up front and 265/35s out back.
Murphy’s Law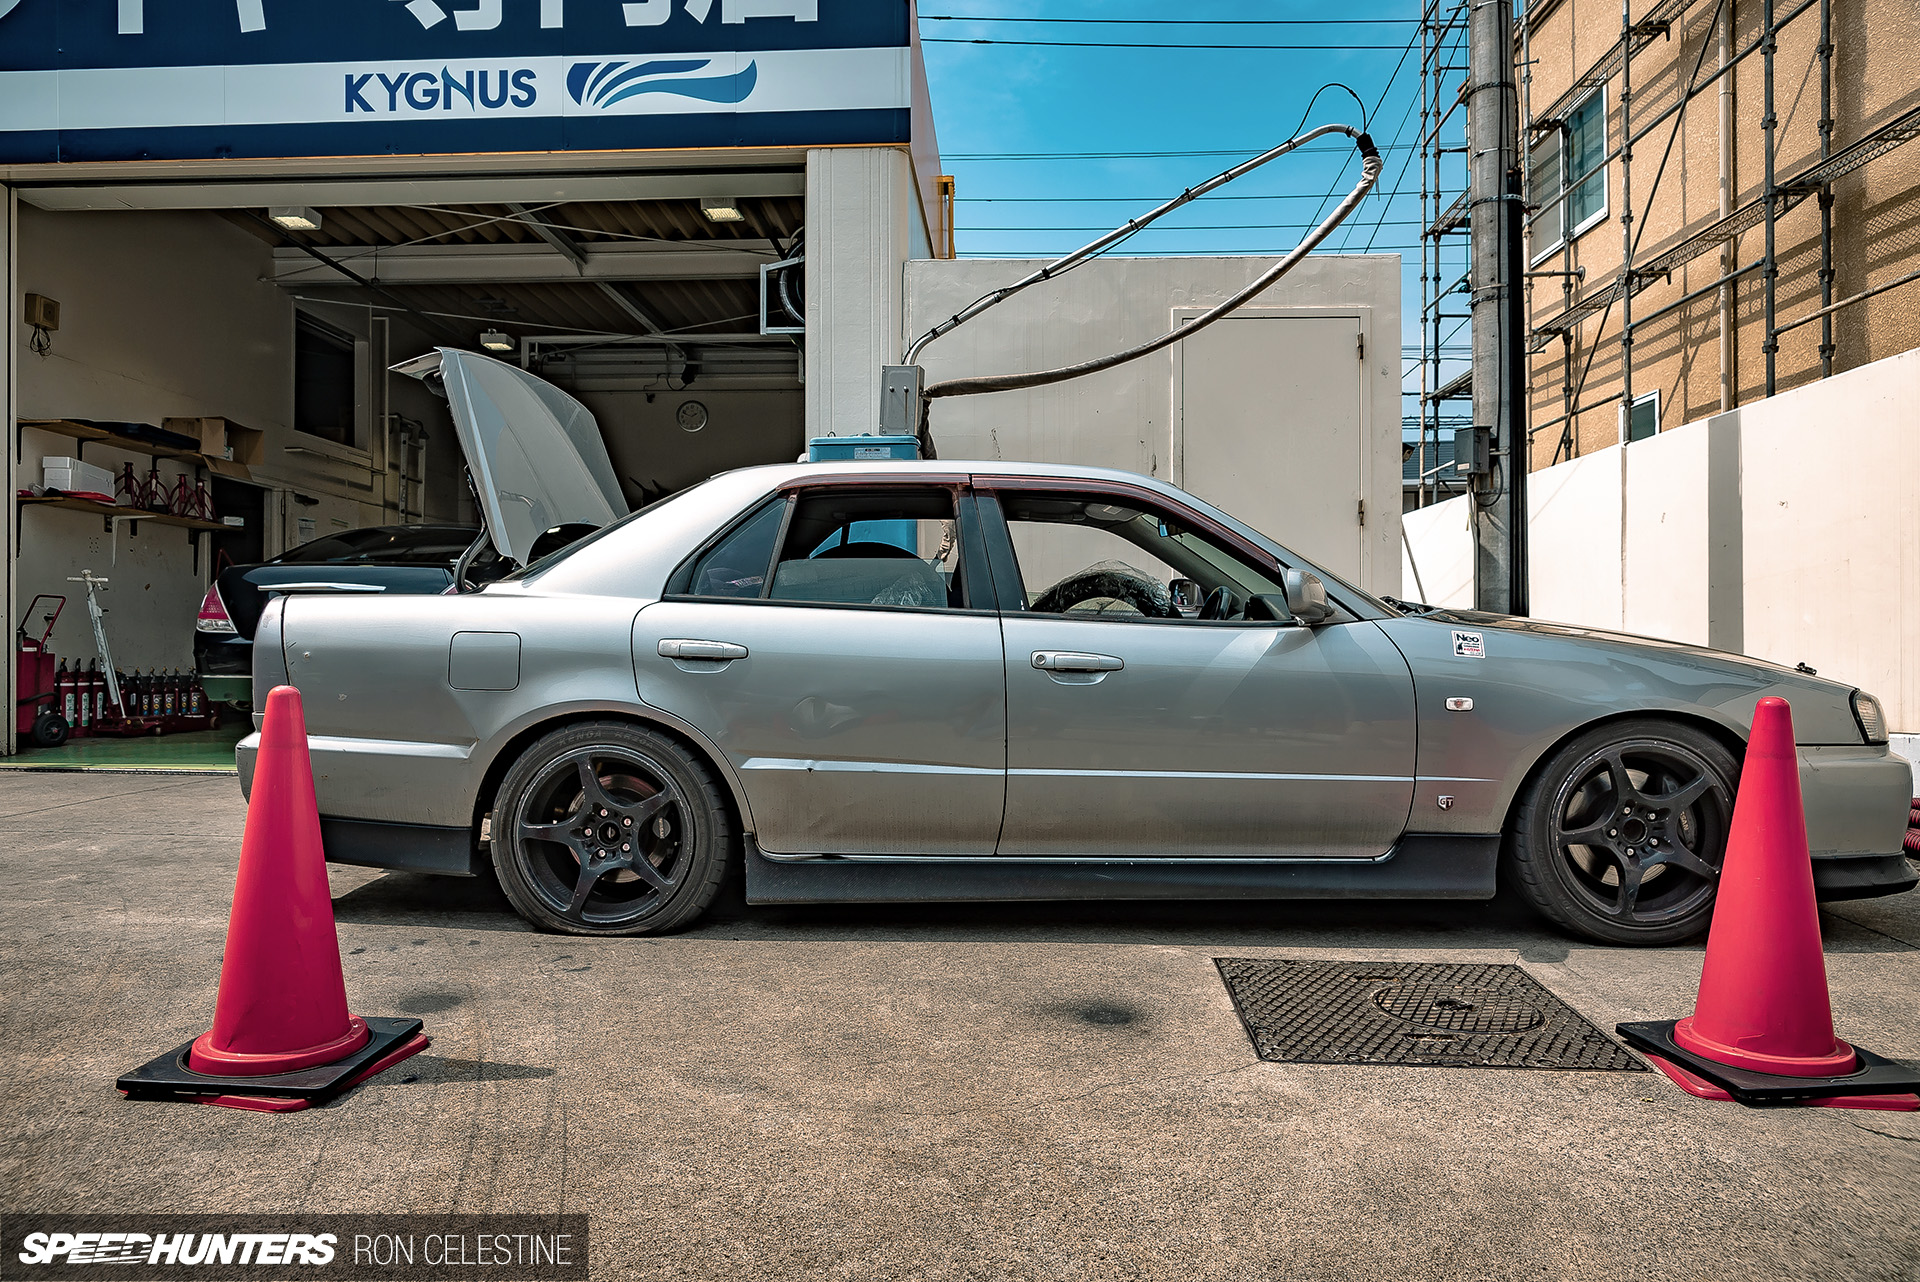
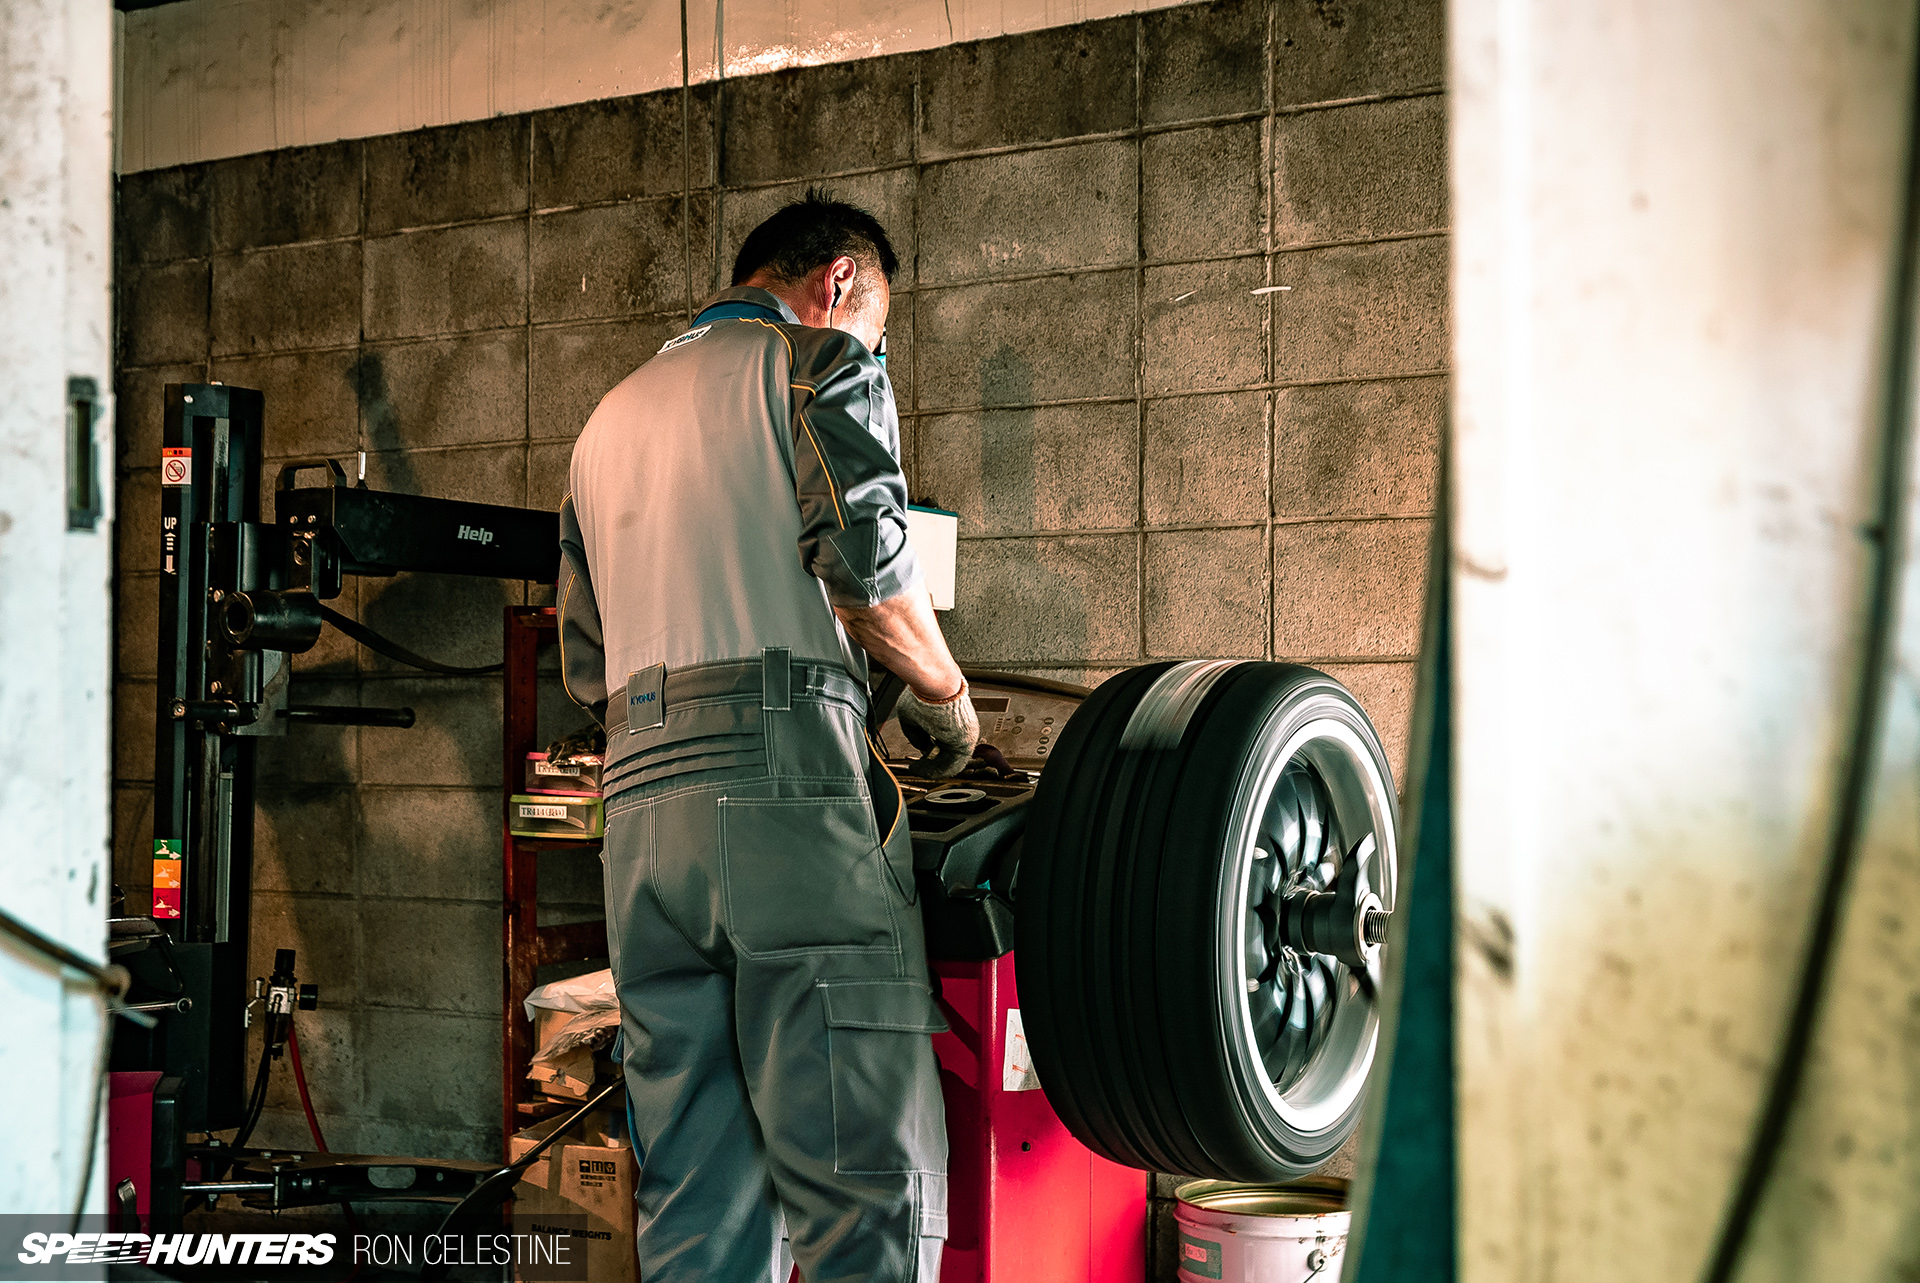
With all wheels and tires loaded up in Project Rough, I gently limped to the nearest service station to have the new Hankook rubber fitted to the Arthur Exchange wheels.
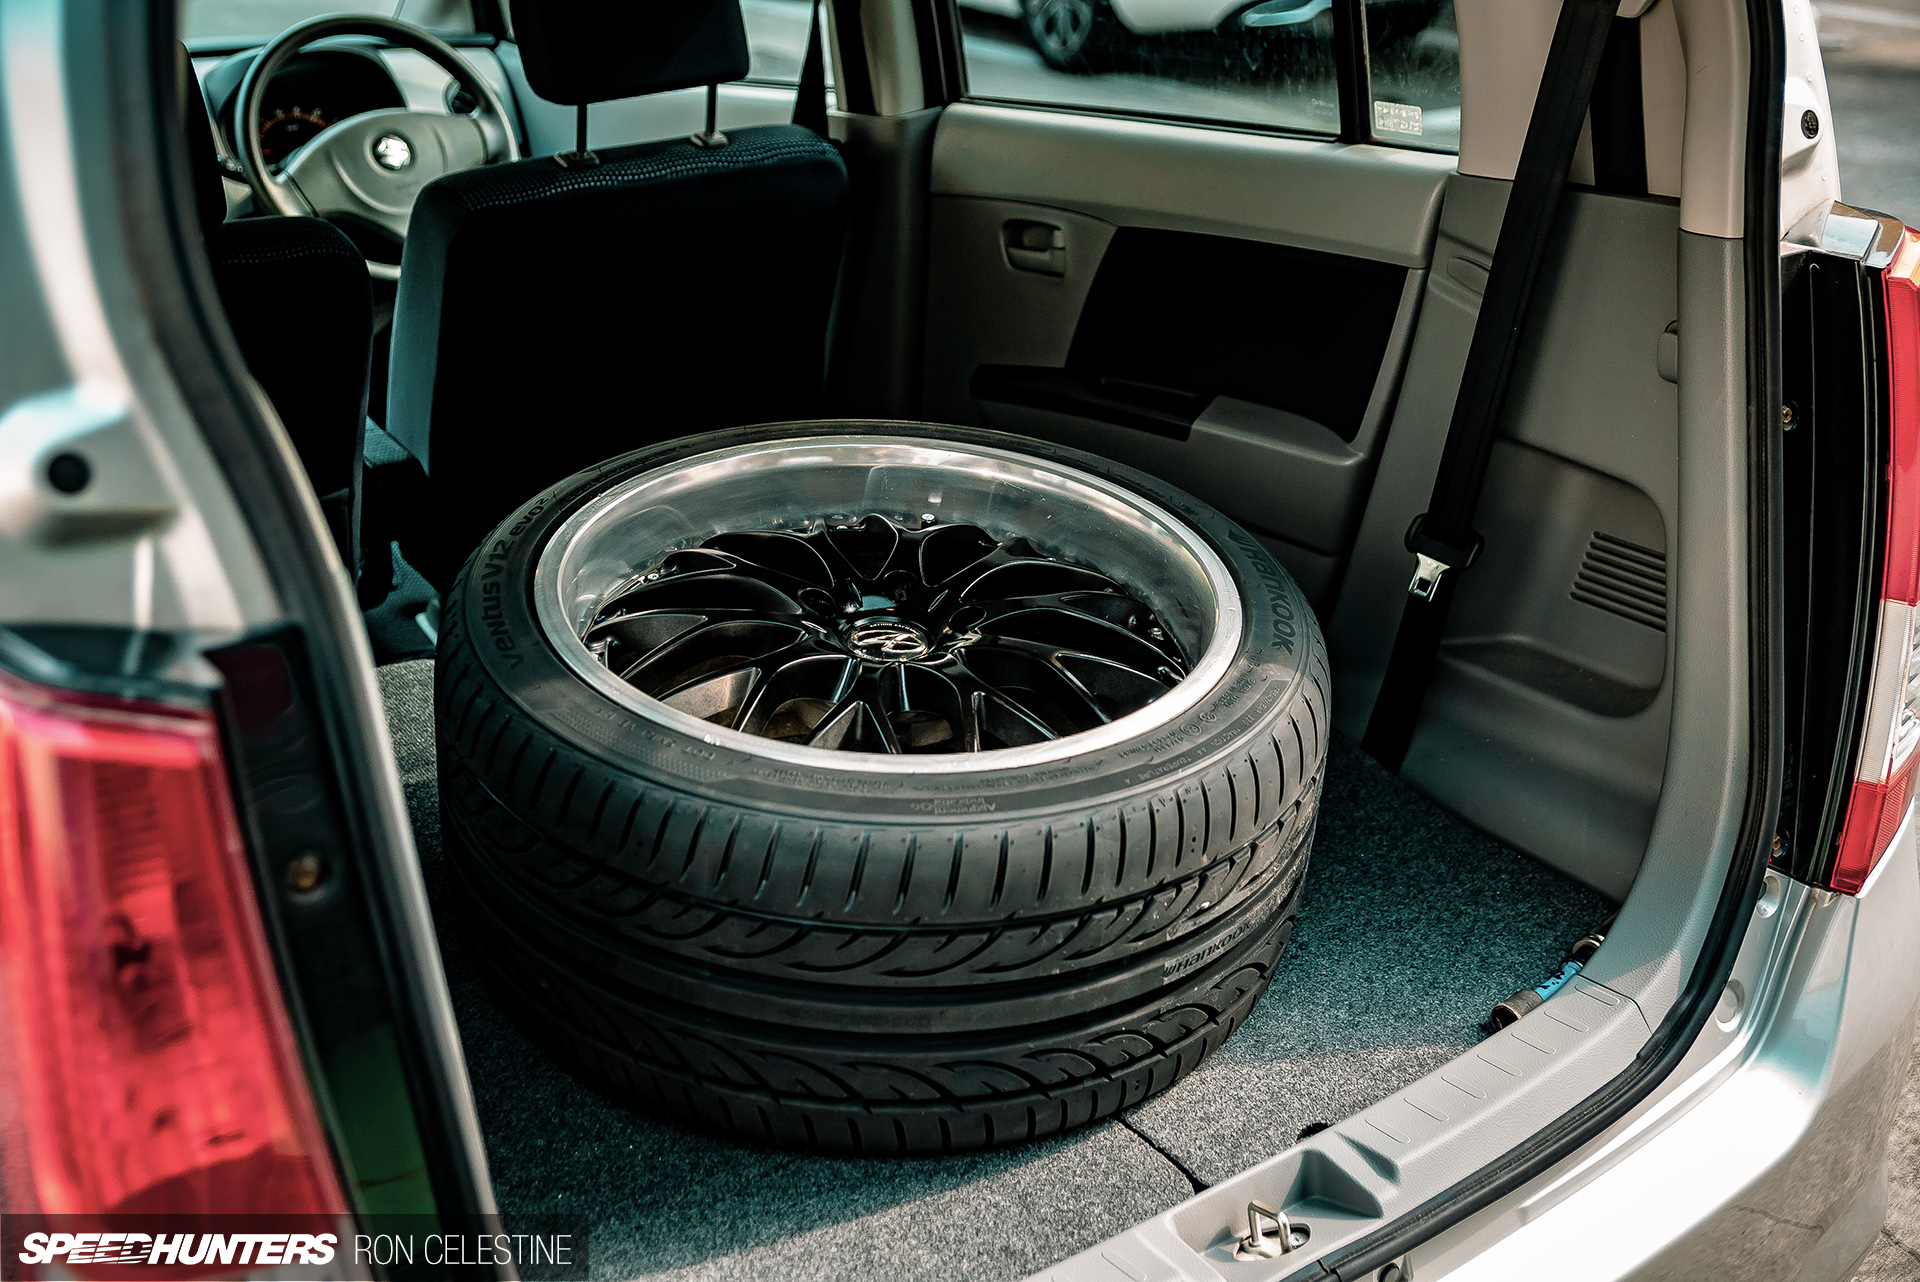
The spare tire that came in Project Rough was also flat, so that made for a rather interesting 1km drive. At least the flat tire was also on the damaged wheel so I wasn’t too worried about it.
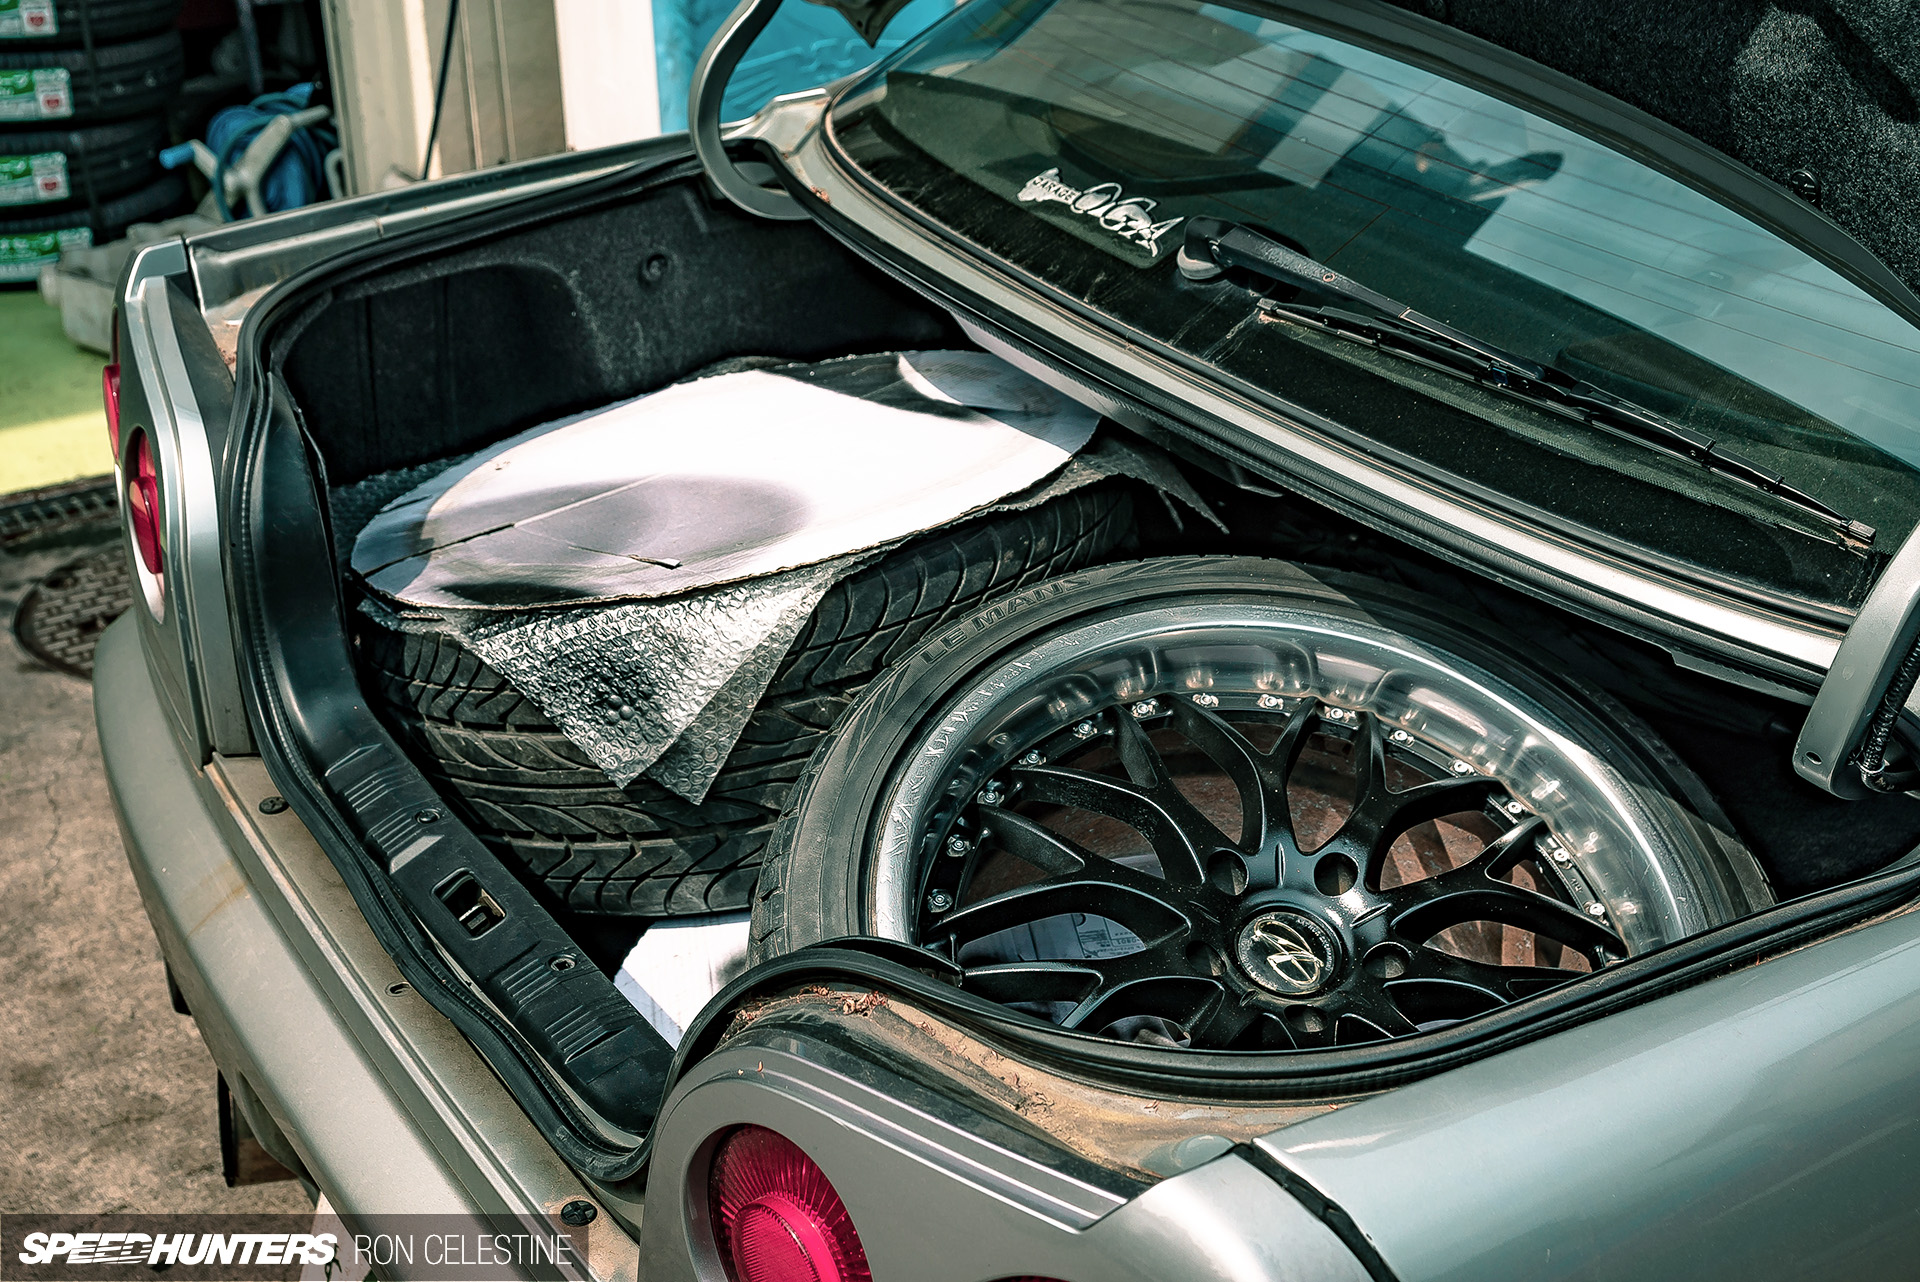
If you were ever wondering, the ER34 has a ridiculously big boot – three wheels were able to fit with ease.
If you are unfamiliar with Murphy’s Law, it states that anything that can go wrong will go wrong. Until this point, things were going rather smoothly – a bit too smoothly.
I planned almost everything out and in theory it should have gone off without a hitch, and I didn’t have any real major hiccups along the way.
Yes, I ran out of paint and needed to sand a lot more than expected, but that is nothing that I would consider a problem.
It was at this point I was told we had a problem. The lug nuts that were used on my old Volks would fit the holes of the Arthur Exchange wheels, but since they were of an older generation, a 17mm socket wouldn’t fit.
A 16mm socket would fit, but the lug nuts were design for 17mm socket, which meant that we were pretty much screwed. Shit.

That’s when one of the staff members (who happens to be a car otaku) offered to drive me around in their loaner car to a few shops to search for the correct lug nuts. After two failed attempts at the nearby car shops, he made a call to an Up Garage a little outside of town to see if they had the correct lug nuts.
“OK!” he said with a smile, “they have them there so let’s go pick them up.” I’m sure the massive hug I gave caught him off guard, but I couldn’t help myself.
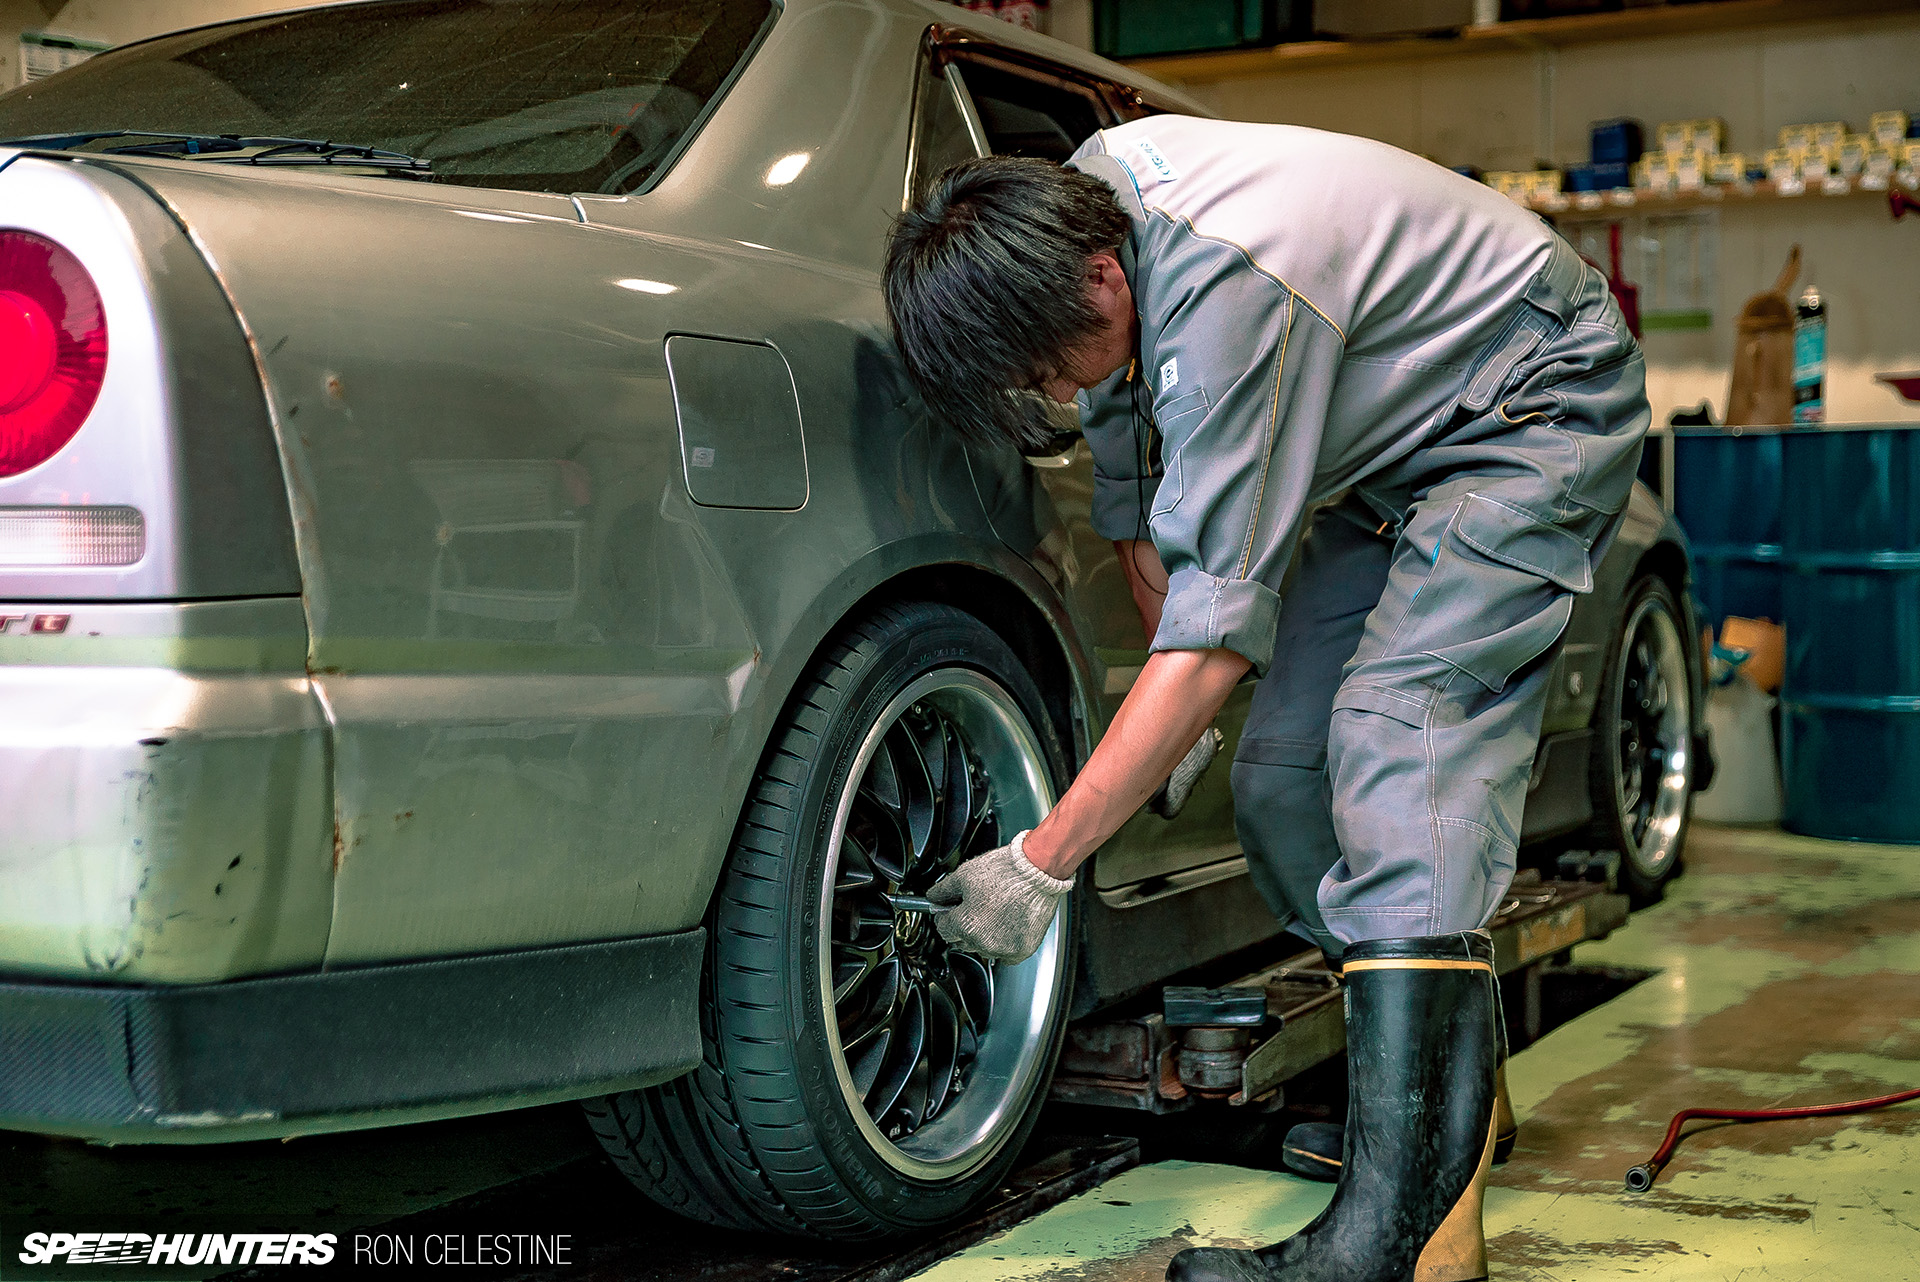
With the new lug nuts in place, he mounted the tires on and I was on my way. Thank you again (本当にありがとうございます!).
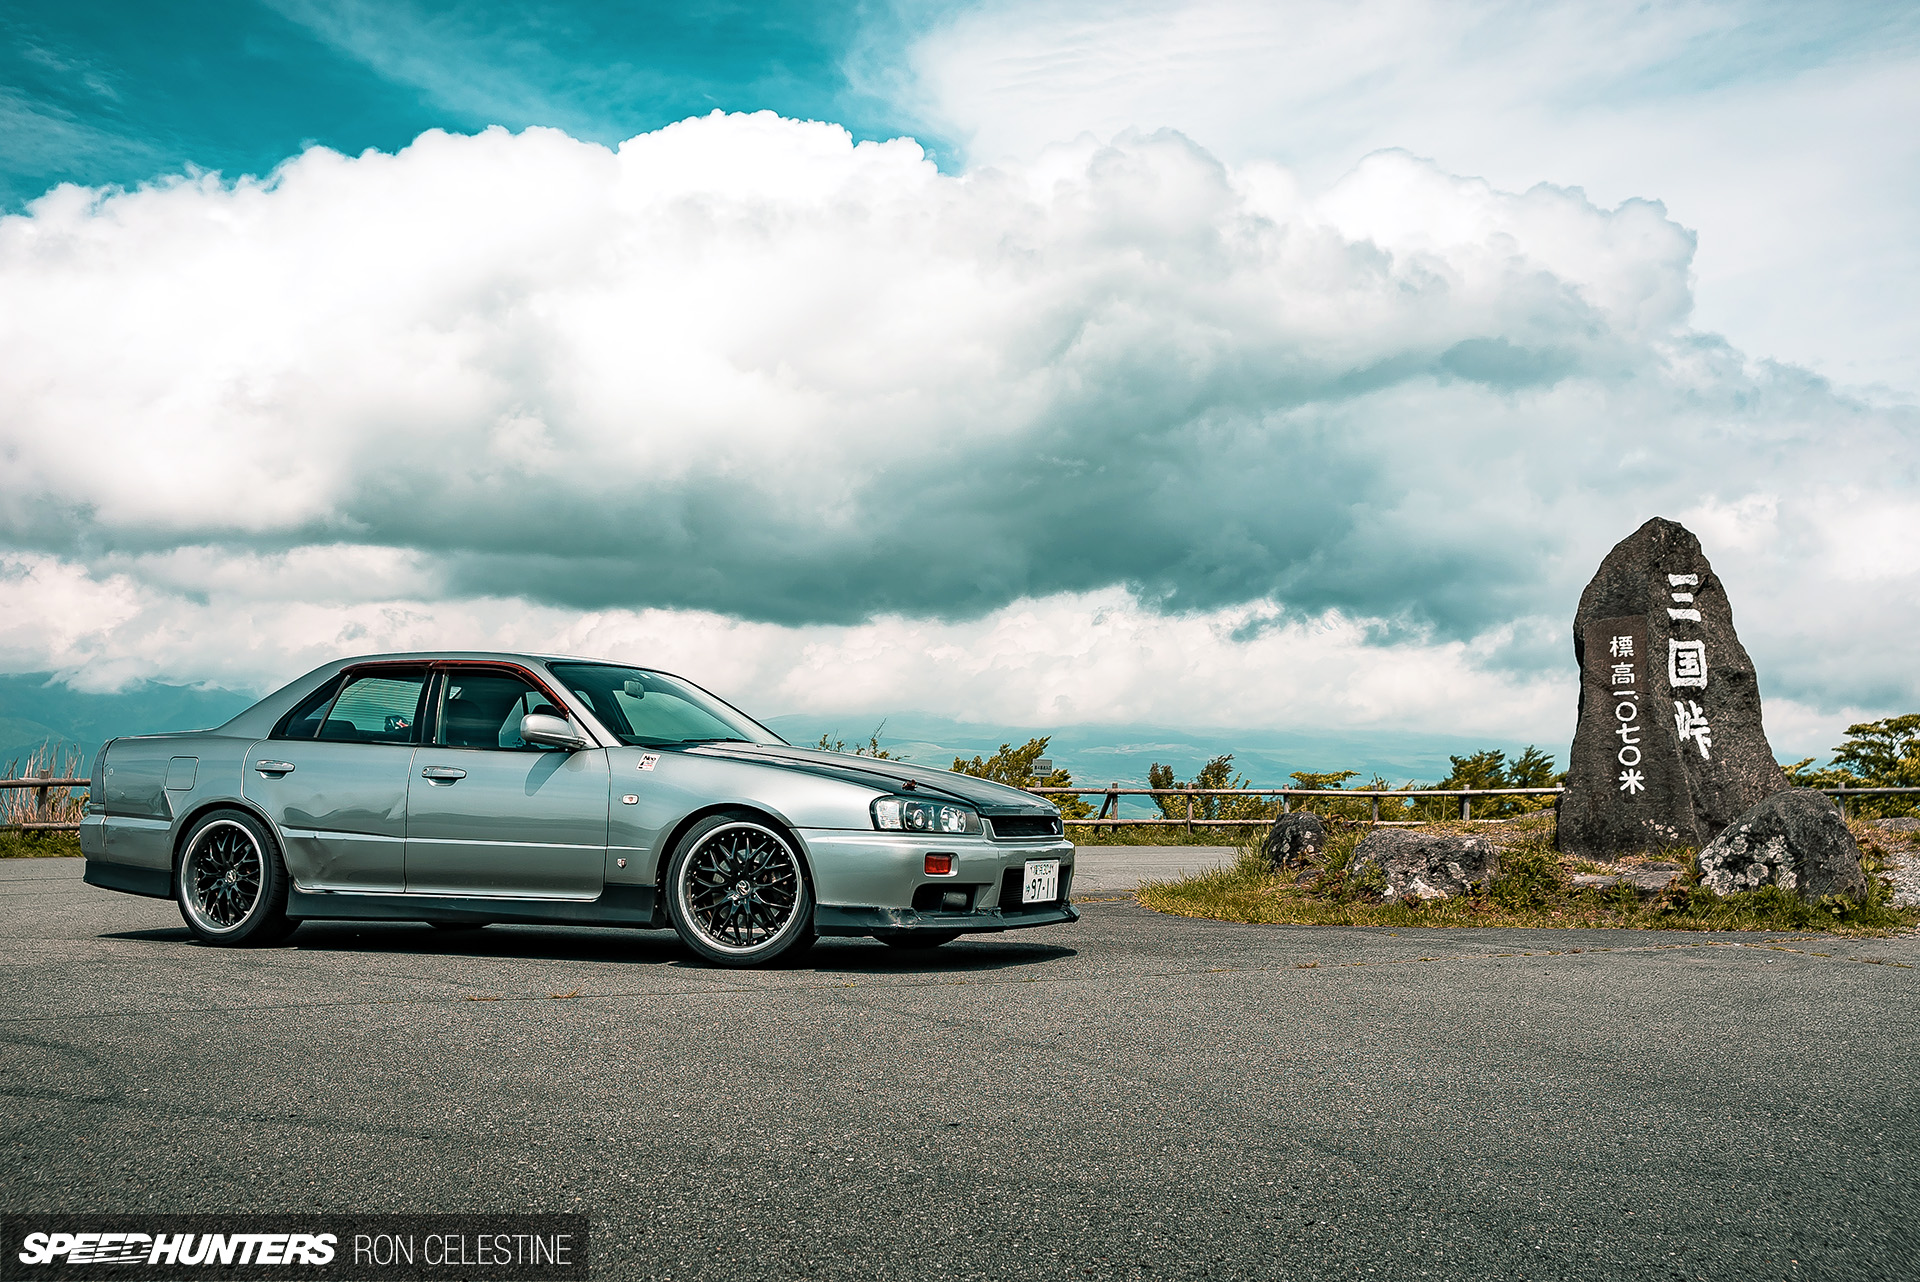
The next weekend I took Project Rough to Hakone to see how everything performed. I mean, what better place to get some new beauty shots and enjoy a nice drive.
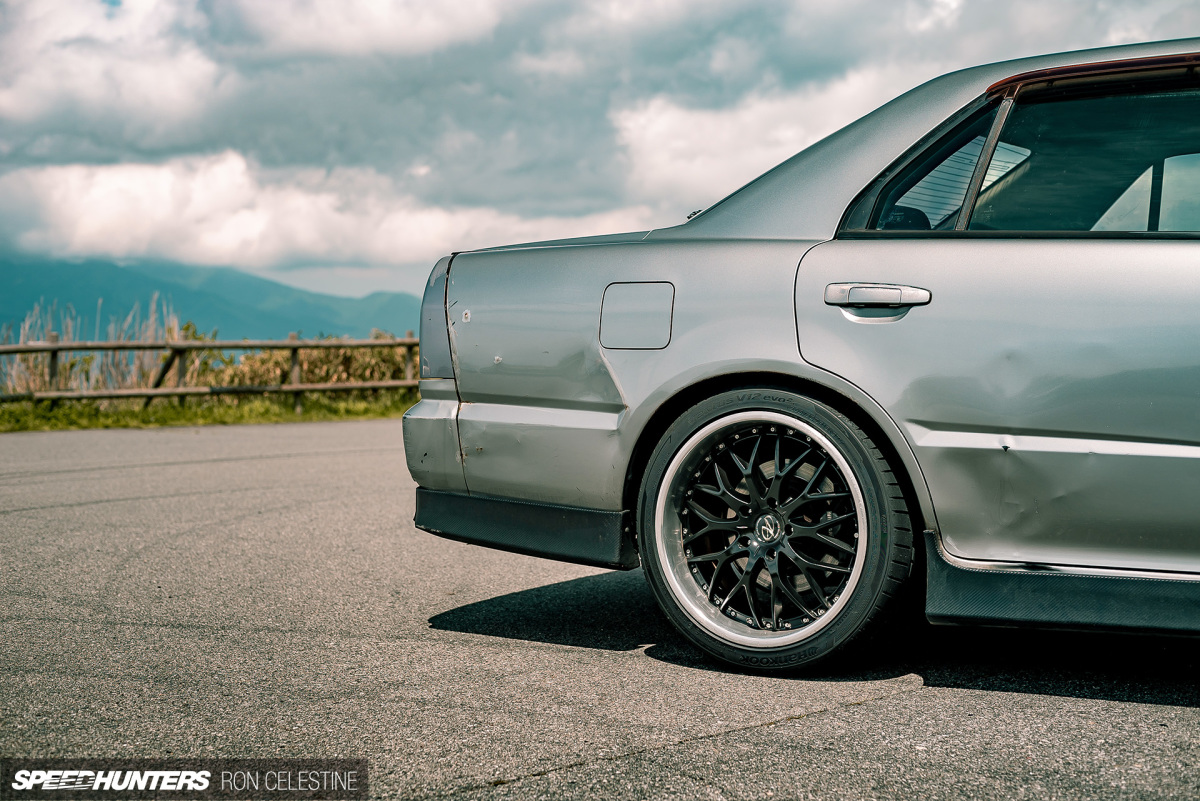
Honestly, everything turned out far better than I expected. The overall look of Project Rough has really been transformed and the newfound grip means the car feels faster than it did previously. First gear at full noise will still chirp the tires, but only ever so slightly. Second gear now hurls the car forward without any fuss and allows for me to get on the throttle mid corner.
The experience is radically different and one I will need a bit more seat time to fully get use to. Regardless, truly having 400-ish usable horsepower for grip is a rather lovely thing.
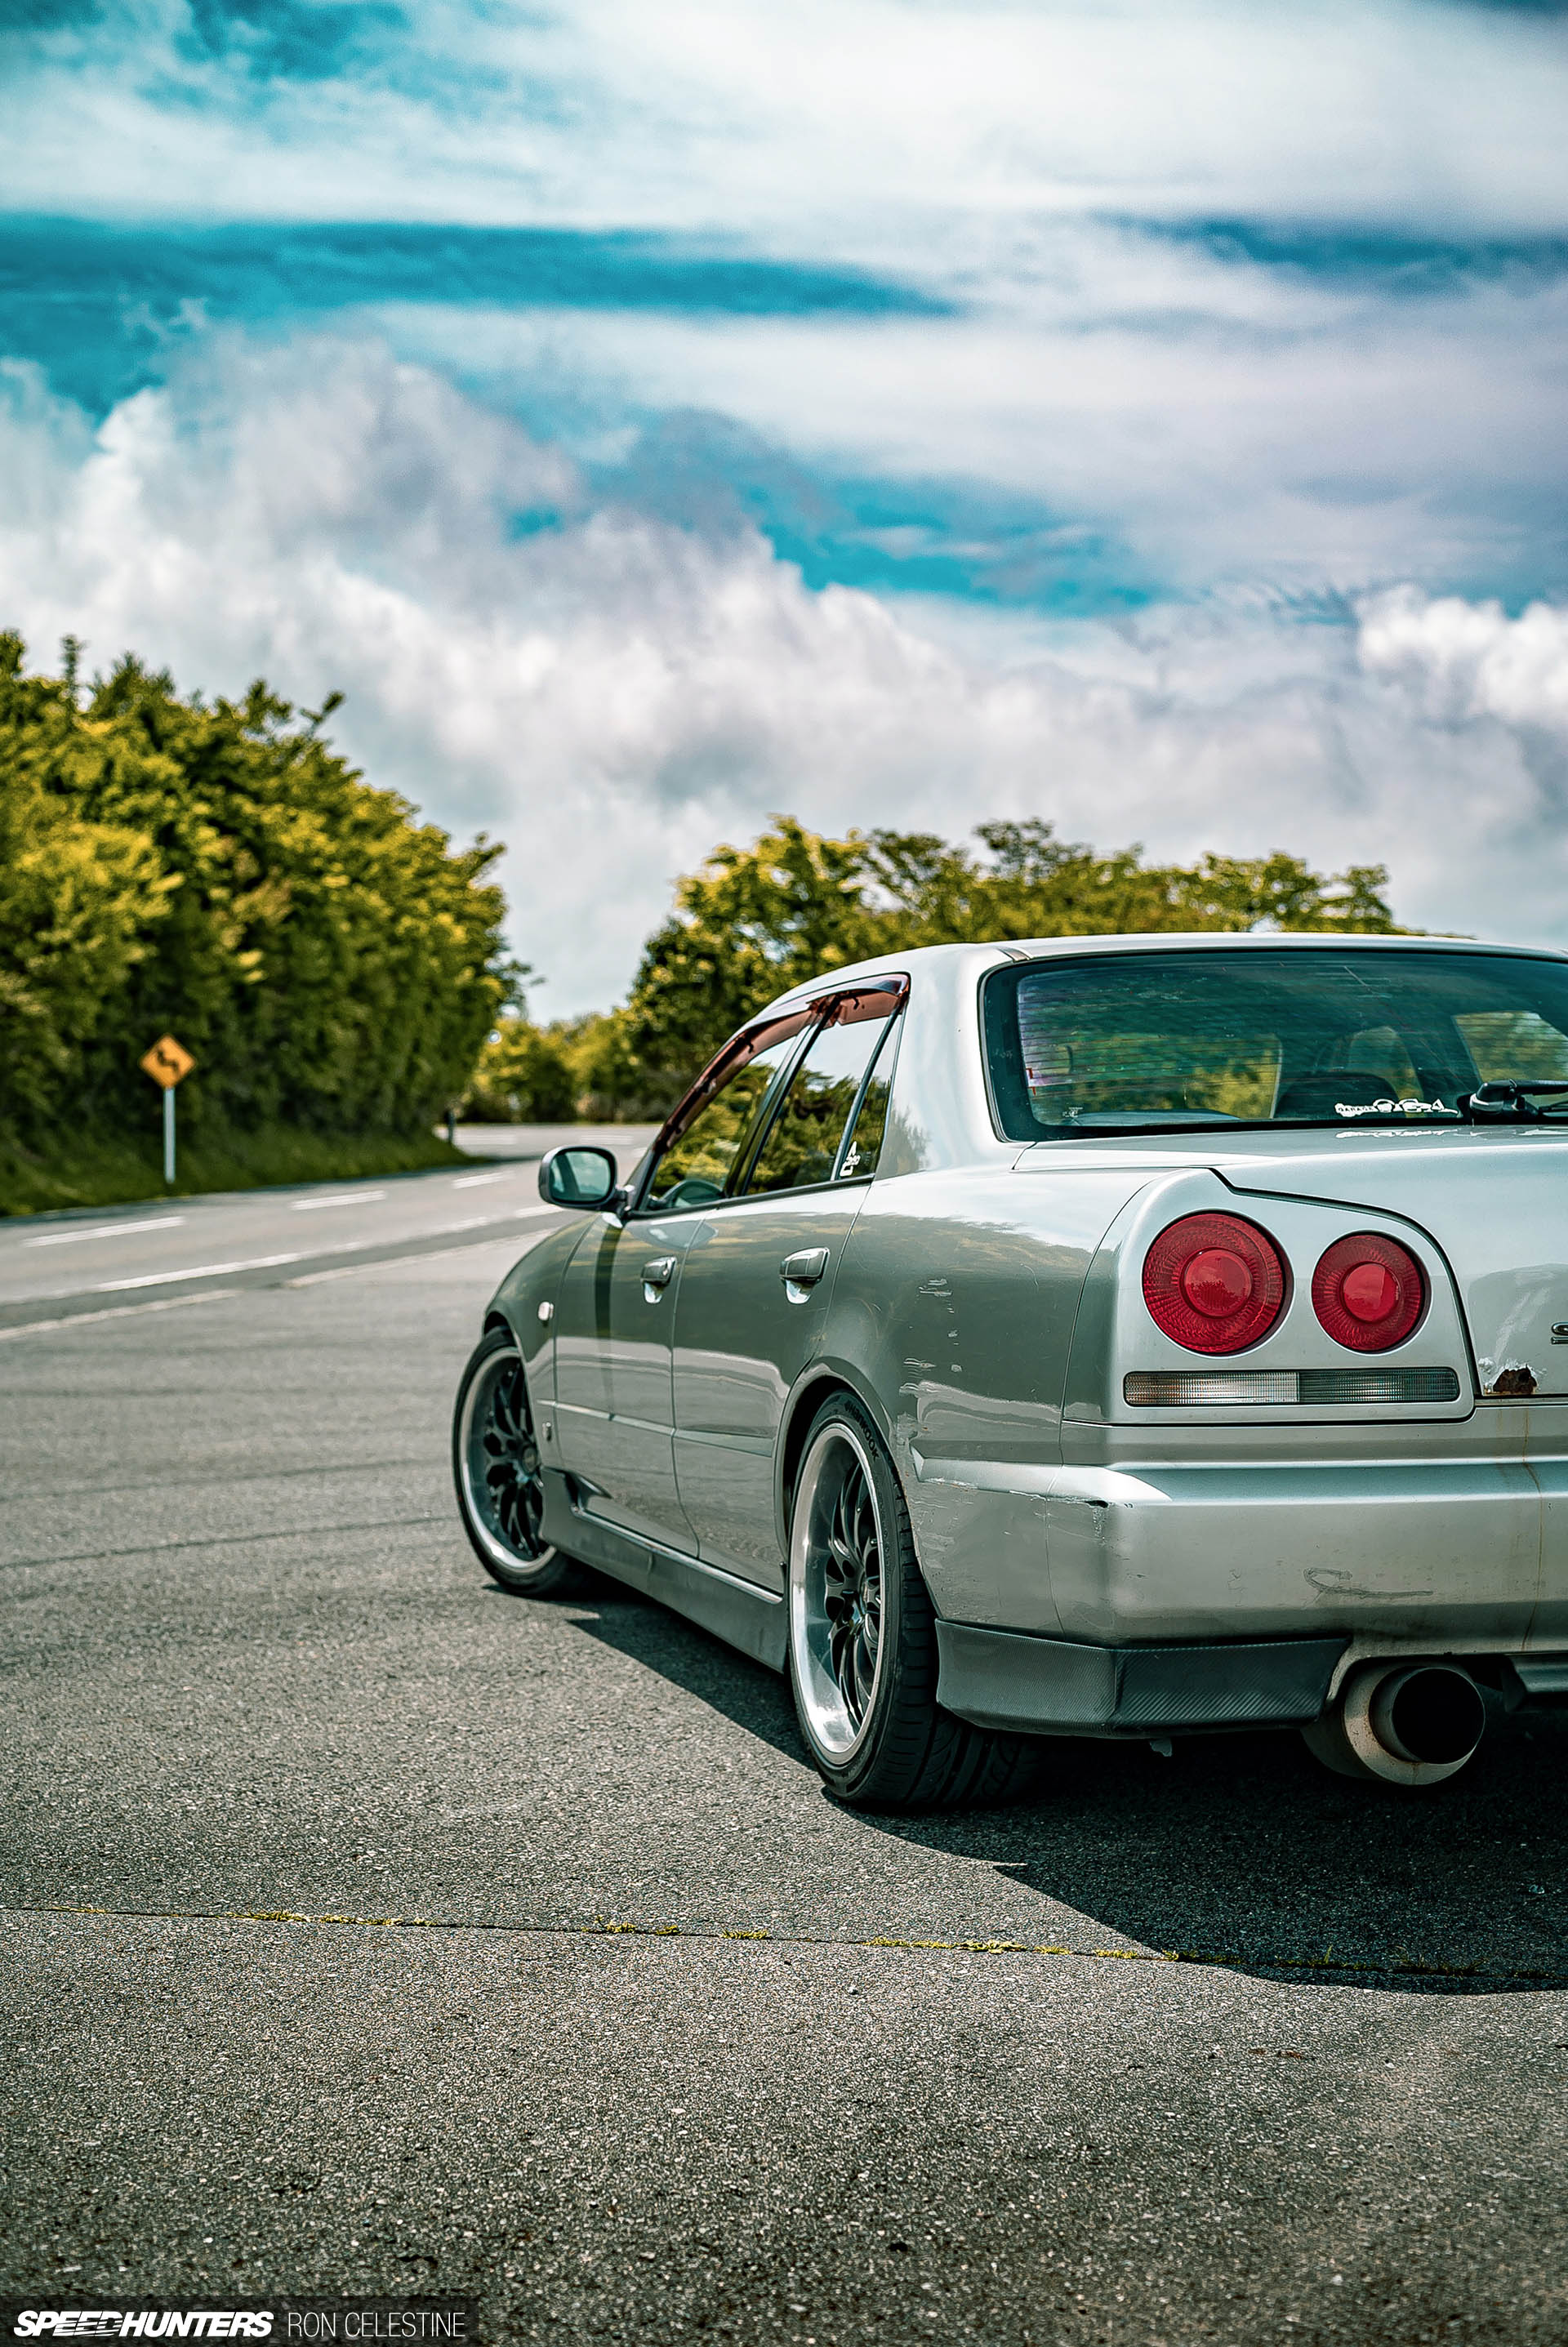
I think another Tsukuba session is in order soon.
Now if you’ll excuse me, I’m going to go out and drive a bit more.
Ron Celestine
Instagram: celestinephotography
OFFICIAL SPEEDHUNTERS SUPPLIERS


Wow, just noticed the huge chunk of rust on the trunk. That's really bad.
It is - hints the name of he car. But the rest of the car where it truly counts is solid. Besides, Project Rough is a work horse and gets driven hard. As it stands, its not a show car ^__^ Although whenever I do decide to make it a bit more presentable to attend shows, then I'll let you know
Great result, considering what you started with. I like the low budget approach on this project and am sure, that many Speedhunters can relate to this build more than to the über-budget ones.
As we have very strict rules in Germany and can't just put any size wheel on the car that might look good, there are quite a few tire calculators online. Makes finding legal tire sizes a lot easier by indicating the difference in circumference etc. in percent values. If the difference is too big, the speedometer must be adjusted and checked/legalized by the TÜV or DEKRA. They also check for clearance issues and if the wheel is suitable for the car. Might sound very strict to people in other countries but mind you... we drive up to 250 km/h every day on the commute to work (if the Autobahn isn't congested).
Google: Reifenrechner
My favorite tire calculator is reifenrechner.at from Austria, because it includes offset calculation.
Thank you! I def want to try and do things that perhaps a lot of our viewers can relate too. I know I love to read about things I can truly relate to, so if I am in the position to do so, then I will try ^^.
Japan is pretty strict as well when it comes to rules such as tires poking out beyond the fenders, how low the car is (mines might not pass that requirement as it stands and planning on lifting it just a bit) and what not. I don't think it is no where as strict as Germany tho. As you said, we aren't traveling at 250 km/h every day hahah. That tire calculator is a good tec tip tho!
Also available in English: tire-size-calculator.info
Hmm, never heard of that particular wheel before! Before I scrolled down to the part where you said they were made by Rays, I mistook them for a Work wheel, à la a Work Rezax or VSXX. It's a great look for Rough though.
Thank you! Yes - at first I wasn't too familiar about the wheels either and it was a bit difficult to find any real information about the wheels (even in Japanese) until they arrived at my door step for me to really take a good look at them.
Those bit up lips cleaned up nicely!
More suspension word on the agenda?
Thank you! Was def worth the finger sacrifice. I overhauled most of the suspension a little over a year ago, but there are a few things I still want to do with it to get it bang on ^__^ So yes!
I love this project! Please keep updating us. I am really enjoying reading about this build.
Thank youu ^__^ Def will try the updates flowing
"I'm just going for a quick lap of Hakone."
Matt's envy increases.
Loving the new look , Ron!
Then you're probably not going to like what I have "planned" for tomorrow Hahaha thanks Matt!
Nice fitment, are the wheels +43 offset? Seems a little high for a Skyline. The K120 tyres are excellent, have them on my wagon. Incredible grip in the wet and dry.
Thank you! Yes, they are +43 offset which is a bit more conservative than I would like. To get them perfect, I will probably need a 15mm or 20mm spacer up front for that flush look and lift it up a tad. The lower profile tire drop the car a bit more than i had anticipated. I absolutely adore them. Road noise isn't bad either (not that it was really a selling point to me but a nice bonus lol)
The wheels really transformed from when you bought them, looks great on Rough!
You should do some quick-fixes on those exposed rust-spots though, so it doesn't get worse
Thank you! The trunk one yah haha. Yes, that one does bother me a bit - too much character haha. I don't mind it as much as I'm constantly putting equipment to that lid but maybe a quick fix wouldnt hurt
Looking good Ron! Keep up with the updates on Rough..
Just a quick question - when you respray the wheels, do you retain the inspection / details of the rims stickers of the inner barrels? I have been contemplating to refinish my wheels but have been put off if it means having to remove these stickers.
I've tried the internet but so far can't find specific content on whether refinished wheels still retain these stickers.
Where i'm from (care to take a guess?), counterfeit wheels are aplenty and I am keen to retain these stickers as proof that they are original made in Japan stuff.
Cheers.
Thank you!! And yes, I kept the stickers on. depending on the manufacture, they stamp their specs and company name inside the spokes (my old Volks had them). Worse case, if you are doing it yourself, just mask off the sticker so that you wont paint over them. You also could just clean the inside of the barrel and only paint the face / lip. Guess it depends on what you have in mind